Got questions? We’ve got answers. Use the search bar below to find what you need.
General DTF & UV‑DTF Fundamentals
DTF printing is like printing your design onto a special clear film using an inkjet printer. After printing, we sprinkle a fine adhesive powder on the wet ink and cure it with heat so it sticks. When you place that film on your fabric and use a heat press, the design transfers onto the garment, giving you bright, durable prints.
DTF transfers are those ready‑to‑go printed films with adhesive already applied and set. You simply place the transfer on your shirt, press it with heat and pressure, peel away the film, and voilà—your design is on the fabric and ready to wear.
UV DTF stickers use inks that harden instantly under a UV lamp instead of heat. This makes them perfect for hard surfaces like mugs or phone cases. Regular DTF needs a heat press and works best on fabrics.
Unlike DTG, which prints ink directly onto fabric, DTF prints your design onto a film first, then transfers it with heat. That means you can use DTF on a variety of materials—cotton, polyester blends, and even hard surfaces—while DTG is mostly limited to cotton.
Sublimation turns inks into gas that bond with polyester fibers, so it only works on light‑colored polyester. DTF, on the other hand, sticks to many fabrics—cotton, blends, dark colors—and delivers vivid colors on almost any material.
Screen printing pushes ink through stencils onto fabric, and plastisol transfers are vinyl patches you press on. DTF skips the screens and vinyl cutting, letting you print full‑color designs and fine details without extra setup.
DTF transfers give you full‑color, photorealistic prints without the need to cut and weed like HTV. They’re thinner, softer, and stretch with your fabric, so they feel like part of the garment instead of a heavy patch.
You might choose DTF because it’s cost‑effective for both small and large orders, works on almost any material, and produces vibrant, durable prints with a soft hand feel. Plus, setup is quick, so you can get your custom designs fast.
Yes, when applied correctly and cared for! Wash inside out at 30 °C (86 °F) with mild detergent. DTF transfers can last through 50 or more washes, matching the durability of screen prints. It will most definitely outlast the garment itself!
DTF transfers are very thin and flexible, so they feel soft on your shirt and won’t weigh it down. They blend nicely with the fabric, so you hardly notice them under your fingertips.
DTF prints have a smooth, slightly raised feel that moves naturally with your fabric. They’re comfortable to wear, and you’ll barely notice the design is there.
When you apply DTF transfers in a thin layer, they let air pass through the fabric, so your garments stay breathable. Only very large or thick prints might feel a bit less airy.
DTF colors really pop! Rich, saturated hues and smooth gradients that look great on any color fabric. You’ll get bright, consistent results every time.
DTF excels at printing photos and fine lines thanks to precise ink application, so you’ll see clear images and crisp details even at small sizes.
Standard DTF handles most colors, but special effects like metallic or neon need specialty powders or inks. We offer these options so you can add a glittery or neon touch to your designs.
Yes, DTF printers have a white ink channel that lays down a bright base layer on dark fabrics, making colors look true and vibrant.
With the right settings and quality materials, DTF transfers can produce crisp white prints on dark garments that don’t look dull or faded.
Absolutely! We can mix glitter, glow‑in‑the‑dark, or holographic powders into the adhesive layer, so your designs can sparkle or glow under UV light.
DTF transfers can have different finishes—matte for a subtle, vintage look, or glossy for a shiny, eye‑catching finish. You pick the style that suits your design.
DTF printing doesn’t use water to cure inks and creates less waste than screen printing. While the film is plastic, we encourage recycling unused transfers to keep things eco‑friendly.
Our inks are water‑based and safe once cured, and our powders meet all safety standards. After pressing, transfers are non‑toxic and skin‑friendly.
Yes! We use inks and powders certified for children’s apparel, so you can feel good about designing kids’ clothes without safety worries.
DTF printing is more sustainable because it uses no water for ink curing and produces less setup waste. On‑demand printing also helps avoid overproduction.
You can recycle the PET film used in DTF transfers at many centers, and you can store unused transfers for future jobs, cutting down on single‑use waste.
The powder melts under heat to bond the ink to the fabric. It acts like glue, making sure your design stays put wash after wash.
High‑quality films and precise heat press settings prevent shrinkage, so your transfers stay true to size. Distortion is usually less than 1 %.
Yes! Advances in film and powder technology have made DTF transfers thinner, more stretchable, and softer than ever, so they feel almost like they were printed directly onto the fabric.
Artwork & Design Preparation
We love PDFs and high‑res PNGs! PDFs keep your shapes and text super sharp, and PNGs let you have a clear background. Just save everything at 300 DPI so your designs look crisp and ready to go.
Yes, please! A transparent background means your design stands out all on its own without any extra color around it. Your shirts and items will shine through where you want them to.
No worries about that—you don’t need to flip anything. We’ll take care of the mirroring on our end so your design always looks just right when you press it.
300 DPI is our sweet spot for keeping lines crisp and details clear. If it’s any lower, things can start to look a bit fuzzy.
We can handle text as small as 6 points and lines around 0.5 mm wide without losing detail. For the cleanest results, simpler shapes and a bit larger text work best.
DTF does a great job matching colors, but fabrics can tweak the final look a tiny bit. We always send you a digital proof so you can give it the thumbs up first.
Send us your artwork in RGB at 300 DPI and let us know any special color notes. Then we’ll share a mockup so you can confirm everything looks perfect before we print.
Absolutely! We mix our inks to get as close as possible to your Pantone codes. Fabrics can shift things slightly, but we’ll suggest the nearest match if needed.
Absolutely not! Colors won’t cost you extra. We charge by the size of your transfer, so feel free to get as colorful as you like!
DTF loves gradients and detail, but super tiny transitions can get a bit soft. Aim for shapes at least 0.5 mm wide and smooth gradients for the best results.
Our biggest single transfer goes up to 16×24 inches. Need something bigger? We can tile multiple transfers to cover any size you want.
You sure can! Just order multiple transfers or a full‑body transfer, and let us know your shirt styles and sizes so we can plan the layout together.
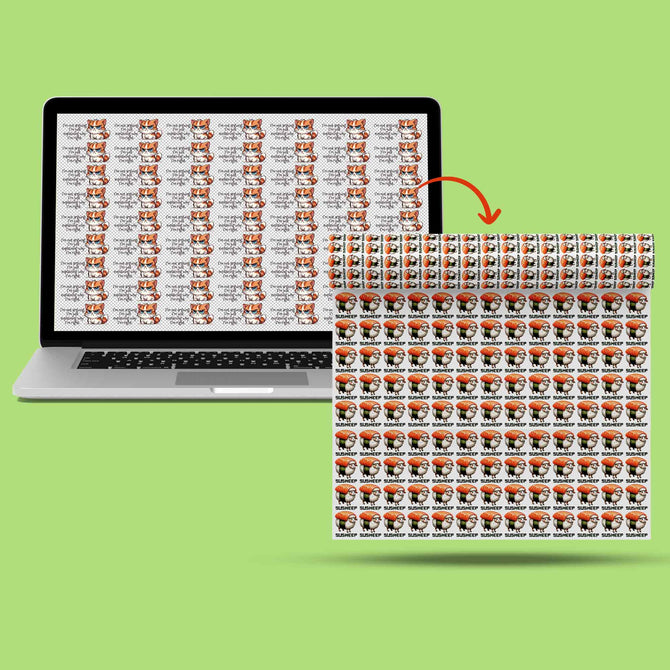
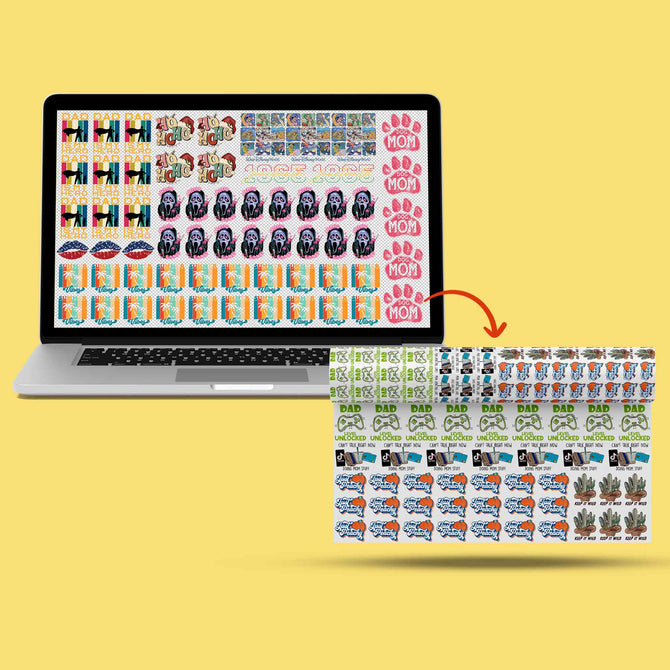
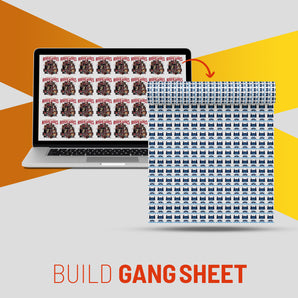
A gang sheet is a big sheet with lots of smaller designs all printed at once, ready for you to cut and apply where you choose.
Yes! As long as they all fit on the sheet, we’ll include cut guides so you can separate them easily.
Just pack all your designs into one file, label them clearly, and we’ll arrange them to make the most of the space, complete with cut lines.
Definitely. Just let us know which designs go where, and we’ll make sure each one is cut out just right.
Place each player’s name next to their number in your file and label each pair. We’ll cut them as matched sets so you can press them on in no time.
You can group them all on one sheet if they fit, which often saves time and money. Or, if you prefer, you can order them separately—your call!
Yes, whatever you upload is exactly what we print. If you don’t want a background, please send us a file with transparency or just let us know and we’ll help you remove the background!
Yes, please remove any unwanted background before you upload so your design is the only thing that prints. If you don’t know how to do it, that’s fine too. Just let us know and we’ll help you (and even do it for you, whenever possible)!
We use a white underbase layer to make colors pop, which can look like a border if your file wasn’t transparent. For a clean finish, send us artwork with transparency and ask for a clear cut.
Ordering, Production & Fulfillment
You can purchase DTF transfers right here at Iris DTF by visiting our website! Go to our main menu—the left‑most item lists soft‑garment DTF prints, and the second ("UV DTF") is for hard surfaces. Pick the option you need, whether that’s ordering by size, building a gang sheet, or uploading your own design, and follow the simple checkout steps.
Head to “Order by Size” or “Build a DTF Gang Sheet,” upload your artwork (PNG, SVG, AI, or EPS), choose sizes and quantity, then check out—we guide you every step of the way.
No minimums! Order one transfer or a thousand—bulk discounts appear automatically when you build larger gang sheets.
Orders placed by 2 PM CT ship the same business day. Printing takes about a day; delivery is typically 1–3 business days depending on location.
Yes—choose next‑day or two‑day shipping at checkout for a small fee. Your order jumps to the front of the queue.
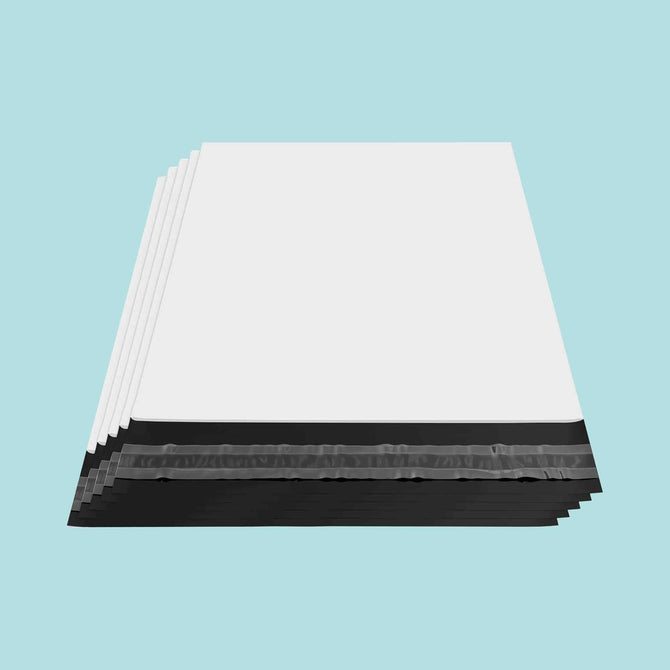
Transfers ship either flat between protective boards or rolled in sturdy tubes, sealed in plastic sleeves and padded mailers for safe, dry transit.
They’re stable between 32 °F and 120 °F. Avoid prolonged exposure above 140 °F or below freezing. Store them cool and dry upon arrival.
If you’d like us to keep your design on file, let support know and we’ll save it for easy reorders.
Yes—order a sample pack to check color, adhesion, and durability before committing to larger quantities.
Films vary in thickness, peel type, and finish; powders differ in mesh size and bonding strength. We select the best combo for your needs unless you specify otherwise.
The white powder is adhesive. Gently shake off loose powder or flash‑heat to set it before pressing.
Inspect the package, count and size‑check your transfers, then store them flat in a cool (65 °F‑75 °F), dry place until pressing.
Absolutely—use our gang sheet builder or upload your own sheet to place high‑volume orders quickly.
Yes—tiered pricing gives bigger savings as total square inches or quantity increases.
We do—contact the Iris Business team for requirements and special wholesale pricing.
Yes, you’re free to resell our transfers as long as you follow our resale guidelines and respect trademarked branding.
No supplier logos appear on the printable area. Choose white‑label packaging at checkout if you need fully unbranded packs.
Yes—select “Individual Packaging” during checkout or contact support for custom labeling (small additional fee).
Definitely—keep transfers in stock and press them as orders arrive, no specialized equipment needed on your side.
Owning a printer gives lower per‑piece cost at high volume and full control, but requires a large upfront investment and technical upkeep. Buying transfers means no equipment cost and easy fulfillment, though per‑piece cost is slightly higher.
Storage & Handling Before Use
Store sheets flat in their original packaging, in a cool, dry spot away from direct sunlight. This keeps adhesive powder and ink fresh for vibrant results.
Properly stored transfers remain in great condition for about one year. Check the package date for best‑by guidance.
For peak color and adhesion, use transfers within 6‑12 months of production.
Yes—aim for 68‑77 °F and under 50 % humidity to prevent moisture absorption and keep adhesive powder ready.
High humidity can make powder clump and film curl. Store with desiccant or in climate‑controlled space.
Prolonged heat or direct sunlight can fade pigments and weaken adhesive. Keep transfers away from hot windows or radiators.
Minor creases flatten under correct pressing. Lightly pre‑press or weigh the sheet flat; deep creases may reduce adhesion.
Small wrinkles usually disappear during pressing. Smooth the film and test‑press at low temp if unsure.
Yes—use sharp scissors or a craft knife, leaving a narrow margin so edges don’t lift during transfer.
Trimming is optional; a thin border won’t show. Removing excess film can make peeling easier and speed cleanup.
Equipment & Tools
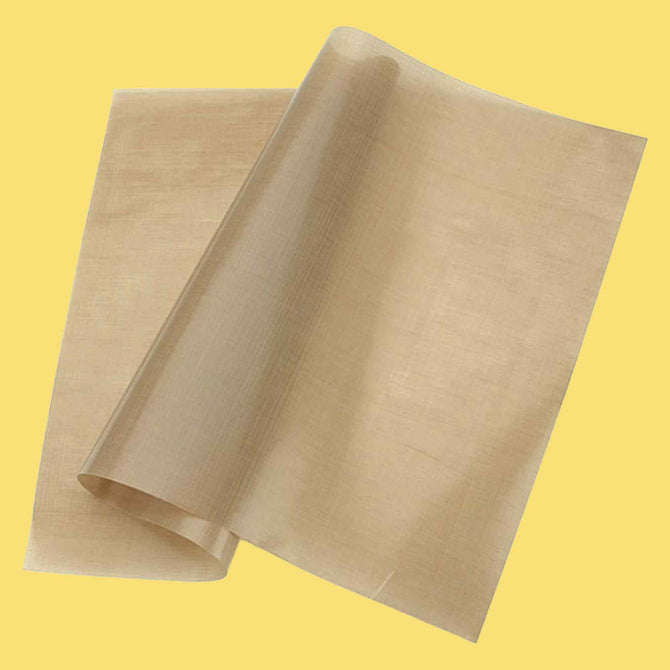
A heat press gives the best results. You’ll also need DTF film, protective Teflon/parchment sheets, and a small weeding tool. A household iron works in a pinch.
A heat press ensures even heat and pressure, but you can use a household iron if you apply steady heat and firm pressure through a protective sheet.
Yes, though maintaining consistent temperature and pressure is harder. Practice on a test shirt first.
Absolutely—devices like Cricut EasyPress reach the right settings for DTF. Follow recommended time and temperature.
A soft pressing pillow or silicone pad helps achieve even pressure on seams, zippers, and curves.
Siser EasyColor DTV is printable heat‑transfer vinyl that you cut and weed. DTF is printed with ink and adhesive powder, pressed directly onto fabric.
No—DTF requires a printer with DTF inks and a white‑ink channel. Standard printers can’t handle the process.
Professional setups use RIP software to manage color and white underbase. Some entry‑level machines bundle simplified software.
You’ll need an adhesive‑powder shaker for even coating and a curing oven or hot‑air dryer to melt powder onto film before pressing.
Use a soft silicone squeegee or roller for smooth application and wear powder‑free nitrile gloves to avoid fingerprints.
No—UV DTF stickers are pre‑cured; you only need firm pressure to adhere them.
UV DTF transfers bond with firm pressure only—no heat required.
Material & Surface Compatibility
Yes—cotton absorbs adhesive and ink well. Pre‑wash, then press at 300‑315 °F for 10‑13 s with medium pressure for vibrant, durable prints.
They bond strongly to polyester and blends. Press at ~275 °F for 7‑10 s to avoid fabric damage or dye migration.
Absolutely—use about 300 °F for 10 s to ensure even adhesion without scorching polyester fibers.
Yes, but coatings can reduce grip. Clean the surface, press at ~300 °F with firm pressure, and test adhesion before final pressing.
Yes—pre‑heat the fabric, use a Teflon sheet, press firmly at ~300 °F, then test peel to confirm bond.
They can, but use lower heat (~290 °F) and firm pressure. Always test a small area to ensure no cracking.
Yes—press at 300‑315 °F for 12‑15 s with firm pressure, protecting the fabric with a Teflon sheet.
Yes—use flexible adhesive, lower heat (~275 °F) and light pressure so the print stretches without cracking.
Definitely—apply at 275‑290 °F with light‑to‑medium pressure to keep fabric elasticity and vibrant color.
Yes, but tiny holes may show through. Use smaller designs and press at ~290 °F with firm pressure.
Yes—press gently at ~275 °F for 5‑7 s with a protective sheet; always test scrap first.
Yes—use a cap heat press or shaped platen, protect the fabric, and apply firm, even pressure.
Yes on textile parts such as canvas; avoid rubber/plastic. Press at ~300 °F and trim transfer to shape.
Pre‑clean or pre‑wash, then press at 300‑315 °F for 10‑13 s with medium pressure for crisp results.
Standard DTF may not bond to raw wood. Seal/varnish first and press at ~300 °F, or use UV DTF for hard surfaces.
No—use UV DTF sticker transfers instead, which cure under UV light and adhere without high heat.
Metal and plastic do not bond with standard DTF adhesive. Choose UV DTF stickers for those materials.
UV DTF stickers work on glass, metal, plastic, acrylic, ceramic, and sealed wood—no heat press required.
Yes—the UV‑curable adhesive forms a strong bond, ideal for drinkware, signage, and device decals.
Yes—seal or varnish the wood first for the smoothest, most secure adhesion.
They are flexible and conform to curved shapes, remaining durable after curing.
Low‑energy surfaces like silicone and many rubbers repel adhesive; special primers or tests are needed.
A smooth surface maximizes contact and prevents edge‑lifting; textured areas can reduce adhesion over time.
Pre‑Press & Positioning
Center the film design‑side down using a ruler from collar or side seams; press edges lightly or secure with heat‑resistant tape outside the ink area.
Yes—pre‑press 3‑5 s at target temperature to remove moisture and wrinkles for even adhesion.
It eliminates steam pockets and flattens fabric so the film contacts fibers fully, giving sharper prints.
Yes—use tape rated above your press temperature, keeping it off inked areas to avoid residue.
Always protect the film and platen with parchment or Teflon for even heat and to prevent sticking.
Use a cover sheet—direct contact risks scorching and ink transfer, especially on long or high‑volume presses.
Heat Press Settings
300‑320 °F (150‑160 °C) for 12‑15 s at medium pressure, then peel as directed by your film.
Lower to 275‑300 °F (135‑150 °C) for 12‑15 s to avoid scorching or dye migration.
Yes—cotton needs higher heat; synthetics need lower heat. Blends fall in between—always test.
Firm platen contact that slightly compresses fabric but doesn’t flatten thick seams—about 40‑60 psi on gauges.
Place paper between platens—an even imprint signals adequate pressure; adjust knob until consistent.
Use the paper test or compress a foam pad slightly; medium pressure gives noticeable resistance when closing.
Yes—tape edges for alignment, press overlapping sections separately under a cover sheet.
Split the design into segments or slide the garment to cover the full image, pressing each part evenly.
Insert a firm board or pressing pillow to raise the print area above obstructions, and pre‑press to flatten.
Zip up, place a hard board behind the print zone, and avoid pressing directly over zippers; press in sections if needed.
Use a small platen or iron, pre‑press the sleeve flat, align 1 in / 2.5 cm from seams, and press with cover sheet.
Yes—apply the first, let it cool 10‑20 s, then press the second using identical settings and cover sheet.
Not if you cover the first print and avoid excessive additional heat; brief cooling minimizes lift risk.
Yes—wait a few seconds so the adhesive sets before reheating a new area.
Alternative Press (Iron & Cricut)
Yes—set iron to cotton, no steam, press firmly 10‑15 s per area through parchment/Teflon, ensuring full coverage.
Maximum dry cotton setting; avoid steam to keep moisture away from the adhesive.
Press with two hands, rock gently, or apply static pressure; work in overlapping sections.
Preheat tool, use flat base, cover with parchment, follow recommended temp/time, and test on scrap fabric first.
Irons have uneven heat and small surface, risking poor adhesion, ghosting, or scorching; multiple passes extend time.
Peeling & Finishing
Films come in both types. Hot peel—remove carrier immediately while warm; cold peel—wait until completely cool.
Check film packaging or supplier notes—hot peel is labeled “immediate peel,” cold peel specifies cooling first.
Hot peel speeds production, cold peel can be gentler on fine detail and specialty fabrics—choose per workflow.
Only for cold peel films; hot peel must be removed while still warm.
Peel at about 45° with steady, moderate speed to avoid ink lift.
A consistent, moderate pace prevents tearing or adhesive residue.
Re‑cover, repress 5‑10 s, let cool fully, then peel again.
Lay carrier back, repress a few seconds under cover sheet, cool, then peel carefully.
Yes—peel while hot; wear heat gloves if needed.
The adhesive cools and may tear; reheat 2‑3 s to soften before peeling.
An optional 3‑5 s post‑press under parchment smooths print and boosts durability.
Not mandatory but recommended for maximum wash life and softer hand.
It finalizes ink cure, fully bonds adhesive, and flattens the print for a smoother feel.
Cover with parchment or Teflon, press at original temp for 3‑5 s under medium pressure.
Inside‑out with similar fabrics; avoid rough items (zippers, Velcro) that can rub the print.
Yes—this protects the print surface from direct abrasion.
Yes—machine‑wash cold (≤30 °C) on a gentle or delicate cycle.
Tumble‑dry on low heat; air‑drying is even gentler and prolongs print life.
Yes—high heat can soften adhesive and cause lifting or shrinkage. Stick to low/medium settings.
Yes—iron inside‑out with a parchment/Teflon barrier and low heat.
Inside‑out, place Teflon or parchment over the print, low cotton setting, press gently 5‑10 s.
Dry‑cleaning is not advised—strong solvents can weaken adhesive over time.
Yes—bleach and strong cleaners fade colors and break down adhesive. Use mild detergent.
Occasional use is fine, but frequent softener can leave residue that reduces adhesion.
Durability & Long‑Term Performance
High-quality DTF prints will easily last 30-50 washes if you follow the care steps above. You will see that your prints will outlast your garment in most cases.
In most cases you’ll get 30-50 machine washes before you might see a tiny bit of fade or softening around the edges. Your garment fill fade sooner than your print.
If they are pressed with the right settings and cared for gently, cracks and peeling are very rare.
Peeling can happen if the press time, temperature or pressure weren’t enough, or if you wash with harsh detergents or hot water.
Yes, the adhesive is designed to stretch with fabric, but extremely tight stretches can still cause edge lifting over time.
Light to moderate stretches are fine, but avoid pulling the print too far or too often to prevent any distortion. Watch our videos where we stress-test our prints to see pretty much every kind and strength of stretching is okay. We trust our prints that much!
All prints wear slightly over time, but pressing correctly and washing gently will keep them looking new as long as possible.
You can carefully re-press with medium pressure and a cover sheet, but always test on a spare piece first.
For small lifts, apply a bit of heat with an iron or heat gun and a protective sheet. We don’t recommend adding extra glue.
Removal & Reapplication
Reheat the area gently with a heat gun or iron on low, then peel the transfer slowly to avoid ripping the fabric.
You’ll usually have a bit of residue, but careful removal and a gentle spot cleaner can help, though some slight marks can remain.
Heat is safest: warm the transfer to soften the adhesive, peel it off, then use a fabric-safe solvent sparingly to clean residue.
Most of the adhesive comes off, but you may see a faint outline that you can fade with spot treatment.
Yes, once the fabric is clean and fully dry, you can press a fresh transfer right over the spot.
If you catch it while it’s still hot you have a short window to peel and reposition, but the bond will be weaker after that.
Fresh prints stay a bit tacky, so fold only after a few minutes and let everything cool down fully first.
Yes, that can happen. Always let your shirt sit flat and cool before folding to keep prints separate.
Business, Bulk & Pricing
Absolutely! We offer bulk ordering at Iris DTF with volume discounts to suit businesses large and small.
Yes, most suppliers including us give tiered discounts – the bigger your order, the better your price per unit.
We have a wholesale program through Iris Business. Check our wholesale page or send us a message to learn more.
You can resell finished items with your designs but always make sure any artwork you use is licensed for resale.
Buying a printer gives you total control and lower long-term costs but needs maintenance and space. Buying transfers means no equipment investment and no upkeep, though your per-sheet cost is a bit higher, due to our service fees.
While prices vary, a typical 8x8-inch transfer usually runs about $1 to $3 in total consumables.
For small runs under 50 pieces, DTF often wins on cost since you avoid screen setup fees and get quick turnaround.
Custom transfers usually fall between $1 and $5 per sheet, depending on size, color, and order volume.
Yes, DTF’s low setup costs and quick proofs make it ideal for small-batch orders and rapid design testing.
Once you hit around 75-100 garments per design, especially with many colors, screen printing can become the cheaper option.
Legal, Licensing & Compliance
You need the rights or permission from the copyright or trademark owner before selling items using their images or logos. Without a license or explicit permission, using copyrighted artwork is infringement, which could lead to legal consequences.
Most DTF printers, including Iris DTF, require proof that you own or are licensed to use any trademarked logo before production. We follow our Terms of Use and will refuse orders lacking proper permissions.
We decline any artwork that violates copyright or trademark laws, is defamatory, obscene, promotes hate or violence, or breaches our content guidelines. If a design raises legal or ethical concerns, we’ll let you know.
Our standard DTF transfers are produced in facilities adhering to CPSIA guidelines for children’s products and are compatible with Oeko‑Tex Standard 100 practices. For specific certification details on a particular film or ink, contact our support team.
Iris DTF uses inks and powders formulated to be free of phthalates, heavy metals, and other restricted substances. All materials meet relevant safety regulations to keep your garments and customers safe.
Yes, when using CPSIA-approved transfer films and water-based inks, our DTF transfers are tested to be safe for children’s wear, meeting all U.S. regulations for lead and phthalates.
DTF printing uses minimal water and generates little waste compared to traditional screen printing. While we do use plastic film, we strive to recycle offcuts and optimize layouts to reduce environmental impact.
All our inks are water-based and powders are non-toxic, certified for skin contact. They meet or exceed industry standards for safety and environmental responsibility.
Print Technology & Comparisons
DTF prints full-color designs onto a film and bonds them to fabric with powder adhesive, working on any cotton or blend. Sublimation dyes only polyester, DTG sprays ink directly onto fabric for a soft feel but slower setup, screen printing uses stencils and inks ideal for large runs, and HTV cuts vinyl shapes you press on with limited detail.
Siser EasyColor is a vinyl-based film you print on then weed out unwanted vinyl, best for simple designs. DTF gives you detailed, full-color prints on a clear film with an adhesive powder—no weeding, and it handles gradients and photos easily.
Premium brands tune their film thickness, adhesive quality, and ink formulas to improve feel, wash durability, and color vibrancy. Generic films may be more budget-friendly but can vary in consistency and longevity.
Yes, UltraColor Max is Stahls’ branded DTF product, using the same core process but with their proprietary adhesive and film for easy application and reliable results.
Absolutely. Just follow each method’s heat and pressure guidelines to avoid damaging earlier layers. For example, apply your screen print first, then press your DTF design at the recommended settings.
Yes. DTF can handle very fine details on small areas. Use a smaller film width and precision cutter, and adjust your artwork for legibility at small sizes.
For small runs, DTF can be more cost-effective than DTG and faster than setting up a screen print. The hand feel is slightly raised but soft, and properly applied transfers can withstand 50+ washes without cracking.
UV DTF‑Specific Application & Care
Clean the surface with mild soap or isopropyl alcohol and let it fully dry. Peel the clear liner off the sticker, position the design, then press firmly from the center outward with a squeegee or soft cloth. Slowly peel away the top film at a low angle.
Yes. Remove dust, oils, or residue using mild dish soap and water or 70% isopropyl alcohol. Always dry completely with a lint-free cloth.
Yes, 70% isopropyl alcohol works well. It evaporates quickly and leaves no residue if used sparingly.
Strong solvents can sometimes affect paint or finishes. If you’re unsure, test a small hidden area or use mild soapy water instead.
Absolutely. Any moisture or particles can prevent full adhesion and cause lifting or bubbles.
You can lift and reapply almost immediately, but once the adhesive sets, repositioning becomes difficult.
It’s designed for one-time use, though you can adjust placement once before it fully sets.
Press from the center out with a squeegee or soft cloth, using steady, even pressure.
Gently lift the nearest edge, press out the bubble, and smooth it back down. For tiny bubbles, a pin prick to release air can help.
If the adhesive powder wasn’t fully activated by pressure, try re-pressing with a firm, even stroke before peeling.
Press again firmly over those areas, or apply a bit of warmth from a hair dryer to soften the adhesive before retrying.
Peeling too quickly or at a steep angle can stress the film. Peel slowly at a 180° angle in one smooth motion.
A gentle pass with a hair dryer on low heat can soften the adhesive for smoother release.
Likely surface prep was incomplete or pressure was uneven. Clean, dry, and press evenly across the entire design.
Yes. Work in small sections, press firmly with your fingers or a round squeegee, and go slowly.
Many hold up in the top rack, but we recommend hand washing to preserve vibrancy and adhesion.
If the mug itself is microwave-safe, the decal won’t be harmed by microwave use.
Properly applied decals resist hot liquids, but avoid sudden temperature shocks like boiling water in a cold mug.
Use gentle dish soap, a soft sponge, and avoid abrasive pads or cleaners.
Yes, but choose a UV-grade adhesive and consider a clear sealant for extra protection.
Prolonged exposure can weaken the adhesive. Rinse off chlorine or salt after use.
They resist water and light rain, but UV exposure over time can fade colors without a protective topcoat.
They withstand light abrasion, but heavy scratching or sharp objects can damage them.
A clear spray sealant or epoxy resin adds durability, especially for outdoor or high-wear items.
Yes. Make sure the decal is fully set, then pour or brush on a thin resin layer and cure per the resin instructions.
They gain full bond strength after 24 hours at room temperature. Avoid heavy use during that time.
Wait at least 24 hours for the adhesive to fully set before exposing it to moisture or handling.
They usually peel off in one piece or can be scraped off gently. They shouldn’t shatter like ceramic.
Some residue may remain. Cleaning with isopropyl alcohol or adhesive remover will clear any sticky film.
Removal may lift or damage paint. Test on a small area first or use heat to soften the adhesive before peeling.
Equipment Ownership & In-House DTF Printing
We’re happy to help you decide! If you have steady, high-volume orders and want full control over timing, owning a printer can save you money in the long run and give you flexibility. But if your orders vary or you’d rather focus on design and sales instead of machine upkeep, outsourcing to a trusted supplier like us means you get top-quality transfers without the extra equipment hassle.
Great question! Buying a printer gives you lower costs per item when you produce a lot and lets you tweak settings to your heart’s delight, but it comes with upfront costs, a learning curve, and regular maintenance. Ready-made transfers cost a bit more per piece and may have minimums, but you can start decorating immediately with zero equipment worries.
You’re in luck—many small shops love Epson EcoTank models like the L1800 or SureColor P600 series because they balance affordability and reliability. We also carry industrial DTF machines that arrive ready to print, so you can skip the conversion step entirely.
It’s possible! Some Epson inkjets work with conversion kits, but this often voids the warranty and needs careful calibration. If you love tinkering, give it a shot, but a dedicated DTF printer will deliver consistent quality with less fuss.
Maintaining your printer is like caring for any tool: run daily printhead checks and cleanings to prevent clogs, refill your ink and powder before you run low, and swap out filters or dampers on schedule. A little regular care keeps everything running smoothly.
You’ve got this! The basics—loading the design, applying powder, pressing—are straightforward. Perfecting your press settings and powder application takes a bit of practice, but our Iris Academy offers friendly hands-on training and simple online lessons to get you confident quickly.
We stock everything you need right here at Iris DTF, from premium films and inks to the finest adhesive powders. You can also explore industry suppliers for a wider variety, but we’re always here to help you choose the best options.
Plan for supplies like cleaning solutions and filters, and set aside a budget for occasional printhead replacements. A good rule of thumb is to reserve around 5–10% of your printer’s purchase price each year to keep it in top shape.
White ink carries fine pigment that can settle or trap air bubbles. Running a daily circulation cycle and keeping filters clean helps avoid clogs, ensuring your prints stay perfect.
Yes, white inks like to settle, so give your cartridges a gentle shake each evening or use a small roller system overnight. That way, the pigment stays evenly mixed when you print.
Advanced & Fringe Use Cases
Absolutely! You can apply transfers to tie-dyed items, but the original dyes might shift under heat. It’s best to test a scrap first and use slightly lower press temperatures to protect those cool colors.
Yes, with a full-color white underbase your transfer can mask small logos. For larger areas, adding an extra white layer or cover film gives the smoothest finish.
Polyester can release dye when heated, causing color to bleed into the transfer. This is called dye migration and is more common on brightly dyed fabrics.
Using a barrier film really helps! Our special films have built-in blockers to stop dyes from sneaking into your white ink.
The red dye probably migrated into the white layer under heat. Prewashing the shirt or adding a blocker film usually fixes that rosy tint.
Yes, some adhesives cure around 280°F instead of 320°F, perfect for delicate fabrics that can’t handle high heat.
Nope! The film already has ink and adhesive built in, so you can press directly onto a clean, dry garment.
Not at all. Properly pressed DTF sits on top and leaves the tiny pores free for wicking moisture away.
Definitely! DTF is flexible and durable, so it stretches and moves with you without cracking.
Yes, when pressed correctly, DTF bonds tightly to fabrics like polyester and nylon, so it handles sweat and action just fine.
Absolutely—reflective powders and films are available for safety gear. Just ask, and we’ll help you choose the right one.
Ghosting is a faint second image caused by residue or shifting film. Keep your press clean, use a silicone release sheet, and avoid moisture to prevent it.
That ghost shadow usually happens from tiny film movements or trapped moisture. Make sure the garment is totally dry and hold the film steady during pressing.
For ceramics, we use UV DTF with UV-curable inks instead of heat-activated powders. It cures under a UV lamp and works beautifully on mugs and tiles.
Sublimation fuses dyes into polymer-coated mugs for full-wrap prints. UV DTF sits on top with a white underbase and cures under UV light—ideal for dark or textured surfaces.
Yes! UV DTF comes with a white layer and cures under UV, so it sticks perfectly to dark mugs.
You can! Press each layer fully before adding the next, and a quick re-press over overlaps helps them bond seamlessly.
Definitely—tile your design into sections and align them with tiny gaps (1–2 mm) so seams aren’t obvious.
Yes! Just cure the screen print first, then apply DTF for vibrant details without any issues.
DTF film holds fine details, so small neck labels work great. The film is thin enough to stay comfortable.
DTF ink forms a thin top layer, but the heat-activated adhesive bonds into the fiber tips, giving a printed feel.
Safety & Environmental Concerns
Most DTF inks and powders meet non-toxic standards and include safety data sheets for guidance. Just follow any handling tips on the label, and you’re good to go.
Yes! When you choose CPSIA-certified inks and films, DTF transfers are kid-safe. Let us know if you need those compliant materials.
DTF uses water-based inks and recyclable powder films, so it’s greener than many alternatives. Plus, lots of suppliers now offer biodegradable packaging.
White inks need mixing to keep pigments even, but they don’t release harmful fumes. A gentle shake or roller in a closed container does the trick.
You’ll smell a light adhesive scent, but it’s not harsh. For heavy use, an exhaust fan or open window will keep the air fresh.
You might notice a mild plastic scent, but it’s nothing like solvent-based methods. Good airflow clears it quickly.
For occasional projects, a well-ventilated room works fine. For daily high-volume work, consider a simple powder extraction setup to keep things tidy.