


DTF Printing Portfolio Guide: How to Showcase Success & Win Clients

What Is This Article About?
Master the art of building a professional DTF printing portfolio that converts browsers into buyers. This Iris DTF Academy guide covers photo best practices, case-study storytelling, social proof integration, and digital-plus-physical presentation tactics to attract high-value clients and scale your custom apparel business.
In Direct-to-Film (DTF) printing, a well-crafted showcase-success-win-clients" target="_blank" rel="noopener noreferrer">portfolio isn’t just a gallery of images – it’s a strategic asset. By now, you’ve mastered the DTF process in earlier modules; this module (Topic 34) will guide you through assembling and presenting that expertise in a compelling portfolio that attracts clients and builds credibility. We’ll cover why a portfolio matters, how to curate and format it (both digitally and physically), ways to integrate social proof and case studies, and tips to present your work professionally. Let’s dive in!
Why a Strong DTF Portfolio Matters
A professional portfolio serves as a visual proof of your capabilities and a trust-building tool for your business. In fact, your DTF printing portfolio is often “your most powerful sales tool” – it lets you attract clients, showcase your capabilities, and build trust before you even speak to a customer. Consider it your creative resume and a credibility booster:
-
Proves Quality: High-resolution photos of your prints demonstrate your print quality, color vibrancy, and finishing standards. Seeing is believing – crisp images of your work immediately show customers the level of detail and excellence you deliver.
-
Builds Trust: A portfolio filled with real examples builds trust with new customers by showing you have a track record. It sets clear expectations of what clients will receive, easing their concerns. (As one print industry guide notes, “customers want to see your work... this builds trust and helps set an expectation of what they will receive.” )
-
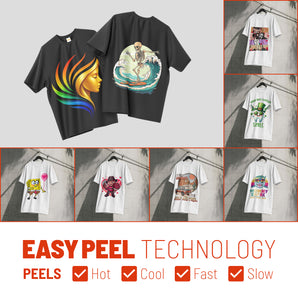
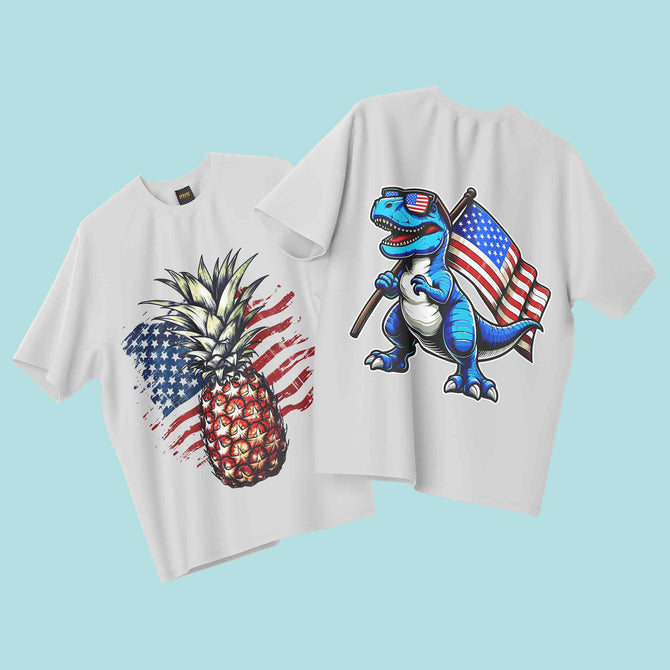
Shows Range: A well-structured portfolio showcases your range of work – for example, printing on different fabrics or products – signaling that you can handle diverse needs. If you can print on cotton tees, polyester jerseys, tote bags, and more, make sure each category is represented to highlight your versatility.
-
Drives Conversions: Portfolios aren’t just for show – they help convert prospects into buyers. Online, having strong portfolio images can increase conversions on marketplaces and websites, as shoppers are more confident purchasing when they see proof of past work. Offline, a great lookbook or sample can win over a hesitant client in person.
-
Differentiates You: In a competitive custom apparel market, your portfolio helps set you apart. It’s evidence of your style, quality, and experience that competitors may not convey. Think of it as your visual elevator pitch – within seconds of viewing it, a client should grasp what makes your DTF services special.
In short, investing time in a polished portfolio is investing in customer acquisition and your business’s reputation. Now, let’s move on to how to curate the content of that portfolio step by step.
Curating Your Portfolio Content: Step-by-Step
Putting together a portfolio is a deliberate process. Follow these steps to select and prepare content that will impress potential clients:
Step 1: Capture High-Quality Product Photographs
Your portfolio will live or die by the quality of its images – great product photography is essential. Here’s how to ensure your printed products look their best on camera:
-
Lighting: Shoot with plenty of light. Use natural light near a window or a softbox to get even, diffused lighting with true colors (harsh shadows can obscure details). Consistent lighting across your photos gives a cohesive, professional look.
-
Background: Keep backgrounds clean and uncluttered. A plain white or neutral backdrop is a safe bet for product shots, as it makes your garment or item pop without distractions. For more lifestyle-oriented photos, use simple settings or props that enhance the item (e.g. a printed shirt draped on a solid-colored chair) but don’t steal focus.
-
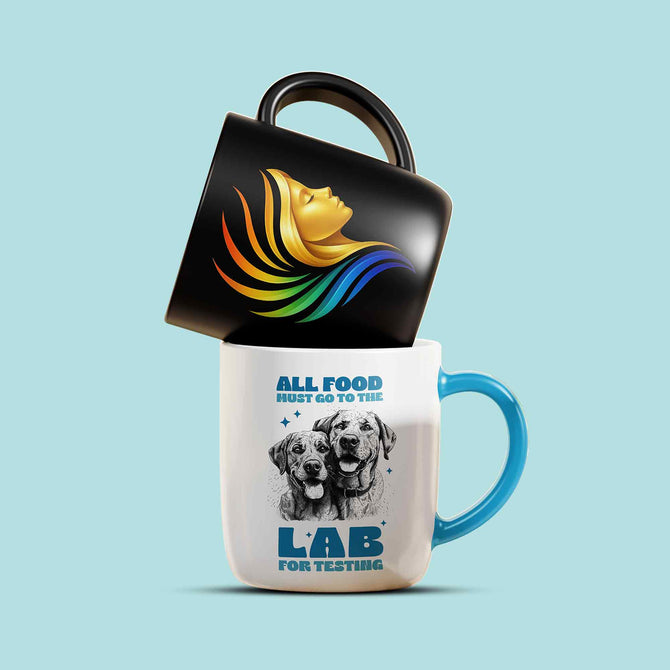
Staging & Composition: Present the product neatly – iron apparel to remove wrinkles, and arrange it attractively. You can photograph flat lays (garment laid flat and shot from above), use mannequins, or have models wear the items, depending on the effect you want. Ensure the product is the star: if using props, choose ones that complement the print’s theme or color. (Example: if you printed a coffee-themed graphic on a mug, you might photograph it on a table with coffee beans as props – but keep it subtle.)
-
Camera & Stability: You don’t need an expensive camera; a modern smartphone or DSLR will do, but prioritize clarity over camera type. Use a tripod or steady surface to avoid blur. Shoot at the highest resolution possible so you can zoom in on details in your portfolio. Focus carefully – viewers may zoom in to inspect print quality.
-
Multiple Angles & Close-ups: For each item, take multiple angles – front, back, and detail shots. A close-up of the print shows texture and vibrancy (DTF prints often have a slight raised texture – a macro shot can highlight that). Before-and-after close-ups (e.g. a transfer sheet vs the pressed final product) can also be compelling.
-
Consistency: Try to maintain consistent style across photos (similar lighting, background, and framing), so when your images are viewed together (on a page or gallery), they feel unified. Consistency in presentation helps keep the focus on the work itself.
-
Post-Processing: Edit photos mildly to correct brightness or color if needed, but avoid filters that alter the true appearance of the print. The goal is to accurately represent colors and details so clients know what to expect. Clean up any specks of dust or background imperfections in an image editing program.
Following a product photography checklist (provided in the Templates section below) will help ensure every image in your portfolio is polished. High-quality images “accentuate the vibrancy and detail of your DTF prints”, instantly communicating professionalism.
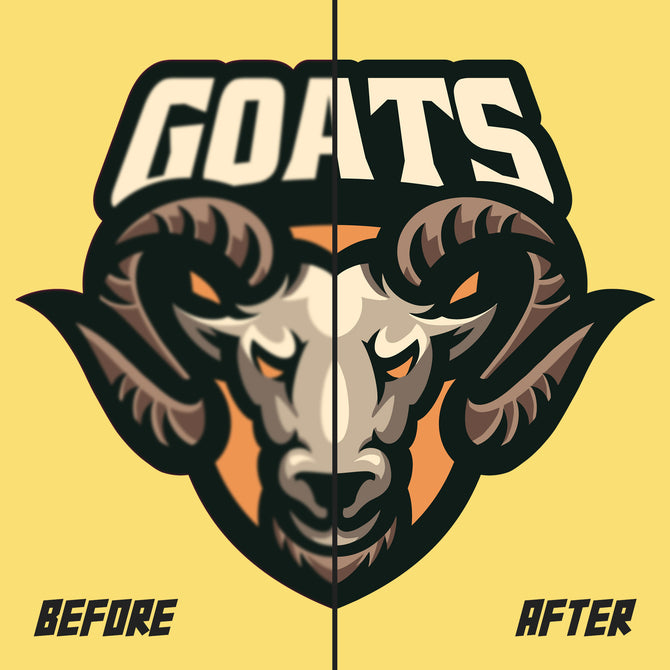
Step 2: Document the Process with Before/After Shots
A great way to set your portfolio apart is by showing how the magic happens. Don’t just display the final products; include some process shots or comparisons that tell a story:
-
Before & After: Show the journey from concept to completion. For example, you could show a digital design mockup side-by-side with the actual DTF-printed garment, or a “transfer film vs. finished shirt” comparison. This helps clients visualize the transformation and assures them that the final result lives up to the initial vision.
-
Production Stages: Consider adding a few photos of the DTF printing process itself. Examples: a shot of your printer in action laying down ink on the PET film, a close-up of the adhesive powder step, or the moment of peeling the film off the fabric. These behind-the-scenes images can be fascinating and convey your technical skill. (One tip from experts: “showcase the process, highlighting the selection of inks, film transfer techniques, and peeling precision” to demonstrate your mastery of DTF technology.)
-
Sequence or Timeline: You might organize a short sequence (3-5 images in order) or a brief video/gif within your digital portfolio to walk viewers through how a print comes to life. For instance: Design -> Printing on film -> Powder & Cure -> Heat Press -> Finished Product. Label each step so clients understand what they’re seeing.
-
Before/After on Difficult Materials: If you have dramatic transformations (e.g., a faded vintage graphic you recreated with DTF on a jacket), highlight those. It underscores problem-solving – you took something and made it better.
-
Annotate or Caption: Include captions or short notes with process photos to explain what’s happening (“Step 3: Applying hot-melt powder to the printed film... ”). This not only educates the client about DTF, but also quietly advertises your expertise in executing each step properly.
-
Client Visualization: These process visuals help clients visualize their own projects with you. Seeing a before/after, they can imagine their logo going through the same journey. It makes your service more concrete and builds confidence in your methods.
Including process documentation in your portfolio serves two purposes: it educates clients (which builds trust in your knowledge), and it differentiates your brand by pulling back the curtain. You’re not just selling a product, you’re showcasing the skilled craftsmanship behind it – a compelling selling point for many customers.
Step 3: Showcase Variety in Prints, Fabrics, and Applications
Diversity in your portfolio content is key. You want to convince potential customers that “if you can dream it, we can print it.” Curate your portfolio to display the full range of your capabilities:
-
Different Products & Fabrics: Include examples of all the product types you offer. T-shirts, hoodies, caps, tote bags, jackets, sports uniforms, décor textiles – whatever your business prints, show at least one of each. Emphasize a variety of materials: cotton, polyester, blends, maybe unusual substrates like leather or nylon if DTF compatible. This tells clients you can handle their specific item (be it a canvas tote or a performance poly shirt).
-
Various Colors & Effects: Display prints on light and dark fabrics, and a range of garment colors. DTF excels at printing vibrant colors even on black or colored garments – prove this by showing, for example, a full-color design on a black tee next to one on a white tee. If you use special DTF inks or techniques (like neon colors or reflective effects), include those striking examples as well.
-
Size and Placement Variety: Show that you can print small detailed logos and large full-front designs with equal quality. For instance, one portfolio image might zoom in on a small left-chest print with fine detail, while another shows a bold 12-inch full-back print. Also demonstrate different placements (front, back, sleeve, etc.) if those are common in your orders.
-
Design Styles: Curate a mix of design genres to appeal to different client tastes. For example, feature a photo-realistic print (to show detail), a graphic text-based design (to show crisp lines), and an artistic illustration (to show color blending). This versatility in design style will speak to a broader audience. As one DTF portfolio guide advises, “include diverse DTF printing projects to demonstrate versatility and mastery in textile customization.” In other words, your portfolio should say “I can handle any style or challenge.”
-
Use Cases/Industries: Think about your target markets (perhaps you identified these in earlier modules). Tailor your examples to them. If you serve local businesses, include a photo of a company logo printed on uniforms or promo items. If you target fashion startups, include a trendy artistic print from a capsule collection. For school or team clients, show sports jerseys or spirit wear with names/numbers via DTF. Grouping your work by category (apparel, accessories, corporate, etc.) can make it easy for a client in that category to find relevant examples.
-
Show Quantity/Scalability: If one of your strengths is handling bulk orders or complex jobs, make sure to showcase that. You could have an image of a large batch of printed shirts stacked and ready for delivery (implying you can handle volume). Or highlight a “most challenging” project – maybe a highly detailed design or a rush order you fulfilled – as a case study (more on case studies soon). Showing a “variety of prints on cotton, polyester, canvas, denim, etc.” alongside notes on order size or complexity can impress B2B clients.
-
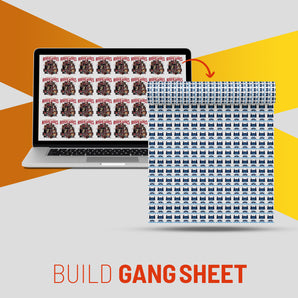
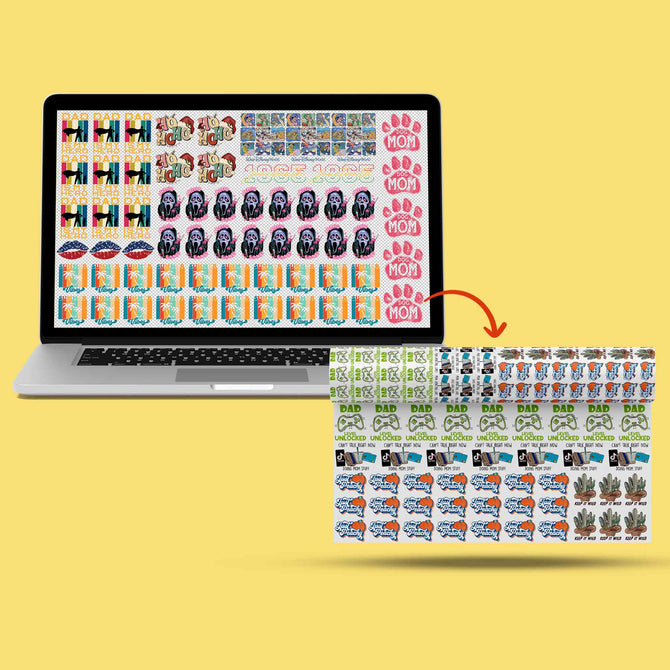
Mix and Match Display: You might create a collage or slideshow in your digital portfolio that quickly flashes through many different items in your catalog. For a physical portfolio or sample book, you could dedicate each page to a product category or theme, giving a page-by-page variety.
The goal of this variety is to communicate adaptability. A diverse portfolio says “We’ve done it all”, which gives potential customers confidence that you can meet their specific needs. As EazyDTF’s guide puts it, project diversity is essential – “mix and match designs to showcase your adaptability.” Don’t make the mistake of only showing one type of print or one style; even if you have a niche, a bit of breadth can broaden your client base.
Step 4: Highlight Your Best Work and Complex Successes
While variety is important, you also want to zoom in on your absolute best and most impactful projects – the ones that truly showcase what you’re capable of. Curate your portfolio to include several “hero” projects accompanied by short narratives (case studies) or captions highlighting why they’re special:
-
Standout Projects: Start by selecting your standout projects – the prints that came out phenomenally well or the orders that made you proud. These should demonstrate both your finest print quality and the breadth of your skills. Your portfolio “shouldn’t only exhibit your finest work but also reflect your mastery in various aspects of the process.” In other words, pick the pieces that not only look great, but also let you talk about a skill or service (color matching, rush printing, design assistance, etc.) that you excel at.
-
Complex or Challenging Orders: Include examples of jobs that were demanding – and explain (briefly) how you met the challenge. For instance, maybe you had a rush 48-hour turnaround for hundreds of shirts, or a design with dozens of colors and fine detail. By featuring this, you demonstrate reliability and problem-solving. A viewer will think, “If they handled that, they can handle my project too.” In your description, frame it in terms of client benefit: “Client X needed 500 shirts in 3 days for an event – we mobilized and delivered on time.” This highlights both your capacity and customer service.
-
Show Technical Mastery: Use these flagship projects to display technical prowess. For example, a project where you dialed in perfect color accuracy or overcame a tricky fabric issue is worth showcasing. You might write a caption like, “Printed on 100% nylon – required special adhesive and technique” to signal your expertise. One portfolio tip is to “display your technical prowess through a mix of finished products, detailed process documentation, and instances of overcoming challenges.” So for each hero project, you might include a finished photo plus a process photo or two (as mentioned in Step 2) and a note of what challenge was overcome (e.g. challenge: low-light original artwork, solution: image enhancement and high-res DTF print).
-
Client Success Stories: If a project led to a notably happy client or a measurable success for them, highlight that outcome. For example, “Helped a local brand launch their merch – they sold out 200 hoodies in a week” or “Our print quality earned a 5-star review from the client’s own customers.” These stories not only pat your back, they also show prospective clients the business value of what you do.
-
Presentation Order: In a digital gallery or a printed book, lead with one of your best pieces to grab attention. You might organize the portfolio so that your very strongest, most impressive image is first. First impressions count – if you have a jaw-dropping full-color print that always gets “wow” responses, make it the cover or the first image. Then, as the viewer navigates, scatter a few more star projects throughout to keep them engaged. End on another strong piece, so the final impression is also positive.
-
Testimonials with Best Work: If you have a client testimonial that corresponds to one of these flagship projects, pair them. For instance, show the project photos alongside a blurb like “The team delivered above and beyond on our complex order – the prints were vibrant and our clients were thrilled. – **Jane D., Boutique Owner”. This one-two punch of visual + social proof can be very persuasive.
By curating in this way, you strike a balance: the portfolio shows range (step 3) and also depth of excellence (step 4). Every potential client browsing it should easily find examples relevant to them and also come away confident that you excel even under tough scenarios. Next, we will discuss how to write up those short narratives or “case studies” for your standout projects, to maximize their impact.
Writing Effective Case Studies for Your Portfolio
Including a few case studies in your portfolio adds a narrative element that pure images alone can’t achieve. A case study is essentially a short success story: it explains a client’s challenge and how your DTF printing service provided a solution with successful results. Well-crafted case studies help prospective customers imagine how you could solve their problems too. They also demonstrate professionalism and analytical thinking. Here’s how to create effective case studies and integrate them into your portfolio:
Case Study Structure: Problem → Solution → Result
Stick to a simple, proven structure when writing case studies. A widely-used formula is often summarized as Challenge – Solution – Results. In practice, your write-up can be 2–3 short paragraphs or a bulleted mini-story covering:
-
Client & Challenge: Start by introducing the client (or project context) and what problem or goal they had. Keep the client identifiable only if you have permission (more on permissions later). For example: “Client: A local brewery needed high-quality, durable printed t-shirts for an upcoming festival. Their challenge was finding a method that could reproduce their intricate full-color logo on dark shirts.” This sets the stage – who it is and what they needed. Be specific about the challenge: tight deadline, budget constraints, complex artwork, need for vibrant colors, etc. Clearly articulating the problem shows you understand client needs.
-
Solution & Process: Next, explain what you did to solve the problem. Describe the DTF solution and any unique steps or decisions. For instance: “Solution: We recommended DTF printing for its vibrant color capability on dark fabric. We color-corrected the artwork for accuracy, printed transfers using our high-resolution DTF printer, and heat-pressed 100 shirts. We also implemented a test print to ensure the fine details (small text in the logo) came out crisp.” This section highlights your expertise and the process in action. You might mention any specific equipment or techniques used (e.g., special adhesive powder for stretch, or an extra hot-peel step) if relevant to the story. Keep it client-friendly – avoid too much technical jargon, but do show that your method was the right solution to their problem.
-
Results & Benefits: Finally, state the outcome. Whenever possible, quantify the results. Did your prints help the client achieve something measurable? For example: “Result: The brewery received their shirts within 4 days – in time for the festival – and reported that the print colors were ‘extremely vibrant.’ The shirts sold out at the event, giving the brewery both profit and publicity. Our durable DTF prints meant even after multiple washes, the staff uniforms still look new.” If you have numbers, include them: e.g., “saved 20% cost compared to their previous supplier” or “increased event merchandise sales by 30%.” Concrete results make the case study persuasive. Even if you don’t have hard numbers, you can cite qualitative outcomes like client praise, longevity of the prints, or how the solution met the challenge (e.g. tight deadline met, quality standard achieved, etc.).
-
Visual Aids: Augment the text with visuals. Each case study in your portfolio should include 1-3 images relevant to the story: perhaps a before/after comparison, the finished product in use, or a chart/timeline if it’s data-heavy. For example, a timeline graphic could illustrate a quick turnaround (“Day 1: Design approved -> Day 2: Printing -> Day 3: Order delivered”). Or include a close-up image of the detailed logo you printed, to visually prove the quality. Many companies keep case studies short and include graphics or video content, emphasizing measurable results the client saw. A picture really is worth a thousand words, and in a portfolio, readers will often look at images and captions more than long text blocks.
-
Client Quote (Optional): If possible, add a short testimonial quote from the client within the case study. Something like: “The prints were fantastic and arrived early – our festival merch was a huge hit! ” – John S., Brewery owner. This provides direct social proof to back up your narrative (we’ll cover testimonials in the next section as well). Make sure you have permission to quote, and use the client’s real name/company only if they’re okay with it (or use first name/position for partial anonymity).
By following this structure, you create a compelling mini-story. It should be succinct – a case study might be just half a page in a PDF portfolio or one section of a web page. The clarity of Problem → Solution → Result makes it easy for readers to skim and grasp how you deliver value. In fact, marketing experts note that case studies are “powerful arguments to support a pitch” and can drive new business, because they provide proof through storytelling, not just claims.
Anonymizing and Permissions for Case Studies
Before you publish client case studies, it’s critical to handle permissions and confidentiality properly:
-
Get Client Permission: Always obtain permission from the client to feature their project as a case study, especially if you plan to name them or show a logo. Even if you intend to anonymize the case study, it’s best practice to inform the client and get their blessing. Many clients will be happy to be featured (it’s extra publicity for them), but some, especially larger companies, might have policies against endorsements. A simple permission email or form can clarify what you’re asking for – the right to use their project details and images in your marketing.
-
Anonymize if Needed: If a client prefers not to be named, you can still write a useful case study by keeping details general. Refer to the client by type or industry: e.g., “a Fortune 500 retail company” instead of the specific name. Omit or obscure any proprietary data. Use generic job titles if quoting (e.g., “COO of the company” rather than the person’s name). An anonymous case study can still highlight the challenge and results; just focus on the story and outcomes instead of the brand. Do take care not to include any identifying info inadvertently (like a photo with their logo, unless that’s okay). When done right, anonymous case studies can still build credibility – sometimes readers can even infer the caliber of the client (e.g., “leading European OEM” suggests a big manufacturer without naming ).
-
Client as Co-Author: In some cases, clients might provide a testimonial or input that you can incorporate. Always verify sensitive details with them – for example, if you want to mention that their previous printing method failed them, get approval on that phrasing to ensure it doesn’t ruffle feathers. Make the client look good in the story as well; they should come off as smart for choosing you, not foolish for having a problem.
-
Use Real Data Carefully: If you have specific data (sales figures, cost savings), confirm with the client that those can be shared. Some results might be confidential. If necessary, use percentages or relative improvements instead of absolute numbers.
-
Legal/IP Considerations: If you’re showing designs that the client owns (like their logo or artwork), your general contract might already allow you to display the work in your portfolio (this is something to include in your terms with clients). If not, explicitly ask. Most will agree, since it’s their branding anyway. For any photographs of client employees or events, get permission for those images to be used publicly.
By respecting these considerations, you ensure your case studies are both effective and ethical. The last thing you want is to sour a client relationship by publishing something sensitive without consent. When in doubt, err on the side of caution: you can anonymize or slightly fictionalize a case study (e.g., change the client name, adjust a detail) to make the point without disclosing identities. Always have the client review an anonymous case study too – this builds trust and avoids surprises.
In summary, case studies in your portfolio function as in-depth testimonials. They combine narrative, visuals, and proof to give prospects a clear picture of how you operate and what you can achieve. Aim to include at least a couple of case studies (even one strong one is a great start if you’re new) in your portfolio materials.
Gathering and Presenting Social Proof
In addition to case studies, social proof is a powerful element of a portfolio that can sway potential customers. Social proof refers to evidence that other people or businesses have had a positive experience with your services – it leverages the principle that we trust something more when others vouch for it. For a DTF printing business, the main forms of social proof include testimonials, reviews, and influencer or partner collaborations. Let’s break down how to gather these and showcase them effectively:
Testimonials and Reviews
Testimonials are short quotes from satisfied customers, and reviews are similar feedback usually posted on public platforms. Here’s how to utilize them:
-
Collecting Testimonials: Develop a habit of asking happy clients for a brief testimonial. Often, a simple prompt in an email or a short feedback form after order completion works. (We’ve provided a “Testimonial Request Template” in the Templates section for an idea of wording.) Aim to get a sentence or two about what they appreciated: e.g. “The colors were amazing and the turnaround time saved our event!” Specific praise is more credible than generic flattery. If you have long-form praise (like an email where a client raves about your work), ask if you can quote part of it publicly.
-
Using Testimonials in Portfolio: Sprinkle these quotes throughout your portfolio content. For instance, on a website, you might have a dedicated Testimonials section or sidebar. In a PDF or print portfolio, you can insert a quote on a page margin or between project examples as a highlight. It’s effective to pair testimonials with visuals of the related project if possible – it creates a mini-story (image of product + client quote about it). Make sure to attribute the quote properly: include the person’s name, title, and company (if B2B) or some identifier (even just “– Jane D.”). If a client prefers anonymity, you might use a descriptor like “Owner, Boutique Shop in Austin”.
-
Credibility: Whenever possible, attach a face or name to testimonials because it increases trust. Even better, if clients leave public reviews (on Google, Facebook, Etsy, etc.), you can cite those and even link to or screenshot them (showing the 5-star rating graphic, for example). Seeing real reviews signals authenticity. For instance, featuring a quote that was originally a Google review can be done as: “★★★★★ Excellent quality and service…” and mention it’s from Google Reviews.
-
Diverse Voices: Try to gather testimonials that represent different segments of your clientele (e.g., a small business owner, an individual customer, a nonprofit group). This way, any prospect reading can relate to at least one of the voices. Ensure all testimonials are positive (obviously) but also somewhat complementary – each could highlight a different strength (quality, service, communication, etc.).
-
Keep It Updated: Regularly update your testimonials. Remove any that become stale or out-of-date (for example, if you improved a process that an older testimonial criticizes indirectly, or if that client is no longer in business). Fresh testimonials show that you are active and consistently delivering great work.
From a practical standpoint, remember the earlier tip from the portfolio content list: “Add quotes from happy buyers” as part of your portfolio content. Many successful print businesses feature testimonials alongside photos of the printed product to reinforce credibility. As a ScreenPrintDirect guide suggests, “feature reviews or feedback, ideally with images of the final product” for maximum impact. A potential client seeing a t-shirt photo and a quote from the shirt’s owner saying “this looks fantastic” experiences a one-two punch of persuasion.
Influencer Collaborations and Notable Clients
If your DTF business has collaborated with any influencers, artists, or well-known brands, leverage that as social proof. This might not apply to everyone, but even a micro-influencer or a popular local business can serve as a credibility marker. Here’s how:
-
Showcase Notable Work: Did you print merchandise for a local band or YouTuber? Did a social media influencer order custom apparel from you and share it? Include that in your portfolio. For example, if an Instagram influencer with 50k followers had you print their logo on hoodies, you could include a photo of that hoodie and caption it: “Printed merch for @InfluencerName – featured on their social media.” (Only do this if the collaboration is public knowledge or was shared by them; otherwise get permission as with case studies.)
-
Logos and Names: On your website or linecard, you might have a section titled “Trusted By” or “Clients & Partners” with a list of logos of businesses you’ve served. For instance, if you printed uniforms for a well-known cafe, showing their logo (with permission) on your site signals to new clients that reputable folks trust you. This is common in B2B service portfolios. Just ensure you have the right to use those logos; a quick request to the client usually suffices.
-
Influencer Testimonials: If an influencer gave you a shout-out or review, quote it. For example: “@LuxeFashionGal: ‘Absolutely loving the custom prints from [Your Business] – quality is on point!’ ”. An endorsement from someone with an audience can carry extra weight with new customers who recognize that name.
-
Case Study Format: You can also present an influencer collaboration as a case study: e.g., “We partnered with fitness influencer John Doe to launch his apparel line via DTF. In one month, his merch sales… etc.” This combines social proof with a success story and can be compelling if your target clients might also be interested in merch or brand partnerships.
-
Events and Sponsorships: If you have participated in community events or sponsored local teams with your prints, highlight that. A photo of the team wearing jerseys you printed with a caption like “Official print partner for XYZ Marathon 2025” demonstrates credibility and community involvement, which is positive social proof for many clients.
Showcasing Social Proof on Various Platforms
It’s not enough to gather social proof – you must also display it effectively where your customers will see it. Different channels allow you to integrate these elements in different ways:
-
Website: Have a dedicated testimonials section or page. You might use rotating testimonial carousels on your homepage. Also, integrate external reviews if possible (e.g., embed Google Reviews widget or simply post screenshots of 5-star reviews with a link for verification). On your portfolio page, intermix project images with testimonial quotes as described. The website is a great place for the “trusted by [logos]” banner as well.
-
Physical Portfolio or Storefront: If you have a showroom or you meet clients in person, you can display testimonials there too. For example, a printed poster or a binder page containing a collage of testimonial quotes. It might include a big quote in calligraphy (eye-catching) and smaller quotes around it. If you have any award or recognition (even something like “Rated #1 Print Shop in Townsville 2024”), put that in view as well.
-
Social Media: Social proof can be part of your social content. Share posts that customers tag you in (user-generated content is gold). Create Instagram Stories highlighting customer feedback or do a monthly “Client Spotlight” post praising a client and subtly showcasing what you did for them. On platforms like Facebook, encourage reviews (and respond to them). You can also pin the best review to the top of your Facebook page if that platform is key for your biz.
-
Portfolios on Marketplaces: If you sell via Etsy, Amazon, or other platforms, your “portfolio” there includes your product listings and the review section. Encourage buyers to leave reviews, and incorporate the best ones into your listing images or descriptions if allowed (for example, Etsy allows you to include text in product photos – you could overlay a short quote on one image).
-
Video Testimonials: A powerful form of social proof is a short video testimonial – maybe a client filmed themselves unboxing your product and reacting positively. If you have any such content, you can embed it on your site or link to it. Even a 15-second clip of a client saying “We love the shirts, thank you [Your Business]!” posted on your Instagram or YouTube and then embedded in your portfolio page can add authenticity.
-
Influencer Posts: If an influencer posted about your product, link to it or embed it if possible (e.g., a tweet or an Instagram post embed on your site). It’s third-party validation in a very direct way.
Remember, social proof elements like testimonials should complement your portfolio’s visuals, not overshadow them. They serve as voice-of-customer support to what you’re showcasing. A potential client browsing should naturally take in the images of your work and then see those reassuring voices saying “Yes, this provider delivers!”
One caution: always use genuine statements. Never fabricate quotes or attribute things people didn’t say – it’s unethical and risky. If you’re just starting out and don’t have testimonials yet, consider offering a beta service or discount to a few early clients in exchange for their feedback that you can use.
To sum up, integrating social proof means your portfolio not only shows what you can do, but also includes voices of people saying “we chose them and it was great.” This combination can significantly increase a prospect’s confidence in reaching out or placing an order.
Portfolio Formats: Digital, Physical, and Beyond
Your portfolio can take multiple formats, each serving different situations and audiences. It’s often wise to implement more than one format so you can showcase your work anytime, anywhere – whether face-to-face with a client or via the internet. Here we’ll explore various portfolio formats and how to leverage them:
Physical Portfolio: Sample Books & Swatches
Despite the world going digital, a physical portfolio still holds a lot of weight in the printing industry – after all, printing is a tangible medium! Here are ways to create and use physical showcases:
-
Sample Book/Lookbook: This is a professionally printed book or binder of your work. It could be as simple as a high-quality photo album with your best project photos, or as elaborate as a custom-printed lookbook with graphics and text. The advantage of a physical book is that it’s tactile and can be browsed during in-person meetings or at your shop/booth. Use a sturdy binder or a bound book with clear high-resolution prints. Organize it into sections (as per your portfolio outline template) – for instance, sections separated by product type or case studies. Ensure the cover has your branding (logo, tagline) because the cover design sets the first impression of your brand identity.
-
Printed Swatch Cards or Fabric Samples: DTF is all about feel and quality, which you can’t fully convey in photos. Prepare swatch samples – small pieces of fabric with your DTF prints on them – to include in your physical portfolio or sample kit. For example, a swatch book might have a canvas printed with a colorful design, a piece of polyester with a print to show stretch, etc. Clients can touch and even test these (try scratching or stretching) to be convinced of durability. Some print businesses create a sample pack to mail out on request (small prints or mini-transfers on various materials). This can be a great leave-behind after a sales meeting.
-
product samples: Wherever feasible, have actual printed products to show. Nothing beats seeing the real output: e.g., bring a few standout printed T-shirts when meeting a client, or display them in your store. If you specialize in certain items (like custom hats or phone cases), have those on hand as physical examples. At trade shows or events, hanging samples or letting people handle them can draw interest. As one marketing tip suggests, “Nothing speaks louder than tangible examples of your work. Invest in creating a diverse portfolio of printed samples... Customers will be impressed by the quality and versatility”.
-
Presentation and Care: Keep physical portfolio items clean and well-presented. If it’s a book, avoid crumpling pages or smudges; if it’s garments, make sure they’re clean and neatly folded or hung. It’s wise to have duplicates of critical samples in case one gets worn from handling. Replenish or refresh physical samples over time (colors can fade if exposed to light constantly; you want them looking vibrant). And don’t forget to update the physical portfolio just as you would the digital – swap in new work, retire older pieces that are no longer representative of your best.
-
Use Cases: Physical portfolios shine in face-to-face scenarios – client meetings, store walk-ins, trade show booths, or networking events. They also serve as an impressive leave-behind: for example, a small printed portfolio brochure you give to a prospect to take home (this could be a condensed version of your portfolio, printed professionally). Having something a client can hold in their hands can be more memorable than yet another website link.
Digital PDF Portfolio
A digital PDF portfolio is like a portable, shareable brochure of your work – great for emailing and offline viewing:
-
Designing the PDF: Treat the PDF portfolio as you would a print design project. Use a clean, visually appealing layout that aligns with your brand style (colors, fonts). Typically, a PDF portfolio might start with a cover page (logo, maybe a striking full-page image), a brief introduction/about, then pages of your curated work sections (with images and captions/case studies), and a final page with contact info. You can base it on your portfolio content outline template. Keep text concise and let images lead, since on PDF people will scroll through fairly quickly.
-
Interactivity: Modern PDFs can have clickable links and even multimedia. Consider linking images to project web pages or embedding short video clips (ensure compatibility and that file size doesn’t bloat too much). At minimum, include clickable links to your website or email on the cover or last page for easy follow-up. You might also include a QR code on the PDF (for example, “View process video” that scans to a YouTube link).
-
File Size and Quality: Balance high quality images with file size. A large portfolio PDF (e.g., 50MB) might be inconvenient to email or download. Optimize images for web (150-200 dpi is usually enough for on-screen). You could create two versions: a high-res one for special uses and a compressed one for quick emailing. Make sure on any device the images still look sharp and colors accurate.
-
Using the PDF: PDFs are extremely useful for client outreach. If a potential client contacts you, you can respond by attaching your portfolio PDF as a polished package of your work. It’s more professional and controlled than just sending a bunch of image files. Also, some clients might forward that PDF internally to decision-makers, so it serves as a leave-behind in digital form.
-
Downloadable on Website: Offer the PDF on your website for interested visitors (“Download our full portfolio”). Some prospects like to save these for reference. It also implies openness – you’re confident enough in your work to let them take it with them. If you do offer it publicly, add a password or contact gate only if you have privacy concerns with some content; otherwise, making it freely accessible can increase reach.
-
Updating: Keep your PDF updated just like other formats. Ideally, include a version date or number in a corner (“Portfolio v1.3 – Jan 2025”) so you know if an older file is floating around. When you update, you can send out the new version to any recent leads (“We’ve added new examples to our portfolio – see attached!” which can be a nice follow-up touch).
Interactive Web Galleries and portfolio websites
The online portfolio is arguably the most important these days, as it’s accessible 24/7 to anyone in the world. This typically takes the form of a portfolio section on your website or a standalone portfolio site/page:
-
Website Portfolio Page: Create a dedicated page or section on your business website for “Portfolio” or “Our Work”. Make this page easy to find (visible in the navigation menu). On this page, organize your work clearly: you might use a grid of thumbnails that users can click to see more details (images, description, maybe case study info). Group projects by category or tag for easy browsing – for example, visitors could filter by “Apparel”, “Home Décor”, “Corporate”, etc., if you have a variety. This categorization shows you’ve done a lot and helps users find relevant examples.
-
Project Pages: Consider creating individual sub-pages or pop-ups for key projects or case studies. Each could contain a gallery of images from that project and the story behind it. This way, your main portfolio page is a visual hub, and deeper info is one click away. Ensure each project page has a call-to-action (like “Interested in similar work? [Contact us]”).
-
Image Quality and Load Time: Optimize images on your site so they look great but don’t load painfully slow. Use web-friendly formats (and consider enabling a zoom or lightbox feature for those who want to see close-up details). Provide alt text for each image (describing the print and product) – not only is this good for accessibility, it can help your SEO (search engines will “see” those descriptions).
-
Interactive Elements: You can get creative with interactive portfolio elements. For example, some print shops embed short video clips or GIFs of the printing process on the portfolio page to grab interest. You might have a slider comparing mockup vs final product that the user can drag. These touches make the experience memorable. Just ensure they work on mobile devices too.
-
Leveraging Portfolio Platforms: In addition to your own website, consider uploading your work to portfolio or social platforms like Behance, Dribbble, or Instagram. While these aren’t specific to DTF, they have audiences for design and could lead clients to you. Behance, for instance, is great for showcasing project case studies with multiple images and text – you could repurpose your website case studies there for extra exposure. If you do this, keep branding consistent and link back to your main site/contact info.
-
Google My Business and Others: Don’t forget more straightforward “portfolio” avenues: On Google My Business (the listing that appears on Google search/maps), you can upload photos of your work. This is important for local SEO and first impressions (someone finds your profile – sees nice portfolio images immediately). According to one guide, uploading visuals to Google My Business provides local SEO benefits and showcases your work to searchers. Similarly, on any listing site or directory relevant to print shops, ensure your best images and maybe a PDF link are present.
-
Keep it Updated and Curated: A web portfolio can grow unwieldy if you keep adding every new project. Be selective – it’s better to have 20 excellent, diverse examples than 100 where quality varies. Periodically prune older or less impressive pieces as you add new ones, to keep the overall standard high. Also maintain consistency: ensure all thumbnails have a uniform size or aspect ratio, all captions follow a style, etc., for a professional look.
One benefit of an online portfolio is that it’s instantly shareable – you can send a link to a prospect in seconds. Make sure that link (URL) is easy to share (short and logical, like yoursite.com/portfolio). Also, ensure your site is mobile-friendly, since a client might click your portfolio on their phone first. The experience should be just as compelling on a small screen.
Video-Based Portfolios and Behind-the-Scenes Footage
Video is an incredibly engaging format and can complement your static portfolio:
-
Portfolio Reel: Consider creating a short video reel (1-2 minutes) that showcases highlights of your work. This could be edited like a promo: show quick montages of your best prints, maybe intercut with action shots of printing or your team at work, and overlay text or voiceover about your services. This kind of video can live on your homepage or portfolio page, and can also be shared on social media or YouTube. It gives a dynamic overview of your capabilities in a way that static images sometimes can’t. For instance, a video can show the reflection of light on a print, or the flexibility of the print when a shirt is crumpled – things that communicate quality.
-
Project Walk-through Videos: For one of your case studies or complex projects, you might have a longer-form video (say 3-5 minutes) where you walk through the process in depth. This could involve narrating the steps, showing before/after, and including client testimonial clips if available. It’s like a mini documentary of a project. This can be very persuasive to serious prospects who want to understand your process and see your facility/equipment in action.
-
Behind-the-Scenes (BTS) Footage: Even short BTS clips can be great portfolio additions. A time-lapse of you printing 100 shirts, a quick clip of you peeling a DTF transfer and revealing the design, or a view of your workspace bustling with orders – these convey professionalism and scale. You might compile several clips into a single “Behind the Scenes” video gallery on your site. Prospects often enjoy seeing how their products will be made; it builds trust that you’re using professional equipment and methods.
-
Client Testimonial Videos: If you have any on-camera testimonials from clients or footage of an event where your prints were used, those are gold. For example, a video of the moment a team gets their new uniforms you printed, all smiling – that emotional impact is strong social proof and can be part of your portfolio media.
-
Publishing and Using Video: Host your videos on a platform like YouTube or Vimeo for reliability, then embed them on your site. That way, if you share a PDF portfolio, you can include a link or QR code to the video as well. Also share these videos on social channels and include them in presentations. For in-person meetings or trade show booths, having a looping video on a screen can draw people in (people are naturally drawn to moving visuals).
-
Quality Considerations: Ensure your videos are well-lit and clear, just like your photos. Edit them to be concise – attention spans are short. Add captions or text on screen because often people watch without sound initially. Keep the branding visible (your logo or website in a corner perhaps). A high-quality video sends the message that you’re professional and tech-savvy.
-
Example – Hero Video: One of the best screen printing websites profiled by Printavo used a hero video on their homepage: a simple, high-quality video of their shop and printing process that immediately gave visitors a “wow” factor. You can emulate this by having a short hero video on your site’s landing or portfolio page. It doesn’t have to be Hollywood-level – even a montage of your prints coming off the press can generate excitement and interest.
In summary, think of these formats as tools in a toolbox. You might have:
-
A printed sample binder for local meetings or store visitors.
-
A PDF portfolio to email and for offline viewing.
-
An interactive web portfolio for the broad audience online.
-
A video reel or BTS content for a modern, engaging touch.
By covering multiple formats, you ensure that no matter how a client encounters you, you can put your best foot forward. All formats should contain the core message: visual proof of quality and variety, plus contact info or call-to-action to turn interest into inquiries.
Presentation Best Practices: Pitching Your Portfolio
Having a stellar portfolio is half the battle – presenting it effectively is the other half. Whether you’re meeting a potential client in person, showcasing at a trade show, or sending out cold emails with your portfolio link, how you introduce and explain your work can make a big difference. Below are best practices for using your portfolio as a persuasive tool in various scenarios:
Tailor Your Presentation to the Client
One-size-fits-all is not as impactful when pitching. Research and understand what your prospective client values, and then highlight relevant examples from your portfolio that match their needs:
-
Know Your Audience: Before a meeting or outreach, learn a bit about the client’s industry and what they might be looking for. If you’re pitching to a sports team, they’ll care about durable prints and maybe variable data (names/numbers). If it’s a fashion brand, they’ll be keen on print quality, color fidelity, and maybe special effects. Select portfolio pieces that align – e.g. show other sports jerseys you’ve done for the team, or show artsy apparel prints for the fashion client. Mention briefly during the presentation, “We chose this example to show you because it’s similar to what you need…” – this connects the dots for them.
-
Start with Impact: Lead with one of your best, most relevant pieces for that client. For example, in an in-person meeting, you might first pull out a sample of a project that resembles the client’s brand or challenge. This grabs their attention early. (As a general rule, start strong: “Start with your best project to grab attention, then guide the viewer through a mix of different...” as one agency advises).
-
Speak to Their Needs: As you go through the portfolio, frame your commentary around how you solve problems or add value. Instead of just saying “Here’s a shirt we printed for X company,” you could say, “This company needed a print that wouldn’t crack after dozens of washes, and we delivered – it’s the same approach we’d use for your uniforms to ensure longevity.” This way, you’re linking your past work to the client’s objectives.
In-Person Meetings and Show-and-Tell
When you have a face-to-face meeting (whether at your shop or the client’s office), the way you physically present your portfolio can influence the client’s perception:
-
Professional Packaging: Bring your portfolio materials in a neat, organized manner. If it’s a binder, have it bookmarked or indexed so you aren’t fumbling to find things. If you have multiple items (like a box of samples), make sure they’re well-arranged and clean. Small details, like high-quality printouts or a branded folder for leave-behinds, subtly communicate professionalism.
-
Use Narratives, Not Just Images: Don’t just hand over the book and sit silently. Guide them through it. For each key piece you show, tell a short anecdote or point out a feature. Example: “This design was tricky because of the gradients – DTF handled it smoothly, as you can see. The client loved the outcome.” Storytelling engages the client more than a dry description. It also demonstrates your expertise without overtly bragging – you’re telling how you solved things.
-
Interactive Engagement: Encourage the client to feel the samples, or hold them up. If you have a reversible sequin print or a glow-in-the-dark effect, demonstrate it (darken the room momentarily for glow effect, etc.). These interactive moments are memorable. Also pay attention to their reactions or questions and be ready to pivot: if they show interest in one piece, elaborate on it and perhaps show similar ones.
-
Pace and Volume: Be careful not to overwhelm. It’s tempting to show everything you’ve done, but quality trumps quantity in a presentation. It might be better to showcase 5 outstanding pieces in detail rather than skim through 20 quickly. You can always have more examples in backup if they want to see more. Watch their body language – if they seem captivated, you can dwell longer; if they seem pressed for time, hit the highlights and wrap up.
-
Prepare for Q&A: Your portfolio will likely prompt questions (“How did you get this effect?”, “Have you done work for XYZ industry before?”, “What’s the cost for something like this?”). Be ready to answer clearly. Sometimes the portfolio meeting turns into a quasi-consultation about the client’s project – that’s a good sign! Engage, give suggestions, and refer back to portfolio pieces as examples when answering (“As you can see in this example here, we could do something similar for you…”).
-
Leave-Behind: If meeting in person, leave something tangible: this could be your portfolio brochure (if you made one), a business card attached to a sample print, or even a small freebie (like a sticker or a printed coaster with your logo). This ensures they have a reminder of you. A physical portfolio piece left behind can circulate in their office too, extending your reach (others might flip through it later).
Trade Shows and Events
At trade shows, fairs, or pop-up events, you often have a booth competing with many others. Here’s how to make your portfolio and display stand out:
-
Visual Booth Appeal: Use your portfolio content to create eye-catching displays. A large banner or backdrop with giant images of your best prints can draw people in from afar. You might enlarge some portfolio photos (especially those that show detail or a unique design) as posters. The key is to showcase your best work visibly – you have seconds to attract passersby.
-
Sample Displays: Have a rack or mannequin displaying printed apparel. If you offer various products, create an “array” – e.g., a wall with t-shirt, cap, tote bag, etc., all printed with vibrant designs to show range. People are often tempted to come closer and touch the items, giving you an opening to start a conversation.
-
Portfolio Books on Table: Have copies of your lookbook or photo portfolio on the counter for visitors to flip through. You could even tether them if you’re worried about losing them, but ideally have at least one staff (maybe you or a colleague) who can guide interested visitors through the book. Place it in a nice stand so it’s easy to browse.
-
Digital Portfolio Display: If possible, set up a tablet or screen with your digital portfolio or reel playing on loop. A tablet can run a slideshow of your top 20 portfolio images, for example. This helps when your booth is busy – people can still see your work without one-on-one attention. Ensure the slideshow or video has captions or short descriptors, as audio might not be effective in a noisy event hall.
-
Quick Pitches: At events, attention spans are short. Prepare a 30-second pitch that ties into your portfolio. For example: “We specialize in DTF printing – see these samples? – they show how we can print photo-quality designs on any fabric. Our portfolio here has more examples, like this jacket print… If you have custom apparel needs, we likely have done something similar and can excel at it.” Tailor your quick spiel to the person if you know their context (like if it’s a school rep walking by, highlight your team jerseys etc.).
-
Collect Contacts: Have a mechanism to capture interested leads so you can follow up. A sign-up sheet, business card fishbowl, or digital form on a tablet works. When someone seems really interested and has seen your portfolio, don’t let them leave without exchanging info. Later, you can email them a thank-you with a PDF portfolio attached, referencing what they liked (personal touch).
-
Giveaways with Portfolio Info: People love freebies at trade shows. Consider something like a postcard or small catalog (like a mini portfolio sampler) that they can take. Even a nicely designed flyer that has a few photos of your work and your contact info/QR code to full portfolio can work. That way, even if they don’t talk to you long, they have a piece of your portfolio in hand.
Online Outreach and Remote Presentations
Often, you’ll be sending your portfolio to prospects via email or doing a virtual meeting. Here’s how to navigate that:
-
Emailing Portfolio Links: When reaching out cold or following up on a lead, contextualize the portfolio link or attachment. Instead of a generic “Here’s my portfolio,” write a brief note pointing out one or two items that might interest them. For example: “I’ve attached our portfolio PDF. Page 5 shows a line of athletic jerseys we printed – I recall you mentioned you’re looking for durable prints for sportswear, so you might find that relevant.” This personalizes the experience even through email.
-
Virtual Meetings: If you’re meeting via Zoom or similar, prepare to share your screen to show your portfolio. You could have a slide deck version of it or just navigate through your website portfolio live. Practice this to be smooth – fumbling with technology can distract from the content. Also, have high-res images handy in case you need to send one in the chat or via follow-up for closer inspection. Engage your virtual audience by asking questions like, “Is there a particular type of project you’re interested in? I can show examples if so.” Keep them interactive so they don’t zone out (virtual meetings can be less engaging by nature).
-
Portfolio on Social Media Outreach: If you often find clients via social media DMs or groups, make sure your social profiles themselves act as mini-portfolios. Instagram, for instance, can be a portfolio – ensure your top posts or highlights show your best work. When someone inquires, you might just send them to your Instagram feed. But remember to eventually direct them to your more comprehensive portfolio or website for full details and to capture them as a lead.
-
Follow-Up: After you’ve sent a portfolio or held a presentation, a polite follow-up can nudge the client. Use that opportunity to ask if they had questions about anything they saw. Maybe mention one thing you didn’t get to show that they might find interesting. This shows attentiveness and keeps the conversation going.
General Pitching Etiquette and Tips
Regardless of the medium:
-
Be Honest: Never claim work that isn’t yours in your portfolio or exaggerate your role in it. If a prospect asks, for example, “Did you also design this graphic?” and you didn’t, give credit (“The client provided the design; we handled the printing and advised on tweaks for best results”). Honesty builds trust – and you can pivot to emphasize what you did excel at.
-
Confidence without Arrogance: Speak confidently about your work (“We were really happy with how this turned out and the client was too”), but avoid coming off as arrogant or dismissive of alternatives. Clients want confidence, but they also want to feel heard. Tailor your tone to be enthusiastic and assured, but also open to their ideas or concerns.
-
Listen and Observe: A great presenter listens more than they speak. Pay attention if the client comments, “I like this” or “I’m not sure about that.” Use those cues – ask them to elaborate. The portfolio review is a chance for the client to reveal their preferences. For example, if they say “These colors are great,” you learn they value vibrant color; you can then assure them about your color processes, maybe show another vibrant example. If they seem unimpressed by something, ask what they were hoping to see – maybe you can quickly find it in your arsenal or follow up with a specific example later.
-
Storytelling and Passion: Let your passion for your work come through. People get excited if you’re excited (and genuine). Share a quick backstory if appropriate (“This project was special because...”). Humanizing the work with little stories can leave a more lasting impression than just technical specs.
-
Call to Action: Always end a portfolio presentation with a clear next step. In person, this could be, “So, if you think this quality is what you need, we’d love to provide a quote for your project” or simply, “Thank you for your time – I’d be excited to work on your upcoming order.” In an email, it might be, “Feel free to let me know which examples you liked best, and I can provide more info or pricing for a similar job.” The portfolio should naturally lead to “I want this for myself, how do we proceed?” – make it easy for the client to know how to proceed, whether that’s scheduling a call, getting a quote, or placing a small test order.
By following these practices, your portfolio transforms from a static collection of work into a dynamic sales tool. You’ll not only show what you’ve done, but present it in a way that convinces clients you’re the right choice. Now, as we wrap up the module, let’s summarize with some handy templates and a final checklist to ensure your portfolio is ready for prime time.
Templates and Examples
To help you implement everything we’ve discussed, this section provides templates and structured examples for key portfolio elements. You can adapt these to your business and style.
Portfolio Content Outline (Template)
Use the following outline as a starting structure for organizing your portfolio (whether that’s a PDF, website, or physical book):
-
Cover/Title Page – Your business name, logo, and a tagline or image. (Make it striking – e.g., a full-page photo of your best print or a collage of highlights.)
-
Introduction/About – A brief welcome message. 2-3 sentences about who you are and what you specialize in (DTF printing for apparel, etc.). Keep it customer-focused (e.g., “We help brands and individuals turn their ideas into vibrant reality with DTF printing…”). Include contact info subtly on this page (and again at the end).
-
Services Overview (Optional) – A short section listing what you offer (DTF transfers, custom apparel printing, fulfillment, design assistance, etc.). This can be a bulleted list or icons. It sets context for the portfolio that follows.
-
Portfolio Sections – This is the bulk. There are a few ways to structure this:
-
By Category: e.g., Apparel, Accessories, Home Textiles, Specialty. Under each category, show projects or examples.
-
By Client Type or Industry: e.g., Small Business Merch, Sports Teams, Fashion Brands, Personal Gifts. Show relevant work in each.
-
By Project/Case Study: Each sub-section is a project story (with the Challenge-Solution-Result format). This is great if you want to highlight a few detailed case studies.
-
Hybrid: Start with a gallery of diverse images, then have pages that zoom into case studies.
-
Whichever format, keep a logical flow. For instance, you might lead with broad showcase images, then delve into specifics. Ensure each section or project has:
-
1-3 images (with captions or short descriptions).
-
A brief text explaining either the context or what makes it noteworthy (this could be a condensed case study or simply notes like “DTF on polyester – 8 colors, completed in 48 hours”).
-
-
-
Testimonials/Reviews – A page or scattered call-outs with client testimonials. If doing a dedicated page, you can title it “What Our Clients Say” and list 2-5 testimonials (with names and perhaps small headshots or company logos if available). Alternatively, place quotes next to related project images throughout the portfolio.
-
Notable Clients or Collaborations (Optional) – If you have recognizable client logos or influencer partnerships, dedicate a small section to “Clients & Partners” with their logos, or a note like “Our prints have been featured by: [Influencer/Brand]”. This can be visually shown as a grid of logos or a list.
-
Process/How It Works (Optional) – Some portfolios include a page explaining the process (especially if aimed at clients who might not know what DTF is). This could be a simple infographic or 3-4 step diagram (Design -> Print -> Press -> Deliver). Only include if space allows and it adds value to your target reader.
-
Contact & Next Steps – The final section/page should tell the reader what to do if they’re interested. Include:
-
Contact details: email, phone, website, social media handles, physical address if relevant.
-
A call-to-action: “Ready to start your project? Get in touch for a quote or sample.” Perhaps provide a QR code or short URL for a quote request form.
-
Business credentials if any: e.g., mention any industry memberships, years of experience (“Over 5 years serving the community”), or guarantees (“100% satisfaction guarantee”) briefly if you want.
-
If it’s a physical or PDF portfolio, you might also place your logo and slogan here one more time for reinforcement.
-
This outline is flexible – feel free to re-order sections. The key is to keep it organized and logical so a client flipping through gets a clear narrative: who you are, what you do, proof of quality (the portfolio images and case studies), proof of satisfaction (testimonials), and how to contact you.
Case Study Write-Up Template
When crafting case studies, you can follow a consistent template to ensure clarity and completeness. Here’s a fill-in-the-blank style structure you can use for each case study (whether on your website or in print):
-
Client:
[Client Name or Descriptor]– (One line about who the client is. If anonymous, describe type: e.g., "Local Restaurant Chain" or "Online Apparel Startup"). -
Challenge:
[What problem or need did the client have?]– (Describe the situation. Example: "Needed 200 branded t-shirts with complex artwork in under a week for a grand opening."). -
Solution:
[Your solution and approach]– (Explain what service/product you provided and how. Example: "Recommended DTF printing for its speed and color accuracy. We refined their artwork for print, then printed and pressed 200 transfers in 3 days, working overtime to meet the deadline."). -
Process Highlights:
[Any notable process details]– (Optionally mention special techniques or steps. Example: "Used our new 8-color DTF ink set to ensure the neon colors popped on black fabric. Implemented strict QC at each step."). -
Result:
[Outcome and benefits]– (Quantify or qualify the result. Example: "Delivered all shirts on time. The client’s staff wore them at the event, boosting brand visibility – and the client reported the prints stayed vibrant even after many washes. They praised the quality and promptness."]. -
Testimonial (if available): “[Direct quote from client]” – Client’s Name, Title.
Using this template ensures you hit all the key points: who, what, how, and how well. In practice, you might write it out as a short narrative paragraph or bullet points. For a more narrative flow, you can merge some sections:
Client: Local brewery pub chain Challenge: They needed durable, vibrant merch T-shirts for an upcoming festival, featuring a detailed multi-color logo – with only a one-week turnaround. Their previous prints from another vendor had faded quickly, so quality was a big concern. Solution & Process: We chose DTF printing to reproduce the intricate 8-color logo on black tees. Our team optimized the artwork for color accuracy and printed the transfers using our high-resolution printer. We also applied an extra adhesion step to ensure durability. Working over a weekend, we pressed 300 shirts within 4 days. Result: All shirts were delivered a day early, giving the brewery time to distribute them before the festival. The prints were exceptionally vibrant (noticeable even in crowd photos) and withstood the entire event and subsequent washings without issue. The client noted that these were “the best shirts we’ve ever had printed” and has since returned for two more orders.
The above illustrates how you might expand on the template in paragraph form. Adjust the depth based on your audience’s interest – some may prefer bullet summaries, others like a good story. The main goal: a reader should quickly grasp the scenario and be able to imagine similar success for themselves with your services.
Testimonial Request Template
Getting testimonials can be as simple as asking. Here’s an email template you can use to request a testimonial from a client once you’ve completed an order (feel free to customize the tone to match your relationship with the client):
Subject: Quick Feedback/Quote Request – Thank you for your order!
Hi [Client Name],
I hope you’re doing well. It was a pleasure working on your [describe project: e.g., “custom hoodie prints”] for [Client’s Business/Event]. I’m thrilled to hear that everything was delivered to your satisfaction (and seeing the positive response from your team/customers was the cherry on top!).
I have a small favor to ask: Would you be willing to share a brief testimonial about your experience working with [Your Business Name]? Just a sentence or two about the quality or service would be incredibly helpful for us as we build our portfolio and client base.
For example, something like: “[Your Business] helped us [solve X problem]. We were impressed with [specific aspect you liked].”
Feel free to mention anything you found valuable – whether it was the print quality, our communication, turnaround time, or even the packaging. If you’re okay with it, we’d like to feature your comment (and name/business) on our website and portfolio materials.
If you’d prefer to stay anonymous, we can use a generic attribution (like “Owner, Retail Shop in Dallas”), no problem.
Thank you again for trusting us with your project. We look forward to working with you again in the future!
Best regards, [Your Name] [Your Title or Company Name] [Contact Info]
A few notes on this template:
-
It’s polite and expresses gratitude (important when asking for a favor).
-
It gives a gentle prompt/example, which makes it easier for the client to know what to write.
-
It asks permission to use their name/business, offering an anonymous option.
-
It’s succinct and easy to reply to.
Make sure to adjust details (if you know the client was super happy about a specific thing, mention that to jog their memory). Also, consider timing – send this shortly after the successful completion, when the positive experience is fresh.
Often, clients are happy to provide a testimonial, but sometimes they get busy. If you don’t hear back in a week or so, a polite follow-up is okay. If still nothing, perhaps the client might have intended to but forgot; you could try catching them in person or on a call, or move on and try another client.
Over time, you’ll gather a stable of great testimonials to choose from for your portfolio.
Product Photography Checklist
Consistently good photos require a consistent process. Use this checklist before and during every portfolio photoshoot (whether you’re shooting new work or re-shooting old pieces) to ensure top-notch images:
-
✔ Prepare the Products: Clean and iron garments; dust off any items; remove tags or obtrusive elements (unless showing packaging). Your product should look its absolute best.
-
✔ Set Up Background: Use a plain, non-distracting backdrop. For most products, a white sweep or light gray backdrop works well (or choose a background that complements the item color). Ensure it’s large enough – no edges or clutter in frame.
-
✔ Arrange Good Lighting: Position your light source(s) before shooting. Soft, diffused light is ideal:
-
If using natural light, shoot near a window with sheer curtains (avoid direct harsh sunlight unless for a stylistic shot).
-
If using artificial lights, set up softboxes or umbrellas to distribute light evenly. Use at least two lights (key and fill) to minimize harsh shadows; add a backlight for depth if needed.
-
Check for even coverage: no heavy shadows on one side, no overexposed spots.
-
-
✔ Stabilize Camera: Mount your camera or phone on a tripod. This ensures sharp images and consistency across shots. If handheld, ensure you have image stabilization and a fast shutter speed (or steady hands).
-
✔ Camera Settings: Use high resolution. Set white balance correctly (use a gray card or appropriate preset so colors are accurate). For depth of field, a moderate aperture (f/8-f/11 on DSLRs) often works to keep the whole product in focus. Adjust ISO low to avoid noise (use more light rather than high ISO).
-
✔ Take Test Shots: Snap a test photo and examine it:
-
Check focus (zoom in to see fine details of the print).
-
Check exposure (nothing too dark or blown out).
-
Check color accuracy (does the shirt color in photo match real life? The print colors?).
-
Adjust lighting or settings as needed before the real shoot.
-
-
✔ Compose Thoughtfully: Center the product (or use rule of thirds if doing an artsy shot). Leave some margin around it (you can crop later). Ensure the product is fully visible (for apparel, all sleeve and hem details shown unless intentionally cropping). If shooting multiple items, arrange them neatly or in a creative layout, but avoid looking messy.
-
✔ Capture Multiple Angles: Shoot the product from various useful angles:
-
Front view, back view (for apparel).
-
Close-ups of the print design to show detail/texture.
-
Side or 3D angle if relevant (especially for items like mugs, caps).
-
If the item has special features (sleeve print, inner label, etc.), get those too.
-
For process documentation: capture key steps (print on film, heat press in action, etc.) if that’s part of this shoot.
-
-
✔ Include a Reference (if needed): For size context, you might include a familiar object (e.g., a ruler or coin next to a small printed label) – but only if size is a selling point and the object doesn’t distract. Usually, for portfolio, context props are more for aesthetic (like a model wearing the shirt, or a mannequin).
-
✔ Mind the Props: If using props or models, verify they enhance the image:
-
Props should align with the theme (beach sunglasses next to a summer tank top print, etc.) and not overshadow the product.
-
Model should be well-groomed and wearing complementary clothing; pose naturally to showcase the print.
-
Always keep the printed product as the focal point.
-
-
✔ Take Plenty of Photos: Don’t skimp – shoot multiple photos for each angle with small variations (lighting, positioning) so you have options. It’s easier to discard extras than to reshoot later. Ensure you also photograph in high-resolution RAW format (if available) for maximum editing flexibility.
-
✔ Review and Select: After the shoot, go through images and pick the best ones. Check that in each selected photo: the print is visible clearly, colors look right, and the image is crisp. If any element (like a stray thread or a wrinkle) is detracting, see if another shot is better or plan to edit it out.
-
✔ Post-Process Carefully: Edit the chosen photos:
-
Adjust brightness/contrast so the product looks true-to-life (automatic levels can help, but watch that it doesn’t distort colors).
-
Crop for composition if needed (maintain common aspect ratios like 4:3 or 1:1 if planning for website thumbnails or Instagram).
-
Ensure the background is clean (you might use a tool to whiten the background if needed, or clone out any spots).
-
Sharpen slightly if needed to enhance print detail (but avoid over-sharpening).
-
Export in appropriate formats: high-res for print/PDF and optimized JPEG or PNG for web (make sure file size isn’t too huge for web).
-
-
✔ Consistent Styling: If these photos will sit alongside others in your portfolio, ensure consistency. Similar lighting and background across portfolio images create a cohesive look. If you updated your style (say you switched to gray background from white), consider re-shooting or editing older images for consistency, or group them so the difference seems intentional.
-
✔ Backup Originals: Keep your original photos organized (by project/date) and back them up. You might need to re-edit or use them for something else later. Plus, building a library of your past shoots is useful if you want to do retrospectives or social media throwbacks.
By following this checklist, you’ll maintain a high standard for visuals. Great photos do justice to your hard work and make your portfolio much more effective.
Finally, before deploying your portfolio to the world, run through the final readiness checklist in the next section to ensure everything is on point.
Final Portfolio Readiness Checklist
Use this final checklist to review your portfolio (in every format you plan to use) and make sure you’re fully ready to showcase it to clients:
-
Content & Quality: Every project or image included is high-quality and serves a purpose. (Remove any filler or mediocre examples – your portfolio is only as strong as your weakest piece.)
-
High-Resolution Images: All photos are clear, well-lit, and high resolution. No pixelation or blurry shots, even when zoomed. Close-ups reveal details nicely.
-
Accurate Color: Printed colors in photos look true to life (especially important for apparel – e.g., the black shirt in photo looks black, not gray; the vibrant reds are not dull). Adjusted for accuracy on screen and in print.
-
No Typos or Errors: Proofread all text – project descriptions, testimonials, captions, etc. Ensure client names and technical terms are spelled correctly. A typo can undermine an otherwise professional presentation.
-
Consistent Style: Visual and textual style is consistent. Fonts and colors in your PDF or website align with your brand. Headings, subheadings, and body text are used uniformly. Image sizes/thumbnails follow a consistent format on your site.
-
Logical Flow: The ordering of sections and pieces makes sense. A new viewer can follow the narrative without confusion. (For websites, test that navigation or filtering on the portfolio page works correctly. For PDFs, check the page order. For physical, flip through to ensure it’s sorted well.)
-
Updated Info: All information is current. If you mention “X years in business” or specific dates, make sure they’re up to date. Remove any outdated projects that no longer reflect your best work or current services.
-
Client Permissions: Verified permission for any client names, logos, or sensitive project details you’ve included. (If you haven’t heard back, consider anonymizing those references until you have approval.)
-
Testimonials Attributed: Testimonials are tagged with the proper name/title, and you have the necessary okay to use them. They are placed or highlighted effectively.
-
Contact Details Present: Your portfolio provides clear contact information. Ideally on both the first introduction area and the last page/section (and maybe in a footer of each page in a PDF). Ensure phone numbers, emails, and links are correct and active. Test every hyperlink in digital versions.
-
Calls-to-Action: There’s a visible invitation for the viewer to take next steps (like “Contact us for a quote”). Don’t leave them impressed but not knowing what to do next.
-
Multi-Platform Check: Test your digital portfolio on multiple devices and browsers. Does your website portfolio look good on mobile? Do images load correctly on different screen sizes? If using a PDF, try opening it on another computer or phone to ensure formatting holds. If possible, also print a copy of your PDF to see how it looks on paper (some clients might do this).
-
Physical Portfolio Condition: For physical copies, check the print quality. Colors should be vibrant, pages trimmed neatly, binding secure. If using a tablet or screen for display, all files are loaded and the device is charged.
-
Prepared Talking Points: (For live presentations) – You have your key talking points or stories lined up for each major piece. Not a script per se, but you know what you want to emphasize so you’re not caught off guard. Maybe keep a cheat-sheet card if needed, though speaking naturally is best.
-
Portfolio Accessibility: Ensure you can easily share your portfolio at a moment’s notice. Have the PDF or an image set on your phone or cloud drive for quick sending. Your website’s portfolio link should be easy to tell someone verbally or include in a social bio. Basically, be ready to deploy your portfolio whenever an opportunity arises.
-
Backup and Iterate: Keep a backup of your portfolio files (especially the source design files of your PDF or your website content). This makes it easy to update next time. Plan a schedule to revisit and update the portfolio – say, every quarter or after any big project – so it never gets stale.
-
Feedback Incorporated: If possible, have a friend or mentor (ideally someone in a similar industry or a potential client persona) review your portfolio and give honest feedback. Use their insight to tweak anything unclear or unconvincing.
-
Confidence Check: Lastly, ensure you are confident and proud of what you’re showing. When you believe in your portfolio, that enthusiasm translates to clients. You should be thinking, “I can’t wait for them to see this!” when you send a link or walk into a meeting with it.
With all items on this checklist ticked off, you can be assured that your portfolio is ready to represent you and your DTF printing business in the best light.
Conclusion: A strong portfolio is the bridge between your technical skills and your business success. It strategically showcases your best work, variety, and the success you’ve brought to others, thereby instilling confidence in new clients. By carefully curating content, writing compelling case studies, integrating social proof, leveraging multiple formats, and presenting it with enthusiasm, you turn your portfolio into a persuasive narrative about your brand. In the DTF printing and apparel decoration industry – where seeing is believing – a top-notch portfolio “converts viewers into customers” when combined with professional service.
Now equipped with the guidance from this module, you can build or refine your own portfolio to demonstrate your expertise and attract the clients you desire. Good luck, and happy showcasing!