
Gang Sheet Builder: The Professional Guide to Maximizing Your Profit Margins
In the competitive landscape of the Texas custom apparel market, efficiency isn't just a goal—it’s the difference between a thriving business and one that barely breaks even. As shops scale from small custom orders to high-volume contracts for school districts, oil and gas firms, and regional event organizers, the cost of materials becomes the most critical variable.
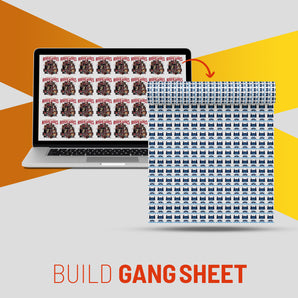
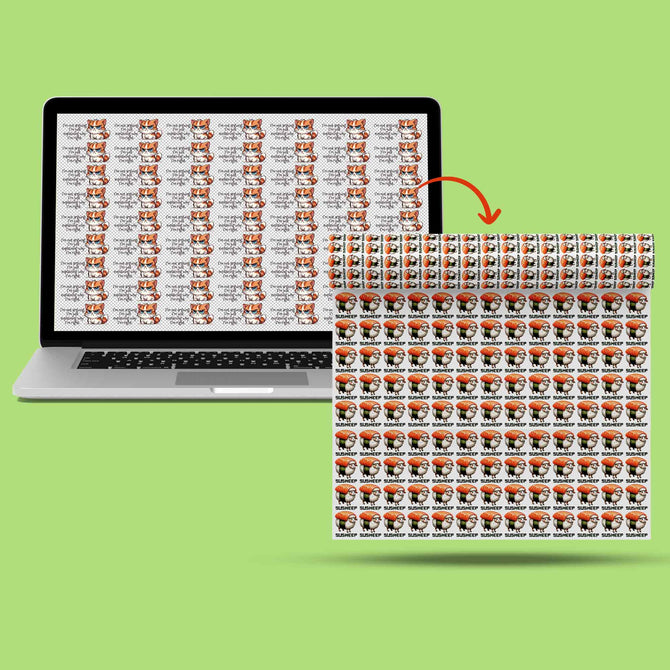
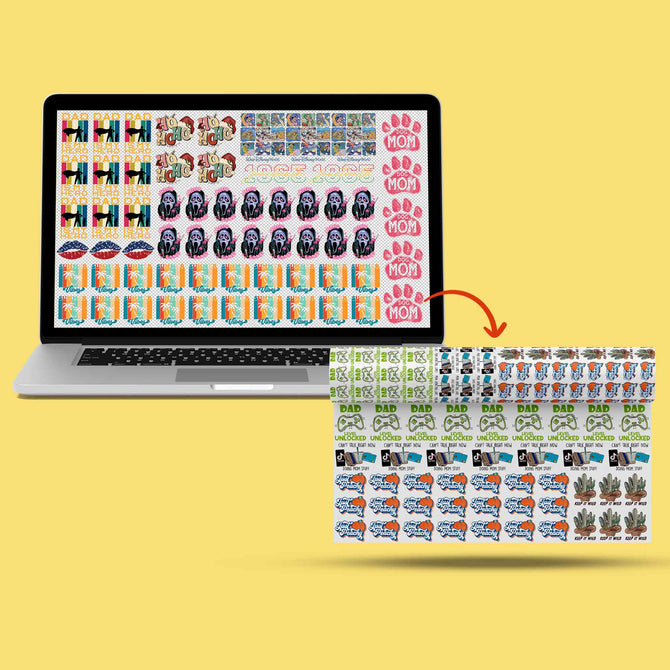
The gang sheet builder serves as the ultimate tool for the modern apparel professional. In the past, ordering individual transfers meant paying a premium for third-party layout management. Today, mastering the ability to "gang" your designs—nesting multiple graphics onto a single roll of PET film—allows you to suppress costs and maximize every square inch of your investment.
At Iris DTF, we believe that your profitability starts with your layout. This guide explores how you can master our builder interface, implement technical secrets to optimize film space, and transform your cost-per-garment from a liability into a competitive advantage.
What is a Gang Sheet Builder and Why You Need It
In the industrial world, space equals money. A gang sheet builder serves as a specialized web-based interface that allows you to nest multiple designs onto a single continuous roll of PET film. Instead of ordering individual transfers—which incurs high handling costs and wastes film margins—you essentially control the real estate on a professional-grade DTF printer.
For Texas decorators managing bulk dtf orders, the builder bridges the gap between retail pricing and wholesale margins. By taking control of the layout yourself, you eliminate per-design setup fees and gain the flexibility to mix different logos, sizes, and colors in a single production run. Whether you are prepping for a high school football season in Katy or a corporate rebrand in Plano, the builder acts as your primary tool for cost suppression.
Technical Specifications for Pros
- Required Resolution: 300 DPI at 100% scale.
- Minimum Line Weight: 0.02 inches (for adhesive integrity).
- Safety Bleed/Margin: 0.25 inches between separate graphics.
- File Support: PNG-24 (Transparent) or Vector PDF.
Step-by-Step: Creating Your First High-Profit Gang Sheet
Using the Iris DTF Gang Sheet Builder is an engineering task as much as a design one. To ensure your custom dtf transfers arrive ready for high-speed production, follow this professional workflow:
- Standardize Your Assets: Prepare every design at 300 DPI before uploading. While the builder warns you about low-resolution files, you should perform initial prep in Illustrator or Photoshop to ensure color accuracy.
- Define Your Canvas: Select your roll width (22" or 24") and determine the total linear length based on your project volume.
- Place with Precision: Drag and drop your files. Maintain the 0.25-inch safety margin to ensure your shop team can cut the transfers quickly without damaging the artwork.
- Verify Transparency: Use the "Background Toggle" in the builder to identify stray pixels or "dirty" edges that might trigger unwanted white ink halos.
Optimization Secrets: Fitting More Designs per Square Inch
You reveal the true value of the builder when you optimize the film's negative space. Efficiency here directly boosts your net profit per garment.
- Nested Rotation: Instead of simple vertical stacking, rotate smaller chest logos or neck labels to fit into the gaps created by larger back graphics.
- Fill the Voids: You pay for every square inch of the roll. If extra space remains, fill it with your own branding tags, size labels, or promotional samples.
- The "L" Shape Technique: Position wide designs at the top and utilize the vertical margins on the sides for long, narrow prints like sleeve or pant-leg graphics.
Common Mistakes to Avoid in the Builder Interface
Even experienced pros can make errors that stall a high-value order. In the fast-paced Texas market, accuracy is vital.
- Ignoring Resolution Alerts: Upscaling a low-res image inside the builder does not fix pixelation; it only prints a larger, blurry image.
- Overlapping Boundaries: Ensure the "hitbox" of one image does not overlap another. Overlapping transparency boxes can trigger RIP software errors, causing missing sections in the final print.
- Small Text Failure: Text smaller than 6 points often lacks the surface area to hold enough adhesive powder. Ensure all fine details meet the 0.02" minimum thickness.
Calculating Your ROI: The Gang Sheet Advantage
You reveal the financial impact of this tool when you calculate the individual unit cost. The following table compares a standard 100-piece order for a local construction firm:
| Metric | Individual Transfer Order | Optimized Gang Sheet Order |
| Unit Price | $4.50 (Per Chest Logo) | ~ $1.85 (Pro-rated) |
| Setup Fees | May apply per design | Zero |
| Total Material Cost | $450.00 | **$185.00** |
| Profit Margin Potential | Moderate | High (60% Savings) |
By using the builder, you turn a variable cost into a predictable, low-overhead expense. You can maintain premium pricing for "Full-Color Customization" while significantly lowering your material investment.
Mastering the gang sheet builder represents a rite of passage for serious apparel professionals. It moves your business away from "buying stickers" and toward "manufacturing custom apparel." By optimizing layouts, respecting technical margins, and analyzing your unit costs, you ensure your shop remains the most competitive operation in your region.
Stop paying for wasted space. The efficiency of your layout dictates the foundation of your success.
Ready to maximize your margins? Access the Iris DTF Gang Sheet Builder and start designing your high-volume, high-profit orders today.
Frequently Asked Questions
What is the best file format for the Iris DTF builder?
Use PNG-24 with a transparent background or Vector PDF. Ensure your resolution is set to 300 DPI at the actual print size to guarantee sharpness and prevent pixelation.
Do I need to mirror my images before uploading?
No. Our industrial RIP software handles the mirroring process automatically. Upload your designs exactly as you want them to look on the final garment.
What is the recommended minimum spacing between designs?
Maintain a safety margin of at least 0.25 inches between each graphic. This provides enough "bleed" for your production team to cut the transfers quickly without damaging the neighboring artwork.