

Understanding DTF Consumables (Films, Inks, and Powder)

What Is This Article About?
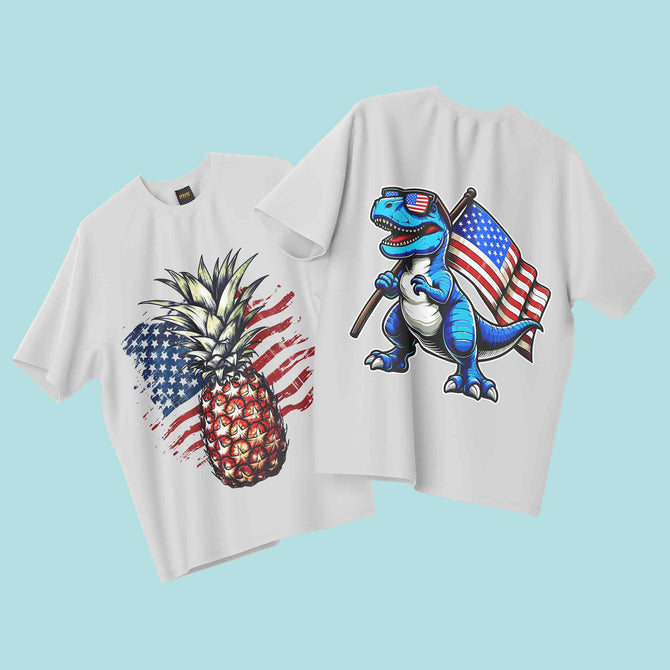
In this lesson (Topic 4 of the Iris DTF Academy), we explore the three core consumables used in Direct-to-Film (DTF) printing: transfer films, inks (including the all-important white ink), and adhesive powder. We’ll break down types and characteristics of each consumable, how they affect print results, and best practices for handling and storage. Whether you’re a complete beginner or an experienced user, this guide will deepen your understanding of how material quality impacts DTF print performance.
Today we explore the three core consumables used in Direct-to-Film (DTF) printing: transfer films, inks (including the all-important white ink), and adhesive powder. For comprehensive training on DTF techniques, visit Iris Academy. We'll break down types and characteristics of each consumable, how they affect print results, and best practices for handling and storage. Whether you're a complete beginner or an experienced user, this guide will deepen your understanding of how material quality impacts DTF print performance.
DTF Transfer Films
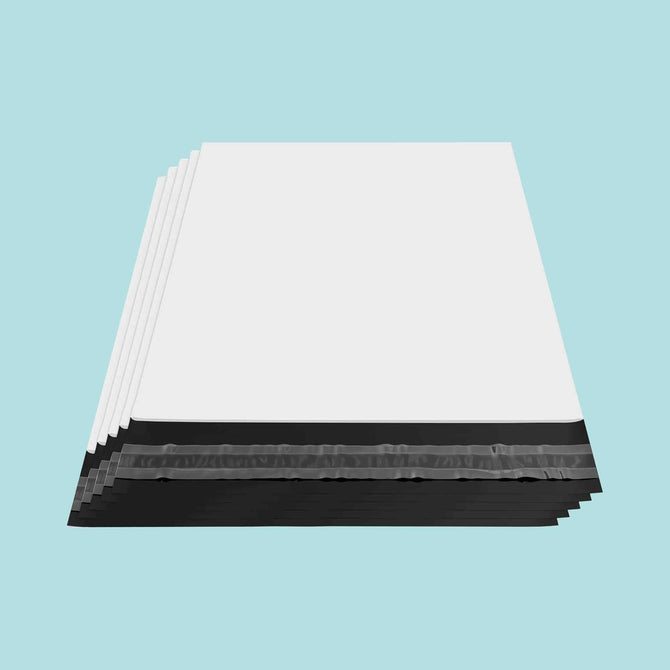
Material & Coating: DTF transfer films are typically made of PET (polyethylene terephthalate) plastic with a special ink-absorbing coating. Unlike plain transparency film, DTF PET film has a matte or "frosted" coated side that readily accepts ink. (Using an uncoated PET sheet won't work – the ink would puddle or wipe off.) The coating is what allows DTF inks to stick, dry, and later release cleanly onto fabric. High-quality films tend to be more opaque (less transparent) because they have a thicker coating that improves ink absorption. This thicker coated layer produces more vibrant colors and sharp details, as it holds more ink without bleeding.
Film Thickness: The thickness of DTF film is measured in microns (μm), with common options around 75 μm and 100 μm. A 75 μm film is standard for most printing needs – it provides good durability and print quality for regular garments. A 100 μm film has a heavier coating and base, which can be beneficial for higher durability and superior ink absorption, especially for heavy use items or when maximum wash resistance is needed. Thicker films may handle high ink loads and repeated washing a bit better, whereas the 75 μm films are a bit more flexible. In practice, both work for everyday use; you'd choose 100 μm if you want an extra robust transfer or are printing on something like thick canvas where durability is a priority.
Hot Peel vs. Cold Peel: DTF films come in two main "release" types – hot peel and cold peel – referring to when you remove the film after heat pressing. Hot Peel films are removed immediately (while still hot) after pressing onto the garment. This speeds up production because you don't have to wait for each print to cool. Hot peels are popular in high-volume shops for their efficiency. Cold Peel films, in contrast, must cool down to room temperature before peeling off. This extra wait time can make workflow slower, but cold peels are valued for yielding more durable transfers and often a better finish. The prints from cold-peel films typically have very strong adhesion and handle fine details well, since peeling cold reduces the risk of lifting any ink with the film. In short, hot peel = fast but slightly less durable, cold peel = slower but very durable and precise. Many DTF users keep both types on hand, using hot peel film for quick-turnaround jobs and cold peel for premium products or intricate designs.
Matte vs. Glossy Finish: DTF films can also differ in whether they produce a matte or glossy finish on the transferred print. This characteristic is tied to how the film is coated. A so-called "glossy" DTF film usually has the coating on one side only (the print side), while the reverse side is smooth PET – this smooth back gives it a glossy appearance. "Matte" DTF film often refers to a double-sided treated film: it has the ink-receptive coating on the print side, and a matte treatment on the back side as well (to reduce slippage in the printer). The choice of matte vs. glossy affects the look and longevity of the print. Generally, matte films tend to yield prints with a softer, muted look but very durable results, whereas glossy films can produce more eye-catching, saturated colors with a shinier finish. One source sums it up: "Matte paper makes prints that last longer and look clean, while glossy paper creates brighter images that look sharper and more eye-catching." In DTF terms, a glossy film transfer might have a bit more sheen and vibrancy out-of-the-box, but a matte film transfer will have less glare and often a smoother feel once applied to fabric. Note that even a "glossy" DTF transfer on a shirt will not be extremely shiny – the difference is subtle, and the fabric texture will show through to give a natural look (you can always press the finished print under parchment to matte it down if desired). Many users prefer matte films for most apparel prints since garments typically have a matte look, but for prints where you want maximum color pop (like a bold graphic on a white tee), a glossy-finish film might be used.
Print Quality Factors: The quality of the film has a major impact on your final print definition, color vibrancy, and how easily the print peels off. Higher-grade films have an evenly applied coating that accepts ink uniformly – this means crisp, sharp details and minimal ink bleed. By contrast, low-quality films might have an uneven or inadequate coating. Printing on such a film can result in the ink not wetting properly or even repelling in areas, causing it to run or smear. You may see fuzzy edges or "bleeding" of ink, and loose particles of pigment can even stain parts of the film (and your hands or printer) if the coating can't hold them. A good DTF film's coating will hold fine lines precisely – even very small text or details come out clean rather than blurry. Another aspect of coating quality is how well excess adhesive powder shakes off after printing. High-end films are formulated so that powder only sticks to the printed areas, and you can "clean shake" them easily – no stray powder clinging to the blank parts of the film. This ensures you don't get random speckles or a rough feel around your design. Finally, quality films have a reliable release layer built into the coating. This means when you go to peel the film off the garment, it comes away smoothly without tearing or sticking in random spots. If you've ever had a transfer where bits of film did not want to release, that's often due to a poor or inconsistent release coating. A good film will peel "like butter" in one fluid motion, leaving all the printed ink on the fabric and none on the film.
Notable Film Brands & Options: There are many DTF film products on the market. Some reputable brands known for consistent quality include Kodak (Kodacolor DTF films), DTFPRO/DTGPro, STS, and others. Suppliers like Chemica and Siser also offer quality films. Kodak, for example, has a Kodacolor FTF transfer film line that is highly regarded. Their film is a matte cold-peel, single-sided coated PET with heat stabilization and anti-static treatment. Users report it produces excellent print clarity and very easy peeling. The anti-static feature is handy because static can sometimes cause film feeding issues or make powder cling in the wrong places – Kodak's film coating minimizes that. It's also scratch-resistant and dimensionally stable (little to no shrinkage under heat). STS is another major player – STS Inks produces DTF films (and they even partnered with Kodak for some products). STS offers both "single-sided matte" films (matte printed side with a glossy back) and "double-matte" films (matte on both sides for better printer traction). They have variants that are cold peel, warm peel, and even an "instant" peel that can do hot or cold. DTFPRO/DTGPro (a popular supplier) similarly sells premium matte sheets, "triple coated" films, and an "InstaPeel" film that peels immediately. When choosing a film, consider your printer size (sheets vs. rolls), the peel method you prefer, and the finish. It's wise to test a few brands – but stick to true DTF-specific PET films (don't try to substitute with generic transparency or sublimation film, it won't work properly). A good film literally lays the foundation for your print, so it's an area where investing in a trusted brand pays off with better ink transfer, more vibrant colors, and hassle-free peeling in your DTF workflow. For more detailed guidance on film selection, check our complete film selection guide.
DTF Inks (CMYK and White)
Pigment Ink Composition: DTF inks are water-based pigment inks – similar in chemistry to inkjet inks used in Direct-to-Garment, but formulated for the DTF process. Each color (Cyan, Magenta, Yellow, Black, and White) contains fine pigment particles that provide the color, suspended in a liquid vehicle. The typical ingredients include the pigment itself, plus binders, solvents, and additives. For instance, white DTF ink pigment is usually titanium dioxide (TiO₂), a dense opaque white pigment that gives the necessary coverage on dark fabrics. The binders in the ink are polymers/resins that help the pigment adhere to the film (and later to the fabric) and provide flexibility so the print isn't crunchy. Solvents (in water-based ink, these are co-solvents like glycols) control the viscosity – ensuring the ink can flow through tiny printhead nozzles without clogging, but also not be too watery. Various additives are included to fine-tune performance: for example, surfactants to reduce surface tension (helping the ink spread evenly), biocides to prevent microbial growth in the ink, and anti-settling agents to keep the pigment dispersed. In short, DTF inks are carefully engineered liquids: the pigment provides color, binders ensure it sticks and survives on the garment, and the fluid chemistry is adjusted so that the ink prints smoothly and dries properly.
White Ink vs. CMYK: White ink is especially crucial and a bit different in behavior. In DTF printing, white ink is used as a base layer under other colors when printing on dark fabrics (much like a primer). This white layer makes the overlying colors appear vivid on dark material. Chemically, white ink tends to be thicker and heavier because the TiO₂ pigment particles are larger and have higher specific gravity than other color pigments. High-opacity is the goal – a good DTF white ink should form a solid, opaque layer that completely masks the fabric color without looking "chalky". Achieving this opacity means a lot of pigment is packed into the ink (much more so than for a typical cyan or magenta, which are more transparent). As a result, white ink has some special challenges: it is more prone to settling (pigment sinking to the bottom of the bottle/cartridge over time) and clogging if not properly maintained. Manufacturers often include mixing balls in white ink bottles or, in higher-end setups, a white ink circulation system in the printer to keep it in suspension. It's important to gently shake white ink bottles regularly (ideally daily or before each use) to re-disperse the pigment. The CMYK inks, by comparison, have smaller pigment particles and lower viscosity, so they tend to flow easier and are less problematic. They still need to be high-quality (for color accuracy and to avoid clogging), but the white ink is usually the "trouble child" of the bunch that needs the most care. Running a dedicated head cleaning or circulation for white on your Epson-based DTF printer is common practice to prevent any settling clogs.
Viscosity and Particle Size: DTF inks must be compatible with piezoelectric printheads (often Epson MicroPiezo heads in converted printers). Thus, the ink viscosity and pigment particle size are critical parameters. Inks that are too thick (high viscosity) or that contain oversized particles will quickly clog or misfire in the printhead nozzles. Most DTF inks are formulated to a viscosity of around ~3 to 5 mPa·s (millipascal-seconds) at room temperature, which is thin enough to jet but thick enough to carry ample pigment. The pigment particle size is typically sub-micron – for example, one manufacturer lists their DTF ink's pigment size as <0.5 µm (less than half a micron). For reference, an Epson DX5 or i3200 printhead nozzle might be around 20 µm in diameter, so you want pigment an order of magnitude smaller to pass through easily. High-quality DTF inks undergo processes like nano-grinding or microfiltration to ensure pigment dispersion is extremely fine and uniform. This not only prevents clogs but also yields smoother prints (no graininess). Ink viscosity is formulated with the printhead and temperature in mind – if it's too thin, it may drip or overspread; if too thick, it might not form droplets well or could dry and gunk up. Manufacturers will often specify the ideal operating temperature/humidity because those factors can change viscosity (cold temps make ink thicker and can cause sluggish flow or clogging). The bottom line: always use DTF-specific inks from reputable brands, because they will have the proper viscosity and finely milled pigments suited for DTF printing. Using an ink not meant for DTF (or a random DTG ink not tested for film) can be risky – it might print unpredictably or ruin your printheads. For printer maintenance tips to keep your inks flowing properly, see our maintenance guide.
Ink Quality and Common Issues: The difference between a high-quality DTF ink and a bargain no-name ink will show in your prints and your maintenance. Good DTF inks produce vibrant, accurate colors that resist fading and cracking, even after many wash cycles. They also run cleaner through the printer – meaning fewer clogs, consistent color output, and less frequent head cleaning needed. In contrast, low-quality inks can have dull or inconsistent color, poor wash durability, and may clog printheads or cause ink separation issues. For example, a cheap ink might print colors that look okay at first but fade noticeably after just a few washes (due to weaker binders or lower-grade pigments). Or the colors might not be true, leading to color shifts because the ink set wasn't well matched/profiled. Another common issue with bad inks is clogging and sediment – you might find yourself doing constant nozzle cleaning because the ink forms sediment or dries too quickly on the printhead. White ink problems are especially notorious if the ink is subpar. Settling and pigment clustering can lead to head clogs and even permanently damaged nozzles if particles harden. If you ever see your white ink separated into a heavy sludge at the bottom of the bottle, that's a red flag for either old ink or poor formulation. Additionally, mixing different brands of ink can sometimes cause reactions (one ink's additives might not play nice with another's). It's generally recommended to stick to one brand/line of ink at a time (flush completely if you switch). In summary, using high-quality ink is key – it ensures strong color, good adhesion (so the print won't peel), and reliable printing without constant clogs. Skimping on ink can cost more in the long run in ruined prints or printer downtime. For troubleshooting common issues, see our comprehensive troubleshooting guide.
Recommended DTF Ink Brands (for Epson-based Printers): Most desktop or mid-size DTF printers use Epson printheads, and fortunately there are several trusted brands formulating pigment inks specifically for these. A few examples:
-
STS Inks: STS is a well-known US manufacturer of DTF inks designed for Epson printheads. Their inks are made in the USA and rigorously tested for consistency. STS DTF inks are formulated to match Epson piezo heads in terms of viscosity and performance, and they advertise a shelf life around 1 year (unopened) for their inks. They also carry certifications – for instance, STS's DTF ink set has obtained OEKO-TEX Eco Passport certification (indicating they're free of harmful substances and safe on skin). Many users praise STS inks for vibrant colors and the white ink's opacity. STS even offers their ink in convenient cartridges or bulk bottles for different printer models. In practice, STS inks produce durable prints that can withstand dozens of washes without issue (often cited around 40–50+ washes when used with a good film and powder).
-
Image Armor: Image Armor is a brand with roots in DTG printing that has released a DTF ink line. Their DTF inks are manufactured in North America and built on their DTG ink experience. They highlight fast curing times, excellent wash fastness, and a soft feel on the fabric. Image Armor's white ink is noted to be highly opaque, which makes colors printed on top really pop on dark garments. A big selling point is longevity – they report a longer shelf life of about 1 year for their DTF inks when unopened (which is great, as some inks start to destabilize after 6 months). Like STS, Image Armor's inks are also OEKO-TEX certified for safety, meaning they passed tests for non-toxicity and skin safety. Users who've switched to Image Armor often comment on the brightness of the prints (especially the richness of the white underbase) and stable performance in Epson 1390/L1800-based systems.
-
DTF Station's Color Prime: Color Prime is a newer entrant, sold through DTF Station/All American Print Supply. It's formulated for DTF printers (such as their Prestige series) and is compatible with Epson-based systems. Color Prime ink is engineered for high color density and a wide color gamut, which translates to very vivid, saturated prints. Consistency is another focus – it's marketed to provide stable, repeatable colors and smooth ink flow for reliable daily production. Users of Color Prime have noted that it performs on par with other top inks, yielding bold colors and a good flowing white. It's often chosen for the Prestige/Apollo DTF printers but can be used in other Epson conversions as well. Color Prime inks also emphasize low maintenance (few clogs) and strong adhesion so the prints don't crack.
-
Others: There are other quality DTF ink brands like Kodak (Kodacolor DTF inks), DuPont Artistri P1600 (pigment inks), Mimaki PHT50 series, etc. Kodak's DTF ink came out along with their film/powder and is tuned for Epson engines as well. DuPont Artistri P1600 is a high-end ink set often used in industrial DTF printers; it's known for very high consistency and is OEKO-TEX certified (DuPont is a reputable chemical company behind many textile inks). If your DTF printer is a smaller desktop conversion (like an Epson L805 or R1390), using inks from the above brands should serve you well – they are made to keep those Epson printheads happy and produce vibrant designs that last. Remember, whichever ink brand you use, always follow their recommended maintenance (like shaking whites, doing nozzle checks, etc.) to get the best results. And avoid mixing ink brands in your cartridges/tanks unless confirmed compatible – if you want to change brands, flush out the old ink first to be safe. By choosing a reliable DTF ink, you'll get brighter prints and far fewer headaches keeping your printer running smoothly.
DTF Adhesive Powder (Hot-Melt Powder)
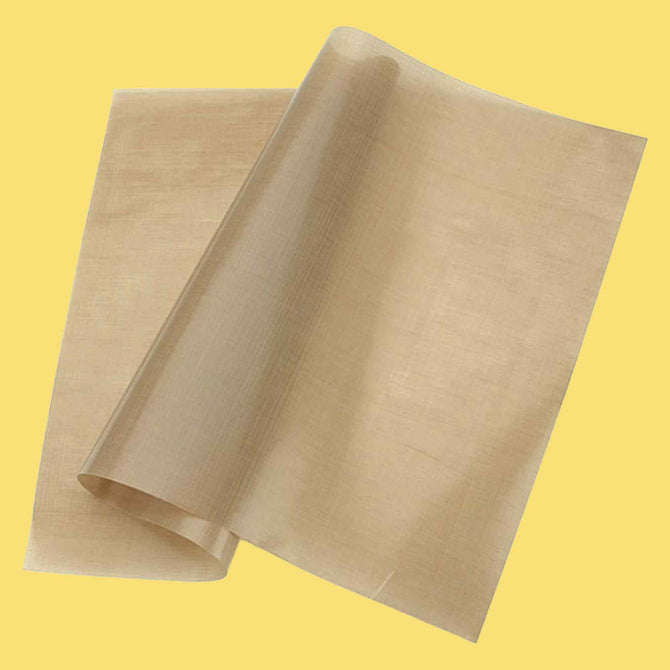
What It Is: DTF adhesive powder is a hot-melt glue powder, usually made of TPU (thermoplastic polyurethane) resin that's ground into a fine powder form. This powder is applied to the printed film (while the ink is wet) and then melted to form the adhesive layer that will bond the ink print to the fabric. In essence, the powder is the "glue" that sticks your ink design from the film onto the garment. When you heat the powder (either by oven or heat press), it melts and then resolidifies upon cooling, anchoring the ink pigments into the fibers of the fabric. Quality DTF powders are typically 100% polyurethane for durability and flexibility. Once transferred, a good powder forms a strong, elastic bond that gives the print its wash resistance and stretchability.
White vs. Black Powder: DTF powders generally come in two color variants: white (or off-white) powder and black powder. Both are actually translucent once melted, but the powder's color can matter for different fabrics. White DTF powder is the most commonly used and is considered an all-purpose adhesive – it works on light or dark fabrics, and after curing it appears clear/whitish. Black DTF powder is a special option meant for printing on dark or black fabrics. The reason is that if you're transferring onto a very dark garment (say a black T-shirt), any tiny excess of white-based adhesive around the design might show up as a faint white haze. By using a black powder, any stray adhesive is much less visible on black fabric (it blends in). Additionally, black powder can sometimes help block sublimation or dye migration – for example, when transferring onto dark polyester that might bleed its dye, a black powder layer can absorb or mask that bleed better than white. As one source notes, white powder is ideal for light-colored fabrics, while black powder excels on dark fabrics, ensuring the print edges look clean on the respective background. In terms of the print's feel and durability, both colors of powder perform similarly if quality is the same. Black powder prints can look slightly less bright on light garments (since the adhesive layer itself has a dark tint), which is why you wouldn't use black powder on a white shirt – stick to white powder there. Many print shops primarily use white TPU powder for most jobs and keep black powder on hand specifically for those all-black or dark poly fabrics to ensure there's no visible residue and to enhance longevity on those items.
Particle Sizes (Fine, Medium, Coarse): DTF adhesive powders are sold in different particle granulometry: fine, medium, or coarse. The particle size affects how the powder behaves and the qualities of the final transfer. Here's a breakdown of each:
-
Fine Powder: Very small particle size, roughly 50–100 μm diameter granules. Fine powder spreads very smoothly and evenly. Its advantages include producing a smooth, soft finish on the print (since the adhesive layer will be thin and even) and excellent detail resolution. Fine powders allow the ink to penetrate and bind nicely, which is great for intricate designs, small text, or photorealistic prints – you get sharp details and no clumping, as the fine particles can adhere in tiny nooks without causing roughness. The result is often a very soft hand feel; you might barely notice the texture of the print. However, because the layer is thinner, fine powder may provide slightly less robust adhesion on heavy-duty items compared to a coarse powder. It's usually perfect for fashion tees, detailed logos, and any case where a high-resolution print is needed.
-
Medium Powder: Mid-sized particles, typically about 70–170 μm. This is a balanced choice and often marketed as "all-purpose" DTF powder. Medium powder is easy to apply (it still flows relatively smoothly, but with a bit more heft than fine) and provides good coverage and adhesion without being too thick. It's noted for its versatility – suitable for a wide range of fabrics and print types. You can use medium powder on cotton, poly, blends, etc., for things like T-shirts, hoodies, tote bags, and get consistently strong transfers. It might not capture ultra-fine detail quite as perfectly as a fine powder, but it's usually a great middle ground. The finish is still fairly smooth, and the bond strength is strong enough for most needs. Many DTF vendors actually only sell one powder (which tends to be a medium-fine) because it covers most use cases well.
-
Coarse Powder: Larger particle size, around 170–300 μm. Coarse powder granules look and feel a bit like very fine sand. This type is all about maximum adhesion and durability. Because the particles are bigger, when they melt, they form a slightly thicker adhesive layer. Coarse DTF powder provides very strong bonding – prints made with it tend to withstand washing and abrasion extremely well. It's a great choice for tough fabrics or items that see a lot of wear and tear. For example, if you are decorating work uniforms, sports jerseys, or printing on textured materials like canvas or nylon, a coarse powder can ensure the print really sticks and stays put. It also can better penetrate textured or rough fabric surfaces (where a fine powder might only stick to the high points, coarse can fill the lows). The trade-off is that coarse powder can leave a slightly more noticeable texture on the print – a bit grainier or stiffer feel – and it may not capture extremely fine detail as neatly (small gaps could get filled with the larger adhesive dots). Thus, coarse powder is often reserved for "utility" applications: e.g. printing hi-vis workwear, heavy cotton hoodies, or any application where longevity outweighs the need for ultra-fine detail. Some users also use coarse powder for fabrics like nylon or sublimated poly along with a lower melt temperature formula, because certain coarse powders are formulated to block dye migration ("anti-sublimation" powders) for those tricky fabrics.
In summary, fine powder = best for soft, detailed prints; coarse powder = best for strong adhesion and tough fabrics; medium powder = a balanced middle ground for general use. There are also specialty powders (as hinted) – for instance, some manufacturers offer an "anti-sublimation" powder (often black powder) that has additives to prevent color bleed on sublimated or neon fabrics, or "anti-stretch" powders that stay extra flexible for elastic garments like spandex blends. But those are basically modifications of the above types for niche needs. For complete guidance on powder application, see our adhesive powder guide.
Impact on Adhesion, Stretch & Feel: The choice of powder affects how your transfer feels and lasts:
-
Adhesion Strength: Coarser powders generally yield higher adhesion strength (more glue per area), which is good for longevity and heavy washing. Fine powders still have good adhesion (especially on cotton and basic fabrics) but if you scratch or pick at a print, a coarse-powder print might resist better. No matter the powder grade, a proper cure is critical to adhesion – the powder must be fully melted (it will look glossy or clear, not granular) to stick well.
-
Stretchability: If you print on a stretchy fabric (like a polyester athletic shirt or a hoodie with some spandex), the powder's elasticity matters. TPU is inherently flexible, so good DTF powders allow some stretch without cracking. Fine powder, making a thinner layer, often stretches very nicely – the print can bend with the fabric. Coarse powders create a thicker glue layer which could crack under extreme stretch unless they are specifically an "anti-stretch" formulation. For most standard garments, any quality powder will stretch enough for normal use, but for things like performance wear or leggings, a fine or special stretch powder is safest to keep the design intact when the fabric is pulled.
-
Wash Resistance: Both the type and quality of the powder determine wash durability. A high-purity TPU powder, when properly melted, can survive 50+ wash cycles without significant issues. In fact, the combination of a good film, good ink, and good powder is what gives DTF prints advertised wash ratings of 50–100 washes. Coarse powders may have an edge in wash durability on tough fabrics simply because there's more adhesive present, but fine powders can also achieve excellent wash results (often 50 washes or more) if applied correctly. The key is full curing and using quality materials. Cheaper or improperly fused powder might start to peel after a handful of washes. Also, using black powder on dark poly can prevent the issue of sublimation dye bleeding into your print over time (a problem where a white print might gradually get a pink tint if pressed on a red poly unless you block it – black powder or an anti-sublimation powder helps in those cases).
-
Feel (Hand): Fine powder usually gives the softest feel – you might not even distinguish the print from the fabric by touch, because the adhesive and ink layer is thin and integrated. Coarse powder prints feel a bit more raised or rubbery, especially if you run a hand over the design's edge. Medium is in-between. This is something to consider depending on your product: a chest logo on a t-shirt, you'd likely want it as soft as possible (fine powder); a number on a sports jersey, a slightly thicker feel might be okay if it holds up to rough use (coarse powder).
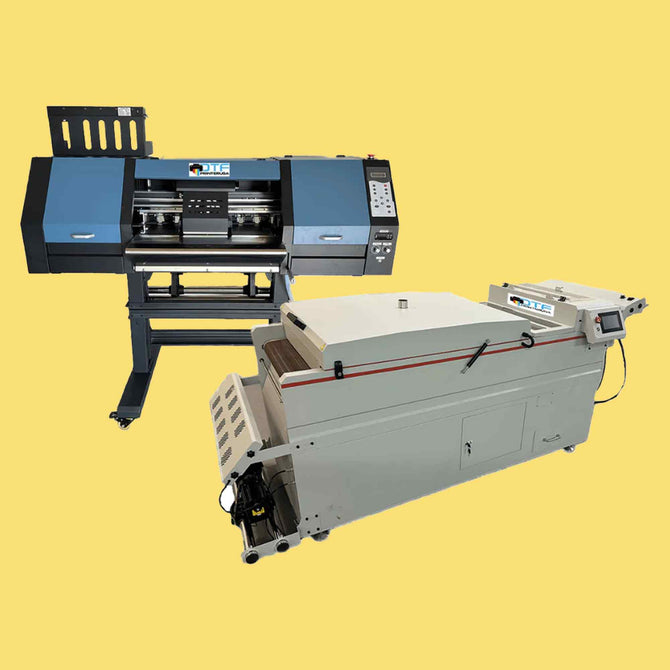
Application: Manual vs. Automatic: The process of applying powder can be done by hand or with a machine. Manual application involves sprinkling the powder onto the printed film (usually over a tray) and gently shaking/tapping the film to distribute the powder across the wet ink, then tapping off the excess. It's a bit of an art to get just the right coverage – you want all the ink covered, but not too much powder clinging beyond the design. Always wear a dust mask when handling the powder by hand, since the fine particles can be hazardous to inhale (ensure you work in a ventilated area as well). Manual powdering is perfectly workable for small-scale operations, but it can be messy (you'll find powder granules around your workspace) and labor-intensive for large volumes. Automatic powder shaker machines exist to streamline this step. An automatic powder applicator will take the printed film on a conveyor, dust it with powder evenly, shake off the extra, and often even melt the powder in an attached curing oven. This means the print comes out of the machine already with the powder fused, ready to press onto a shirt. Automatic machines are fantastic for consistency – they apply just the right amount of powder every time, yielding very clean edges. They also reduce direct handling of the powder (better for health and cleanliness). For example, if you use a Kodak or STS shaker unit, you can print roll after roll and have them all powdered and cured uniformly. The downside is cost and space – powder shaker/curing units are an investment typically for those doing high volume. In summary, if you're just starting, manual powdering is fine (just use basic safety: mask, gloves if possible, and don't sneeze into the powder!). As you scale up, an automatic powder shaker can greatly increase efficiency and consistency in your DTF workflow. For equipment options, see our equipment guide.
Popular Powder Brands & Quality Marks: Many suppliers provide DTF TPU powder – what's important is to choose a reputable, clean powder. Lower-quality powders might contain impurities or fillers that affect performance (and could give off more odor or fumes when heated). Look for powders marketed as "high purity" TPU and those that list a consistent particle size range. Some known brands or sources include STS (STS sells both white and black DTF powder to pair with their inks; their powders are known for good bonding and flexibility), Neenah (a traditional transfer material company, now offering DTF adhesive under the "TransFix" name), and various others often sold through DTF equipment distributors. You'll also see powders labeled by origin, like "German TPU powder" or "Korean powder," which often indicates a certain quality level. One thing to look out for is safety certifications: a number of DTF powders on the market have OEKO-TEX® Eco Passport certification, meaning they've been tested and confirmed free of harmful substances. This is a good indicator of a skin-safe and eco-friendly powder. For example, PerfecPress and some Chinese manufacturers offer OEKO-Tex certified powders, and STS's powder is also noted to pass such standards. Using an OEKO-Tex certified powder is especially important if you are producing apparel for babies or children, or just want to assure customers that the prints are non-toxic. In practical terms, a high-quality powder will melt cleanly (no charring or strong smell beyond a mild "sweet" scent of melting plastic), adhere firmly, and not yellow the print.
To wrap up on powder: it may be the unsung hero of DTF consumables, but it is critical. A great film and ink won't matter if the adhesive layer fails. So invest in good powder, apply it correctly, and you'll get soft, durable transfers with excellent wash and stretch performance. With the right powder, your DTF prints can last as long as silkscreen prints in the laundry – and maintain their color and feel.
Storage & Handling Best Practices
DTF consumables (film, ink, and powder) are sensitive materials, and proper storage and handling will prolong their shelf life and ensure optimal printing results. Here are some best practices:
-
Store in a Controlled Environment: Keep your DTF films, inks, and powders in a cool, dry place away from direct sunlight. Temperature swings and humidity are the enemies. A good guideline is to store between about 10–30°C (50–86°F) and 40–60% relative humidity. Extremes can cause problems – excessive heat can degrade ink (and even warp film sheets), while cold can increase ink viscosity (leading to clogging). High humidity can make films absorb moisture or powder clump up in the container; extremely low humidity can cause static issues with film. Aim for a stable, room-temperature-like environment. Always seal powder in an airtight container or zip-bag after use to keep moisture out, and cap all ink bottles tightly to prevent evaporation or contamination. If you're in a humid climate, consider storing your film and powder with desiccant packs. If you're in a very dry climate, a little humidity control (closed storage) will avoid static that could make film hard to handle.
-
Shelf-Life Awareness: All consumables have a finite shelf life, so try to rotate your stock (use older material first) and avoid overbuying more than you'll use in a reasonable time. Most DTF inks have a shelf life of 6–12 months from manufacture. Notably, white ink tends to have a shorter life – many suppliers recommend using white ink within 6 months (unopened) because the titanium dioxide can start to settle or destabilize after that. Colored CMYK inks might last up to 9–12 months if stored well. It's best practice to date your ink bottles and try to use them up in under a year. If an ink is past its expiration, check for signs like sludge at the bottom or color shifting – expired ink can cause clogs or color issues, so when in doubt, replace it. DTF powder, if kept dry and sealed, is quite stable – typically about 1 year shelf life as well without clumping. It might even last longer, but just ensure it hasn't absorbed moisture (old powder will look clumpy or won't fuse as nicely). DTF film can last a long time (a year or more) if stored properly; however, the coating can slowly absorb moisture or dust over time. Most suppliers suggest using film within 6 months to a year for best results, though some have seen it remain fine for 2+ years. If you notice any powdery residue on unused film or any stickiness, it's a sign the coating might be compromised with age or humidity. Always handle film by the edges to avoid fingerprints on the printable area and keep the sheets/rolls in their original plastic wrap or box when not in use. For inventory management tips, see our guide.
-
Handling Inks: When working with DTF inks, gentle handling is key. Shake your white ink bottles regularly (at least once a week if not in daily use, and before filling your printer). This prevents pigment settling at the bottom. Do not vigorously shake to the point of creating bubbles – a slow thorough roll or inversion of the bottle for a minute does the job. For CMYK inks, a quick agitation is good if they've sat for a long time, but they're less prone to heavy settling. Never top off ink cartridges or reservoirs with water or another solvent – if an ink is thickening, use the manufacturer's cleaning solution or simply replace the ink. Mixing different brands of ink is generally not advised, as chemical formulas can vary (if you must switch brands, flush the old ink out of the system first). Also, keep ink bottles and containers clean – when pouring ink, avoid introducing any dust or fibers. Immediately wipe any spills on the bottle threads and close them up. Exposure to air can not only dry the ink but also can introduce contaminants that might cause mold or spoilage in the water-based ink. If you use refillable cartridges, try to refill in a clean environment and don't leave cartridges open to the air for extended time. Use gloves when handling inks to avoid staining your hands and to prevent any skin irritation (pigment inks are generally not harmful, but some people might be sensitive). Lastly, store opened ink bottles sealed and in the dark if possible (light can sometimes destabilize pigments over a long time). Many people keep their DTF inks in a cabinet or even in a cool basement – just not somewhere hot or in direct sun.
-
Handling Films: Keep your film clean and dry. Dust or oils on the film can ruin a print (causing fisheyes or poor ink adhesion). Before printing, it's a good idea to wipe the printer's platens or rollers to ensure no dust will transfer to the film. Store film sheets flat in their box or a file organizer to prevent bending. For roll media, store the roll upright or suspended and avoid laying heavy objects on it which could deform the roll. If your environment is humid, consider storing film with a silica gel pack. If it's too dry, have an anti-static spray or humidifier in the room – static buildup can make the film attract dust or cause multiple sheets to stick together. One tip: when you open a pack of film, save the opaque black plastic bag it came in – putting your film back in that bag shields it from light and moisture when not in use. Also, only touch the edges of the film when loading in the printer; fingerprints can interfere with the coating and may show up as blemishes in large flat ink areas. If a piece of film gets creased or scratched, it's best not to use it for final prints (those defects could show or cause the transfer to fail in that spot). Another storage note: don't expose coated DTF film to direct sunlight or extreme UV for long periods – it can degrade the coating. Keep it in a drawer or box, out of direct light. Properly stored, the film will remain stable (no curling or sticking) and ready to give you crisp prints every time.
-
Handling Powder: Adhesive powder should be treated almost like a food item – keep it sealed and dry to avoid spoilage (clumping). After you finish powdering your prints, gently funnel any uncontaminated excess powder back into the container for reuse (use a piece of clean paper as a chute, for example). If the powder you reclaim has large clumps, you might sieve it through a fine mesh to break those up. Do not reuse powder that has been partially melted or contaminated with ink. For instance, any powder left on your curing tray that got a bit cooked is not going to melt as well the second time; discard it. Always close the powder container tightly; TPU powder can absorb moisture from the air surprisingly fast, especially in humid conditions. If you ever open your powder tub and find it has solidified into chunks (moisture uptake), you may try to dry it out in a warm oven (not hot enough to melt it!) or just replace it. It's relatively inexpensive, so it's not worth risking prints with bad powder. When handling the powder, as mentioned, wear a mask or respirator and consider gloves. The particles are fine and inhaling them can irritate your respiratory system. Also, melted TPU can give off fumes; make sure your curing oven or heat press area is well-ventilated. Some people use an extractor fan or an air purifier in their DTF work area to capture any stray fumes or dust. Keep powder away from open flames or very high heat outside of the normal curing process – it is a thermoplastic and could combust if for example someone accidentally knocked powder onto a heater. In terms of disposal, small amounts can be disposed of in trash, but avoid washing large amounts down a drain as it could potentially solidify.
-
Avoiding Cross-Contamination: Each consumable should be kept in its own good condition. For example, don't store your transfer films right next to an area where you shake powder – the last thing you want is a light coating of stray powder on unused film sheets! It could stick and ruin their printing surface. Create a workflow or spaces where printing, powdering, and pressing are separated or cleaned in between. After powdering prints, wipe your surfaces so residual powder doesn't later get onto a fresh print or into the printer. Similarly, when refilling inks, do it away from the printing area to avoid any ink splatter on your printer or film.
-
General Maintenance: Maintain moderate room conditions when you are printing. If the humidity is extremely high or low, it can affect print quality (very high humidity can cause slow ink drying and powder caking; very low humidity can cause static and rapid drying of ink in the nozzles). Many DTF users aim for roughly 50% humidity in the print room as a happy medium. Always perform printer maintenance as recommended (nozzle checks, cleanings) – a well-maintained printer will handle the consumables better (for instance, a clogged nozzle can lay down too little ink which might not bind enough powder, causing a weak transfer). And keep an eye on expiration dates for all supplies – fresh consumables produce the best results. If you ever see anomalies – like your film becoming patchy, your ink colors separating, or your powder yellowing – those are signs to troubleshoot and possibly replace the materials. For complete quality control procedures, see our QC guide.
By following these storage and handling best practices, you'll ensure that your DTF films stay flat and printable, your inks stay fluid and vibrant, and your adhesive powder remains effective. Good habits here directly translate to more consistent, high-quality prints and fewer frustrating issues. DTF is a system of parts, and caring for each part means your final transfers will impress with their color, detail, and durability every time.
Conclusion
Understanding and managing your DTF consumables is crucial to achieving great results in Direct-to-Film printing. By selecting the right transfer film (hot vs cold peel, matte vs glossy, appropriate thickness), you set the stage for crisp and vibrant prints. Using high-quality DTF inks – especially a well-behaved white ink – ensures your colors are rich and durable without constantly clogging your printer. And applying a reliable TPU adhesive powder of the proper type (white or black, fine or coarse) gives your transfer the strong bond it needs for long-lasting wear. All three consumables work in harmony to create a successful DTF transfer, so it pays to understand their properties and handle them with care. Stick with reputable brands (e.g. Kodak, STS, DTFPRO for film; STS, Image Armor, Color Prime for inks; and high-purity TPU powders from trusted suppliers) and look for safety certifications like OEKO-TEX if needed to ensure they're safe for skin contact. Finally, remember that proper storage and maintenance – keeping your materials in the right environment and in good condition – will save you time and money by preventing mishaps. With this knowledge, you can confidently manage your DTF consumables and consistently produce professional-quality transfers that wow your customers with their color, detail, and durability. For those just starting out, check our beginner's guide to learn the basics. Happy printing!
For more information about DTF printing standards and industry research, visit the Specialty Graphic Imaging Association (SGIA), FESPA, Printing Industries of America, or consult research from organizations like Smithers Research on printing technologies and market trends. Continue your DTF learning journey with our comprehensive guides: DTF Introduction, DTF vs Other Methods, DTF Equipment Guide, Artwork Preparation, Workspace Setup, How to Apply DTF Transfers, DTF Certifications & Skills, and DTF Resources & Communities.