


Setting Up a Beginner-Friendly DTF Workspace: Layout, Ventilation, Humidity & Safety

What Is This Article About?
Set up your DTF workspace the right way: ideal 20-25 °C, 40-60 % RH, good fume extraction, safe powder handling, and a smooth print-to-press flow.
Starting a Direct-to-Film (DTF) printing operation at home or in a small shop requires thoughtful workspace organization. For comprehensive training on workspace setup and DTF techniques, visit Iris Academy. A well-planned workspace ensures cleaner results, consistent print quality, and safety for the operator. This guide will cover the fundamental principles of setting up a beginner-friendly DTF workspace, including optimal room layout, ventilation, environmental control, safety practices, and efficient workflow design. The goal is to help you create a practical, safe, and efficient work area that suits most small-scale DTF setups.
Room Layout and Space Allocation
Begin by choosing a dedicated space for your DTF printing activities. Ideally, use a spare room or section of a workshop that you can control the environment in. Aim for a room size that comfortably fits your equipment with some extra room to move – for example, about 80–150 square feet (7–14 square meters) is a good range for a starter setup. This space should accommodate your DTF printer, a heat press, a curing station (if separate), and storage for supplies. Keep in mind the following layout principles:
- Divide Clean and Messy Zones: DTF printing involves both clean operations (designing and printing) and messy steps (powder application and curing). Reserve a "clean" zone for your computer and DTF printer where dust or powder will be minimal. Set up a "messy" zone a short distance away for applying adhesive powder and curing prints. This separation prevents stray powder from contaminating your printer or computer. For example, do not apply powder on the printer's table – perform that step away from the printer to avoid the machine "breathing" in adhesive dust.
- Layout and Equipment Placement: Arrange the workspace in a logical flow that follows the DTF process. Position your design station (computer) and printing station (DTF printer) in one area, then your powdering and curing station next, and finally your heat press station for transferring the design onto fabric. Placing these stations in order of use minimizes walking back and forth. For instance, you might have a desk with your PC and printer on one side of the room, a small table for powder application and a curing device in the middle, and the heat press on the other side. This sequential arrangement means once a film is printed, you can quickly move it to the powder station, cure it, and then press it onto the garment without unnecessary travel.
- Allow Adequate Space and Surfaces: Ensure there is enough clearance around each piece of equipment for safe and easy operation. Heat presses, for example, require space to fully open and for you to maneuver garments. Printers need a stable, level surface and room for handling film sheets. Provide a flat work surface (like a table or cart) for applying powder so you can contain any excess. Storage should also be planned into the layout – use shelves or cabinets along the walls to store your DTF films, ink bottles, and finished transfer sheets in an organized manner. Keeping supplies organized and labeled will reduce clutter and help you maintain a tidy workspace.
- Future Expansion: If possible, choose a room layout with a bit of flexibility. As you grow, you might add an extra printer, a larger shaker unit, or more inventory. Having an open layout or modular furniture (like movable tables or carts) can accommodate future equipment. For example, leave a spare outlet and some free table space where a curing oven or larger printer could go later. Anticipating future needs ensures you won't outgrow your workspace too quickly.
By thoughtfully allocating space and separating clean vs. messy processes, you create a workspace that is both efficient and easier to keep clean. This reduces print errors (from dust or powder contamination) and makes the working environment more pleasant.
Ventilation
Proper ventilation is absolutely critical in a DTF workspace for both safety and print quality. DTF inks and especially the hot-melt adhesive powders can release fumes or fine particles when cured. Without good airflow, these fumes can build up and pose health risks (irritating your respiratory system) and even affect the printing process. Here are key ventilation considerations:
- Fume Extraction: Ensure there is a way for fumes to exit the room. Ideally, install an exhaust fan or use a room with a window that can vent outside. When you cure the powdered prints (whether using a heat press or a curing oven), the heat causes chemical vapors to be released. You should vent these vapors out of the workspace or filter them. Many DTF businesses use a fume extractor or air purifier placed near the curing station to capture and filter out fumes. Professional-grade equipment from manufacturers like Brother and Epson often include ventilation recommendations. For example, a small overhead kitchen exhaust hood or a portable fume extractor (like those used for soldering or 3D printing) above your heat press can draw away fumes from melting the adhesive powder.
- Fresh Air Circulation: In addition to targeted fume extraction, maintain general airflow in the room. If you have windows, open them when possible to let in fresh air (but avoid strong drafts directly on the printer during printing, as that could dry the ink too quickly). A simple oscillating fan in the room can help keep air moving, but be careful that it doesn't blow dust onto your prints. The goal is to prevent stagnant air where fumes linger. Good ventilation will also help regulate temperature and humidity. According to OSHA guidelines and standards from ASTM, an exhaust system is essential if using any high-volume curing device like a conveyor dryer, otherwise fumes and heat can accumulate quickly.
- Health and Safety: Remember that the fumes from curing DTF powder can be hazardous if inhaled continuously. These fumes may contain compounds that cause respiratory irritation or allergic reactions in some people. Always work in a well-ventilated area to minimize exposure. If you ever smell strong odors or notice a haze in the air while curing transfers, that's a sign you need better ventilation. Over the long term, investing in proper ventilation (like a duct fan or air filtration unit) will protect your health and make your workspace more comfortable to work in for extended periods.
In summary, make ventilation a priority. It can be as simple as a window fan or as advanced as a dedicated air filtration system, depending on your space and budget. The key is to consistently remove fumes and maintain fresh air circulation to keep your workspace safe and conducive to good printing.
Temperature and Humidity Control
DTF printing is sensitive to environmental conditions, particularly temperature and humidity. Maintaining the right climate in your workspace helps ensure consistent print quality and prevents many common problems that beginners encounter. Here's what you need to know about climate control:
- Optimal Ranges: The ideal temperature range for DTF printing is typically between 68-75°F (20-24°C), and the relative humidity should be kept between 45-55%. These conditions help the inks flow properly, prevent the film from curling, and ensure the adhesive powder behaves correctly. At temperatures below 65°F (18°C), inks can become too thick, potentially causing clogs or poor flow. At temperatures above 80°F (27°C), inks may become too thin, leading to bleeding or poor adhesion. Similarly, if humidity drops below 40%, static electricity can build up, causing film handling problems and potentially affecting powder distribution. If humidity exceeds 60%, the powder may absorb moisture and clump, making it difficult to apply evenly.
- Environmental Controls: Depending on your local climate and the room you're using, you may need to add heating, cooling, or humidity control devices. A simple room thermometer with humidity gauge (hygrometer) will help you monitor conditions. Professional testing equipment from Testex provides more precise measurements. In dry climates or during winter when indoor air is often very dry, a small humidifier can help maintain proper moisture levels. In humid climates or basements, a dehumidifier may be necessary. Portable air conditioners or heaters can help control temperature if your workspace doesn't have adequate HVAC. Remember that some of your equipment (like heat presses and curing ovens) will generate heat, which can raise the room temperature, so factor that into your planning. Some DTF operators use a small fan to circulate air around the printer area, which helps maintain even temperature and humidity distribution.
- Effects on Ink and Film: Under proper temperature and humidity, your DTF ink will maintain the correct viscosity and flow, ensuring vibrant and consistent color prints. The adhesive powder remains free-flowing and only sticks where it should, then melts evenly during curing. You'll notice more reliable results: for instance, at ~50% RH the film lies flat and the printed image looks uniform. If you stray from these conditions, problems can arise – e.g., at 30% RH you might start seeing your whites missing due to clogs, or at 80% RH your printed film might feel tacky and have scattered powder residue. By controlling the climate, you prevent such issues and also protect your consumables (paper and powders stay in good condition). Remember the adage: in DTF printing, "the environment shapes the print", so taking climate control seriously is part of consistent, high-quality production.
Safety Measures (Storage and Handling)
Working with DTF printers and consumables involves handling inks, powders, and films. As a beginner, it's crucial to implement basic safety measures to protect yourself and maintain a safe workspace. This includes how you store materials, how you handle them with protective gear, and how you respond to any issues. Below are key safety guidelines:
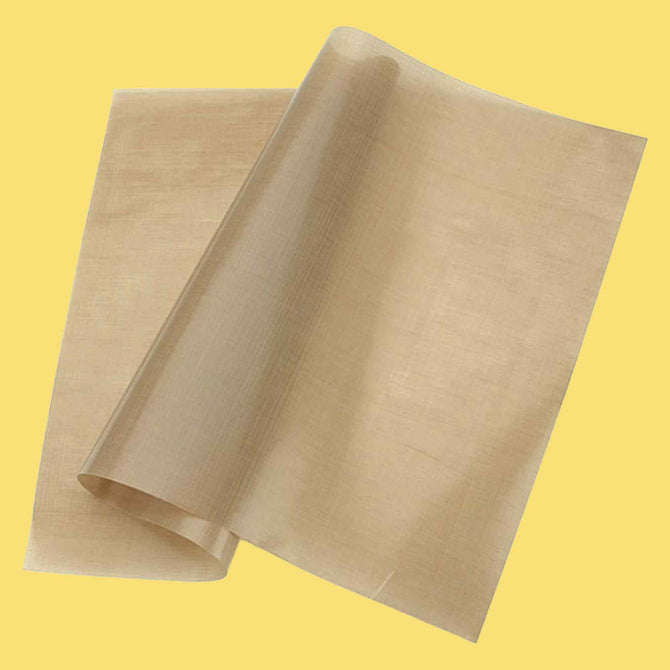
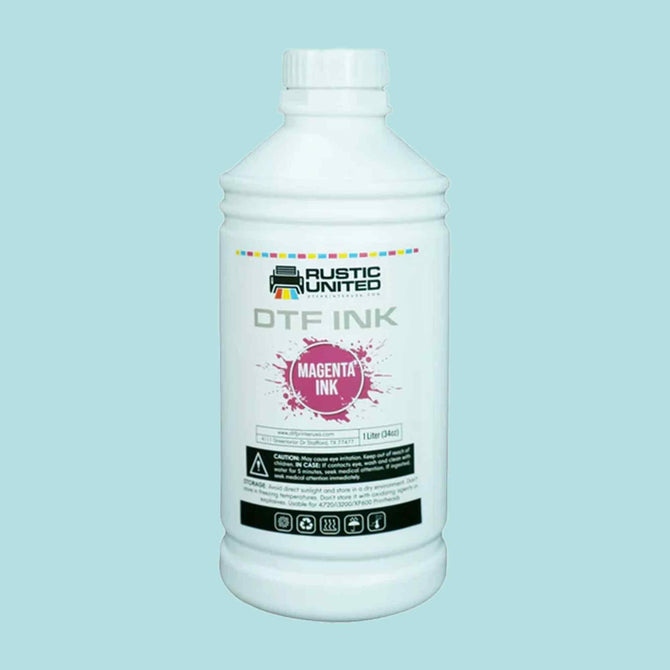
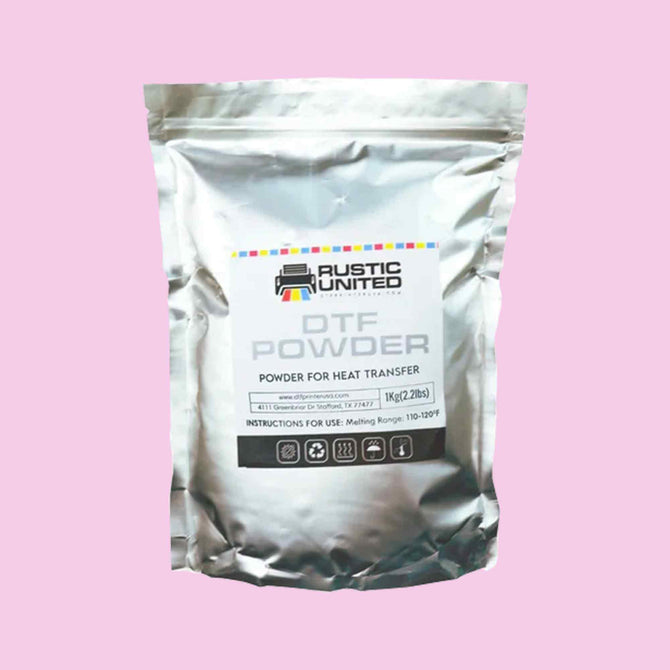
- Material Storage: Always store your DTF consumables from suppliers like Chemica and Siser properly when they're not in use. Inks should be kept in their original containers with caps tightly closed, in a cool, dry place away from direct sunlight. This preserves their shelf life and prevents spills. Many DTF inks are water-based and not highly flammable, but they can still be sensitive to temperature extremes (don't let them freeze or overheat). Adhesive powder (hot-melt powder) must be kept sealed in an airtight container or bag. The powder is very fine and can absorb moisture from the air, causing clumping, so keep it in a cool, dry place. Also, storing it sealed prevents any accidental dust spread or inhalation. DTF film sheets should be stored flat (to avoid curls) and in a dry environment; many users keep film in the plastic bag it came in or a storage box to shield it from dust. Avoid leaning film against walls in humid areas, as it might warp. Additionally, keep all these materials out of reach of children or pets if you're working at home – inks can be toxic if ingested and powders could pose inhalation risks.
- Personal Protective Equipment (PPE): Get into the habit of using basic PPE when handling DTF consumables, especially during the powdering and curing stages. Wear gloves (disposable nitrile or latex gloves) when handling inks and powders to avoid direct skin contact. DTF ink can stain skin and may cause mild irritation for some people, and adhesive powder can cause dryness or allergic reactions on skin with prolonged contact. Wear a mask or respirator whenever you're shaking powder onto prints or curing the powder. Safety standards from OSHA and CDC recommend proper PPE. At a minimum, a good quality dust mask (N95/N99 or KN95 standard) will help prevent inhaling fine powder particles. For heavier use, consider a half-face respirator with appropriate cartridges for organic vapors and particulates. This is important because the fumes from curing powder can irritate your respiratory tract and the fine powder dust is not something you want in your lungs. Eye protection is also smart if you are refilling inks or working close to the powder – safety glasses can guard against any splashes or stray particles (for example, when you shake off excess powder, tiny bits can flick up). Some operators also wear an apron or old lab coat to protect their clothing, and long sleeves to minimize skin exposure.
- Follow MSDS Guidelines: Manufacturers provide Material Safety Data Sheets (MSDS) or Safety Data Sheets for the inks and powders. Read these documents for each product you use – they detail hazards, first aid measures, and safe handling practices. For instance, an MSDS might tell you that a certain ink has a preservative that can cause skin sensitization, or that the adhesive powder is an irritant and to use in well-ventilated areas. By following the MSDS, you ensure you're compliant with safety recommendations (like using gloves, or not mixing chemicals, etc.). Keep printed or digital copies of the MSDS accessible in your workspace. In case of an emergency (like someone accidentally ingests something or a spill gets on skin), the MSDS will tell you what to do or what medical providers need to know.
- Handling and Housekeeping: Practice good hygiene and housekeeping in your DTF area. Never eat or drink in the same area where you handle ink and powder, to avoid ingesting any residue. After you finish working, wash your hands thoroughly with soap (even if you wore gloves, because you might have touched surfaces with traces of chemicals). If you do get ink on your skin, wash it off promptly; for powder, you might use soap and cool water to remove any fine particles from your skin. Clean up any spills immediately. If you spill ink, wipe it with appropriate cleaner (many DTF inks can be cleaned with water or specialized cleaning solution) and dispose of soaked rags properly. If you spill powder, wearing a dust mask, use a damp cloth or a vacuum with a HEPA filter to carefully collect it (sweeping it can send it airborne). Keeping the floor and surfaces free of powder will prevent accidental slipping and reduce airborne dust. It's also recommended to have a first aid kit in your workspace and basic training in using it – for example, eye wash solution in case you get chemicals in your eyes, and gloves in the kit for treating any cuts. Lastly, consider fire safety: while DTF materials are generally not highly flammable at room temperature, the powder can pose a fire risk if exposed to very high heat or open flames. So, store it away from any flame sources and keep a fire extinguisher (class ABC) nearby, especially because you will have a heat press or curing oven running hot. Unplug equipment when not in use, and do not overload electrical outlets (high-wattage devices like heat presses should be on their own circuit if possible).
By adhering to these safety measures – proper storage, using PPE, following chemical safety data, and maintaining a clean workspace – you'll create a safe working environment for yourself. This not only prevents accidents and health issues but also keeps your production running smoothly (since an injury or equipment damage can halt your progress). Safety might seem like extra effort, but it pays off in the long run with a trouble-free operation.
Workflow Optimization and Ergonomics
Designing your workspace layout with workflow in mind will make your DTF printing process more efficient and ergonomic. An optimized workflow minimizes the handling of materials, reduces errors, and can even improve print quality by ensuring each step happens in a timely manner. Consider the following tips for setting up an ergonomic, sequential workflow:
- Sequential Station Setup: Arrange your work stations in the order of the DTF process. This typically flows as: (1) Design, (2) Print, (3) Powder, (4) Cure, (5) Transfer. In practice, that means:
- Design Station – a desk with your computer where you prepare artwork and manage the RIP software.
- Print Station – your DTF printer, ideally positioned close to the design computer (or connected via network) so you can easily send designs to print. This is part of the "clean" zone; keep it free of clutter so you can load film and maintain the printer easily.
- Powder Application Station – a dedicated area to apply and shake off excess adhesive powder on the freshly printed film. This could be a tray or a separate table. Keep a minimal distance from the printer, but not so close that powder could drift onto the printer. Some people use a large shallow bin to contain the powder. Having this station directly next to the printer means you can immediately move the wet print to powder it, which is important because the ink needs to be wet for the powder to stick.
- Curing Station – where you melt (cure) the adhesive powder on the film. If you're using a heat press for curing, this is essentially your heat press area. If you have a curing oven or a conveyor dryer, set that up here. This station should be very close to the powder station, since after coating with powder you don't want to jostle or drop the print. Often, beginners will use the heat press for curing by hovering it above the powdered film; in that case, your powder station and heat press might be the same physical area. Just ensure your heat press is in a safe spot with ventilation (as discussed).
- Transfer (Heat Press) Station – the area where you actually press the film onto the garment. For many, this is the heat press again. If you cured with the heat press, you'll simply increase the pressure and press the garment. If you cured in an oven, you would carry the cured transfer to the heat press station. Make sure there's a clean table or surface to place garments on, both before pressing and immediately after pressing (for cooling down and peeling the film).
Each station following the next in a U-shape or straight line can create a smooth assembly-line flow. By physically organizing in sequence, you minimize carrying distance and avoid back-and-forth movements. This not only saves time but also reduces the chance of dust settling on a print while you transport it across the room, for example.
- Ergonomics and Comfort: Plan for ergonomic working conditions so you can work longer hours without strain. Ensure that work table heights are comfortable – if you will stand while powdering and using the heat press, a slightly higher counter-height table (around 90 cm / 36 inches) might be suitable so you're not bending too much. The printer might sit on a standard desk (~75 cm height) if you need to see into it or change cartridges without reaching up or down too far. If you sit while designing, use an adjustable chair with good back support. It's also useful to have an anti-fatigue mat on the floor if you stand in one spot (like at the heat press) for long periods. Arrange frequently used tools within arm's reach at each station: for example, keep your powder container, a scoop or spoon, and a soft brush for excess powder right next to the powder station. Keep heat-resistant gloves and Teflon sheets near the heat press. This way you avoid unnecessary stretching or walking around to find things, which can be tiring and interrupt your workflow.
- Organization and Labeling: A well-organized workspace boosts efficiency. Use storage solutions like shelves, drawer units, or rolling carts to store supplies near where they're needed. For instance, store your extra DTF film and ink bottles in a labeled bin or shelf near the printer station, so you can quickly reload when you run out. Store extra adhesive powder, brushes, and parchment or silicone paper near the powder/curing station. Keep blank t-shirts or other substrates on a shelf or rack close to the heat press. Label your drawers or containers (e.g., "DTF Ink – CMYK", "White Ink", "Hot Melt Powder", etc.) so you or anyone helping you can identify contents instantly. This minimizes downtime spent searching for items. It also helps maintain inventory – you can see at a glance when you're low on a particular supply.
- Minimize Material Handling: The fewer times you touch or move a print, the better. Try to set things up so each print goes through the flow without backtracking. For example, you might position your heat press so that when you finish curing a transfer, you can turn and immediately place it on the heat press to apply to a garment, rather than walking to the opposite side of the room. This reduces the chance of dropping a sheet or getting fingerprints on it. Some users even use transfer carts or drying racks: after curing a batch of transfers, they lay them on a rack or cart next to the heat press, so they can press them in order. Think about bottlenecks – if one step (like curing) takes longer than printing, make space to queue up prints between those steps. A small drying/cooling rack can hold films that are waiting to be pressed or garments that are cooling down after pressing.
- Cable Management and Utilities: As part of workflow layout, don't forget about cables and power outlets. You will likely have a computer, printer, heat press, maybe a heater or dehumidifier, etc., all needing power. Plan the placement so that cables are not crossing walking paths (tape them down or use cable covers if needed). Overloading a single outlet can be dangerous; high-wattage devices like heat presses should ideally have their own circuit or at least a high-quality power strip. Also consider where you'll place any temperature/humidity control devices (humidifier, dehumidifier) so that they are out of the way yet effective – e.g., a humidifier might sit in a corner where airflow will carry its moisture toward the printer area.
By optimizing your workflow and workspace ergonomics, you'll find that your production becomes faster and more consistent. Little efficiencies add up: saving a few seconds on each transfer, avoiding reprints due to accidents, and reducing physical fatigue will all contribute to a smoother operation. Remember that every DTF workspace might look slightly different – customize the general principles to fit your room's shape and your personal working style. The end result should be a workspace where each task flows naturally to the next, and you can maintain a steady, comfortable pace of work.
Conclusion
Setting up a beginner-friendly DTF workspace is all about planning for efficiency, safety, and quality. By thoughtfully allocating your room into clean and messy zones, ensuring good ventilation, controlling temperature and humidity, following safety protocols, and streamlining your workflow, you create an environment where you can focus on producing great prints rather than troubleshooting the space. Continue your DTF learning journey with our comprehensive guides: DTF Introduction, DTF vs Other Methods, DTF Equipment Guide, DTF Consumables, Artwork Preparation, How to Apply DTF Transfers, DTF Certifications & Skills, and DTF Resources & Communities. A well-organized workspace not only protects your health and equipment but also boosts your confidence as a DTF printer, knowing that you have a solid foundation for your new venture. Start with these principles as your guide, and you'll be well on your way to a successful DTF printing setup that can grow with you as you gain experience. Happy printing!