
Ultimate Guide to DTF Printing Equipment: Printers, Powder Shakers, Heat Presses & Setup Tips (2025)

What Is This Article About?
A complete guide to Direct-to-Film (DTF) printing equipment, covering printers, powder applicators, curing ovens, and heat presses, plus environmental setup tips for optimal print quality. Includes beginner vs. pro recommendations, real-world examples, price ranges, and pros/cons to help you choose the right gear for your budget and production scale.
Direct-to-Film (DTF) printing requires a coordinated set of hardware components that work together to produce high-quality heat transfers. This guide covers all essential equipment in a DTF workflow – from printers and powder applicators to heat presses, curing ovens, and even the environmental setup. For comprehensive training, visit Iris Academy. We'll explain the function of each component, how they fit into the typical workflow (printing → powdering → curing → transferring), and what beginners vs. professionals might choose based on budget and production scale. Real-world examples, price ranges (USD), and key pros/cons are included to help you make informed decisions.
DTF Printers: Converted vs. Commercial Models
Role in Workflow: The DTF printer is the starting point – it prints your design onto PET film using specialized pigment inks (including a white ink layer). The output is a printed film ready for powder application. There are two main categories of DTF printers: converted desktop models and purpose-built commercial machines.
-
Converted Desktop Printers: These are typically standard inkjet printers (often Epson models) modified to handle DTF inks and films. For example, hobbyists and small shops commonly convert printers like the Epson SureColor P600 or P800 into DTF printers. Converted units are appealing because of their lower upfront cost – an Epson P600/P800 base printer might cost $800–$1,200 before conversion, and conversion kits plus RIP software ($300–$500) can turn them into DTF printers. Another popular converted model is the Epson L1800 (an A3 photo printer); some vendors sell it as a ready-to-use DTF printer in the ~$1,200–$1,500 range. These desktop units are budget-friendly and suitable for entry-level use. However, they often print slower (since they're usually sheet-fed A3/A4 size) and may require more hands-on maintenance (like frequent head cleanings) to manage the challenges of DTF ink (especially white ink). Strengths: Low cost of entry and uses readily available printer hardware. Weaknesses: Can be finicky – issues like color consistency and reliability are common challenges on DIY conversions. Expect a learning curve for maintenance and no official warranty once converted.
-
Commercial DTF Printers: These are printers designed and built by manufacturers specifically for DTF or adapted from large-format platforms. They generally support larger print widths (often 17″, 24″, or wider rolls of film) and come with pro features like automated white ink circulation, bulk ink tanks, and higher print speeds. Commercial models have a higher upfront cost but are geared for business use. For instance, the STS VJ-628D (24″ DTF printer co-developed with Mutoh) is priced around $8,000. Mimaki's TxF150-75 (a 31″/80 cm roll-fed DTF printer) lists at $12,995 and comes equipped with Mimaki's reliability features. Other leading manufacturers include Roland and Brother (white ink circulation, nozzle checks, etc. to reduce clogging). High-end systems can even reach $15,000–$20,000+ for wide-format or industrial models. Strengths: Greater print speed and volume capacity, better consistency, and often manufacturer support/warranty. These printers can handle continuous roll printing and integrate with automatic powder machines for efficient workflow. Weaknesses: The cost is significantly higher than converted units, and they require a larger space and more technical installation. However, for businesses with high volume demands, the cost per print can be lower in the long run due to efficiency.
Typical Pricing
DTF printer prices span a broad range. Entry-level converted models (A4/A3 size) usually start around $1,500–$3,000 (including conversion and setup). Mid-tier or smaller commercial printers might range $3,000–$7,000, offering faster speeds and features like roll feed or basic auto maintenance. True commercial-grade systems designed for production often cost $10,000 or more. In general, "you get what you pay for" in terms of speed and reliability. For instance, an all-in-one DTF printer with advanced features (auto film feeding, onboard powdering, etc.) will command a premium. Always factor in that a DTF setup typically needs more than just the printer (as we'll cover, you also need a curing method and other hardware).
Beginner vs. Pro Considerations
A beginner or home-based business might start with a converted desktop printer like an Epson L1800 or P600 conversion – these offer a gentle learning curve and minimal investment. They can produce quality prints albeit at a slower rate (e.g. a few A3 sheets per hour). A small shop starting to get regular orders could use such a printer to learn the ropes and test the market. On the other hand, a pro or growing business (doing dozens of transfers daily) will quickly find an entry model limiting. Pros tend to invest in at least a mid-range 17″ or 24″ roll-fed DTF printer. The higher print speed and roll capability mean you can print many transfers in one go and even operate in a semi-automated fashion. Additionally, commercial printers reduce downtime – features like white ink stirring or circulation prevent sedimentation and clogs, and some have self-cleaning or nozzle redundancy to keep production going. In short, small-scale setups prioritize low cost, while larger operations prioritize throughput and reliability.
Powder Applicators: Manual vs. Automatic Powdering
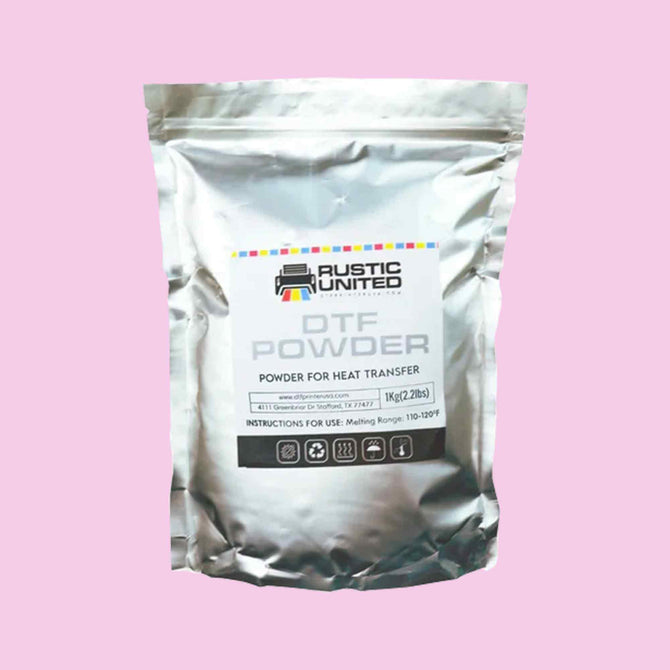
After printing on the film, the next essential step is applying hot-melt adhesive powder to the wet ink. This powder sticks to the printed areas and later melts to permanently bond the design to fabric. You can apply powder manually or use an automatic powder applicator (a shaker machine). The choice impacts your workflow speed, consistency, and mess management.
-
Manual Powder Application: This is the entry-level method. It involves manually sprinkling a layer of TPU adhesive powder over the freshly printed film (usually done over a bin or tray), then gently shaking or tapping the film to ensure excess powder falls off. The goal is to coat the printed design evenly. Manual powdering is perfectly workable for small batches or one-off prints. The hardware setup is minimal – often just a shallow tray or container to catch excess powder, a scoop for the powder, and maybe a small brush or card to tap the film. It's a very low-cost approach; essentially the only cost is the powder itself and a tray. However, manual application has downsides: it can be messy (fine powder can spill or become airborne), and consistency depends on the operator's technique. Beginners should wear a dust mask when handling the powder to avoid inhaling any stray particles, and work in a relatively draft-free area so the powder lands evenly. You'll know the coating is good when you see a uniform, sugary layer on the printed areas with no bare spots or clumps. Many startups begin with manual powdering but often upgrade as their volume increases – while you can certainly process dozens of sheets by hand, it becomes labor-intensive and introduces variability (some prints might get too much or too little powder).
-
Automatic Powder Shaker Machines: An automatic powder applicator (often called a DTF shaker or powder shaker & dryer) automates this entire powder-coating step. These machines typically pair with roll-fed printers, but they can also process individual sheets. A shaker machine usually has a conveyor belt that carries the printed film under a powder dispenser; the machine evenly coats the print with powder, then vibrates or "shakes" the film to knock off the excess powder (often reclaiming the excess powder for reuse). Immediately after, the film goes through a heating section (integrated oven) within the machine to melt and fuse the powder onto the print. The result is a fully cured DTF transfer coming out the other end, ready to be pressed onto a garment once cooled. Automatic powder applicators excel in production settings because they greatly improve efficiency and consistency – no manual shaking and far less risk of uneven powder. According to one supplier, using an automatic powder station "takes the DTF printing process to another level, accelerating your workflow and boosting your printing business". In other words, it's comparable to how DTG printers use automatic pretreatment machines to save time – a DTF shaker is a time-saver for powdering.
Types & Pricing
Automatic powder machines come in various sizes to match common printer formats. For instance, there are compact 13″ (A3) width shakers for smaller printers, and larger 24″ or 30″ models for wide rolls. A small 13″ shaker (often combined with a mini curing oven) might cost on the order of $2,000–$4,000, whereas a professional 24″ shaker is typically in the $5,000–$8,000 range. As a real example, the Uninet 24″ Slim Shaker (an automated 24″ powder applicator with vertical space-saving design) retails for about $6,900 on sale. This investment might be overkill for a hobbyist, but it becomes vital for a shop doing large volumes. Many commercial DTF packages bundle a printer + shaker together (e.g. Mimaki offers a 24″ DTF printer with a matching shaker as a combo). Note that these machines also include heating elements to cure the powder, so they effectively replace a standalone curing oven (discussed below) in the workflow – the print goes straight from printer into the shaker, and comes out cured/dried.
When to Upgrade
How do you know when it's time to move from manual to automatic powdering? A few indicators:
- (1) Volume – if you find yourself spending too much time powdering prints each day (for example, an hour or more just coating and curing sheets), an automatic unit will drastically cut down that labor.
- (2) Consistency demands – for business orders, customers expect uniform results. A shaker gives you repeatable quality by applying just the right amount of powder each time, whereas different people powdering by hand might yield slightly different results.
- (3) Mess and safety – automatic shakers are enclosed or have exhaust vents, reducing airborne powder and fumes. If your workspace is getting coated in stray powder or you're concerned about inhalation and cleanliness, a closed machine is safer. Essentially, a hobbyist doing a few shirts a week can easily stick with manual powdering, but a mid-size shop fulfilling dozens of transfers a day will quickly see the benefit of automation. It not only frees you (or your staff) from a tedious task, but also enhances quality control.
For those in-between – there are also some "semi-automatic" powder stations designed for sheet-fed use. For example, the Seismo S20 "manual powder station" can take individual 16″ x 20″ sheets and automate the shaking step (you still sprinkle powder manually, but the machine then vibrates and heats the sheet). This kind of unit is less costly than a full roll shaker yet offers some automation to streamline batch production.
Heat Presses for Transfer (and How They Differ from Curing Ovens)
A heat press is a crucial piece of equipment in DTF and other garment decoration methods. After your DTF print is powdered and cured, you use a heat press to transfer the design from the film onto the garment. The press provides the required heat and pressure to bond the design permanently. It's important to note that while a heat press can be used to cure DTF powder on the film in a pinch, its primary role in DTF is for the final transfer to fabric – whereas dedicated curing ovens or the shaker's heater are intended for the curing step. We will discuss curing ovens separately in the next section, but first let's focus on heat presses.
Types of Heat Presses
Heat presses come in various styles and sizes. The most common for apparel are clamshell presses (the top platen opens like a clamshell) and swing-away presses (the top platen swings to the side). Sizes are typically described by the platen dimensions – e.g. 15″ x 15″ or 16″ x 20″ are popular for T-shirts. For DTF transfer application, any quality heat press that can reach the necessary temperature (usually around 300–350°F) with even heating and can apply firm, even pressure will do the job. Clamshell presses tend to be more compact and affordable, while swing-away presses give you more room to work and ensure even pressure (helpful for delicate placements). In fact, some experts recommend swing-away designs for DTF because you can hover the top platen above the print during curing without touching it. There are also pneumatic (air-powered) or automatic presses that are used in professional shops for efficiency and consistency, but those are higher cost.
Using the Heat Press for Transfers
Once you have a cured DTF transfer (powder melted), you place it on the garment and press it under the heat press per the recommended time and temperature. A typical transfer might be pressed at ~300°F (150°C) for 10–20 seconds with medium pressure, but it's important to follow the film/powder manufacturer's guidelines. The heat press ensures the adhesive that was cured onto the film re-melts and binds into the garment fibers. After pressing, you let the garment cool a bit and peel off the film, leaving the design on the fabric. Quality heat presses have digital temperature control and timers to make this process consistent – these features are highly recommended so you can dial in, say, "315°F for 15 seconds" and get repeatable results.
Using a Heat Press for Curing (Optional)
If a standalone curing oven is not available, a heat press can double as a curing method for the powder on the film, particularly in a small-scale setup. The technique is to hover the heated platen above the powdered film without clamping down. Essentially, the radiant heat melts the powder. For example, one guide suggests curing DTF powder with a heat press by lowering the press (set to around 320–350°F) just near the film for 60–90 seconds – not actually pressing it, just hovering – which is enough to melt the adhesive powder layer. This method works for low volumes and saves cost early on (no separate oven needed). However, it's less efficient for multiple prints and carries some risk (if you accidentally press or if the film touches the platen, you could ruin the print or get powder on your press). So, it's a good workaround for beginners but not ideal once you scale up. Keep in mind that occupying your heat press for curing will also slow down your production (you can't press shirts at the same time you're curing new prints if you have only one press).
Pricing: Heat press prices vary widely by size, quality, and features. Entry-level 15″×15″ clamshell presses (suitable for hobby use) can cost as low as ~$200–$300. Mid-range 16″×20″ presses from reputable brands might be in the $500–$1,000 range (these often have better heat distribution and durability). High-end or specialty presses (pneumatic auto-open presses, large format presses, or ones with interchangeable platens for hats, etc.) can go $1,500 and up. For instance, a top-of-the-line 16″×20″ press with auto-open and slide-out table (like those from Stahls' Hotronix or Geo Knight) often runs around $1,500–$2,000. While a basic press can certainly do DTF transfers, investing in a reliable press is wise as you grow – consistent temperature and pressure across the platen will ensure the transfers adhere properly and don't peel. A cheap press that has cold spots or inaccurate temperature can lead to failed transfers (which waste the prints and shirts).
Differences vs. Curing Ovens
To summarize, the heat press uses contact heat and pressure and is mainly for pressing the transfer to the garment. A curing oven (next section) uses heat (no pressure) to melt the powder on the film. You wouldn't use a curing oven to do the final garment pressing – that requires pressure which only the press can provide. Conversely, using a heat press to do the powder melting is possible but not as convenient as an oven, especially for larger operations. One advantage of keeping the curing and pressing steps separate is efficiency: if you have a dedicated oven or an automated shaker, you can be curing one batch of prints while simultaneously pressing a finished transfer onto a shirt with the heat press. In a small one-person setup with a single press doing double-duty, you'd have to stagger the tasks.
Curing Ovens and Dryers: Efficient Powder Curing
A curing oven (or dryer) is a device used to melt the adhesive powder on DTF films in a controlled and efficient manner. After you apply powder to a DTF print, the powder must be heated until it turns from a loose powder to a melted, slightly glossy solid layer on the film. Only then is the transfer ready to be applied to a garment. While you can achieve this with a heat press (as discussed) or even a heat gun in very DIY cases, a curing oven is the proper tool for the job if you are making DTF transfers regularly. It ensures even heating and frees up your heat press for its main task (pressing garments).
Types of DTF Curing Ovens:
Tabletop Tray Ovens
These resemble small convection ovens or dryers where you place the DTF film inside (often on a tray or rack) and the machine provides heat from above (and sometimes below) to melt the powder. Some are essentially modified flash dryers or infrared heaters enclosed in a box. They may accommodate one or several sheets at a time. For example, a 16″ x 20″ curing oven (to match a standard sheet size) is common. A unit like the "Phoenix Air 16x20" DTF curing oven can cure a sheet up to that size in under a minute at ~230–250 °F. Such ovens often have digital timers and temperature control for precision, and as a bonus, some include built-in air filtration (the Phoenix Air has a built-in purifier to reduce fumes, improving safety in the workspace). These tabletop or box ovens are great for small to mid-scale production using sheet-fed DTF printing. They are fairly compact (desktop-sized) and typically cost on the order of a few hundred to a couple thousand dollars, depending on brand and features.
Conveyor Belt Dryers
In larger shops – especially those with roll-to-roll DTF printers – a conveyor dryer is used to cure the continuous film. This is similar to the dryers used in screen printing: the film moves on a belt through a tunnel oven. The oven blows hot air or uses infrared heat to melt the powder as the film passes through. By the time the film exits, the powder is cured. These dryers allow nonstop production; you could be printing and powdering on one end and collecting cured transfers off the belt on the other. They come in various widths (to match 24″ rolls, 32″ rolls, etc.) and lengths (longer tunnel = more curing time at higher throughput). Conveyor dryers are more expensive and take more space – often several thousand dollars – but they are the go-to for professional, high-volume DTF operations. Some of the automatic shaker machines essentially contain a mini conveyor dryer inside them as well, as we described earlier.
Hybrid Units
As mentioned, many automatic powder applicators have integrated curing sections, effectively acting as a powder coater and oven in one. If you have an all-in-one powder shaker, you might not need a separate oven for roll printing. But if you are printing sheets and doing powder manually, then a standalone oven or a flash dryer unit is beneficial.
Efficiency and Consistency
A dedicated curing oven ensures that the entire print is evenly heated to the proper temperature, avoiding under-cured areas (which would look powdery or granular and might later flake off) or over-cured/scorched areas (which could discolor the design or damage the film). Ovens have thermostats to maintain the target temperature, and often a timer or alarm. In contrast, trying to cure with a heat press or heat gun could result in uneven melting – for example, the center of the press platen might be hotter than the edges, or a heat gun might not evenly cover the print. With an oven, you simply set the temperature, insert the film, and after the set time the powder is melted uniformly. In practice, many users find that an oven produces a smoother, more consistent adhesive layer, which can translate to better transfer results (softer feel and strong wash durability) since the powder is properly fused.
Another advantage is throughput: say you have 10 transfers to cure – with a small oven that fits multiple, you could possibly cure a few at once or in quick succession, whereas a heat press one-by-one (at ~2 minutes each including handling) is slower. Conveyor dryers excel here: they can cure dozens of prints per minute if set up properly, supporting the needs of a busy shop.
Impact on Workflow
In an optimal setup, the DTF workflow is: print → powder → immediate cure → done. You want to cure the print fairly soon after powdering so the powder doesn't start falling off or absorbing moisture. A curing oven lets you do this promptly. If you're printing in batches, you might powder a group of films and then place several into an oven together. With a conveyor, it's continuous – the moment the print is powdered, it goes down the conveyor for curing. The faster you cure after printing, the less chance of any defect (like if the ink is very wet and you wait too long, it might start to spread or you could accidentally smudge the powder).
Price Ranges
Small curing ovens (for A3/A2 sized sheets) often range from around $300 on the very low end (some people repurpose convection toaster ovens, though that's not ideal or necessarily safe) to $1,000–$2,000 for units specifically made for DTF with good controls and ventilation features. Larger floor model ovens or conveyor dryers can go from $3,000 up to $10,000+ depending on size and sophistication. When budgeting, consider that if you already plan to get an automatic shaker, an oven might be included in that system. But if you're doing manual powdering of sheets at moderate volume, budgeting for a curing oven is wise for efficiency. It's one of those upgrades that "level up" your DTF operation from hobby to business, alongside a good press and perhaps an automatic powder coater.
Note on Ventilation
Curing ovens, especially enclosed ones, often have an exhaust port or filter. You should place the oven in a well-ventilated area or under a hood if possible. The fumes from melting the powder can be unpleasant or potentially unsafe over long exposure (more on ventilation in the next section). Some modern DTF ovens address this with built-in air filters or purifiers (as cited, one model has an integrated purifier to help scrub the air). This is a valuable feature if you're working in a small or closed room.
In summary, beginners might skip the oven initially (using their heat press to cure small numbers of prints), but anyone doing DTF as a business will benefit from a curing device. It improves consistency and speeds up production by freeing your heat press for its main job.
Environmental Setup: Ventilation, Humidity, Temperature, and Space
Setting up a proper environment for your DTF workflow is often overlooked, but it's critically important for both print quality and safety. DTF involves chemicals (inks, adhesive powders) and processes (printing, heating) that have environmental requirements. Let's break down the key considerations:
Ventilation & Fume Extraction
When you cure the powder (whether using a heat press, oven, or shaker), the adhesive can release fumes. Many DTF powders are polyurethane-based (similar to plastisol in screen printing) and can emit volatile compounds (some users note isocyanate odors) when heated. Good ventilation is a must – working in a closed room with these fumes can lead to headaches or irritation. At minimum, use an exhaust fan or open window to circulate air. For example, one crafter suggests using "an open window with a fan blowing out and an air purifier" in the room to reduce fumes when pressing or curing DTF transfers. This setup is similar to what's done for sublimation or laser engraving in home studios. For a more professional solution, consider a fume extractor unit with proper filters. Industrial suppliers offer fume extraction systems specifically for DTF printers and curing machines to capture dust and fumes. If you are in a commercial space, having a dedicated ventilation hood over the curing oven or shaker is ideal. Remember, ventilation isn't just about comfort – it's a health and safety priority. Prolonged inhalation of solvent ink fumes or hot-melt adhesive fumes is not healthy. Always work in a well-ventilated area or wear appropriate PPE (e.g. an N95 mask or respirator) when handling powder and during curing if ventilation is limited. Some DTF users go as far as to set up their powdering and curing in a separate room or garage with an extractor fan. The bottom line: don't underestimate ventilation. It will also help with any smell that might otherwise permeate your working area.
Humidity Control
DTF printing, like DTG, relies on water-based inks that include white pigment. These inks perform best in a controlled humidity environment. Low humidity can cause issues like ink drying in the nozzles or static electricity affecting the film and powder. In fact, at humidity below about 40%, you may encounter PET film sheets sticking together from static and white ink misbehaving (clogging or overspraying due to static charge). On the other hand, very high humidity (exceeding ~65%) can lead to moisture absorption in the film and powder, potentially causing wet or "oily" looking prints and slower drying. The sweet spot recommended by many is roughly 40–60% relative humidity in the print room. This range keeps static low but also prevents the air from being so moist that it condenses on things or gums up the works. If you live in a dry climate or run heating/air conditioning that dries the air, use a humidifier in the print room to maintain a moderate RH%. Conversely, in a very humid climate, you might need a dehumidifier or A/C to bring humidity down. Monitor the humidity with a hygrometer. Maintaining proper humidity will extend the life of your printheads (white ink clogs less when humidity is adequate) and improve powder behavior (less static means the powder stays where it should – on the ink, not jumping to unprinted areas). As an example of issues: static can cause powder to stick to edges of designs or in unwanted spots, which then transfers as stray specs – regulating humidity helps avoid that problem.
Temperature Control
The ambient temperature of your workspace also matters. For the printer, typical room temperature (let's say ~65–80°F or 18–27°C) is fine. If it gets too cold (below 60°F/15°C), the inks might not flow or adhere as well, and the printer's electronics might not perform optimally. If it's too hot (above 90°F/32°C), you could see ink viscosity changes or faster drying (which could clog nozzles). Most DTF printer manufacturers (or conversion kit sellers) will cite an optimal operating temperature range (often around 20–30°C). Keeping the environment in a comfortable range for humans generally suffices for the machine as well. Avoid placing the printer in direct drafts of hot or cold air – for instance, don't have a space heater or A/C blowing directly at the printer or film, as that could dry the ink on the printhead or cause other issues. Also, when curing prints, ensure the ambient environment isn't impacting other prints – e.g. if you cure in the same room, the heat and any off-gassed moisture shouldn't create a sauna next to your printer. It's usually fine, but just be mindful of not confining everything in a tiny unventilated space.
Space & Layout:
Plan out your workspace to accommodate each component and the workflow. Even a small DTF setup will need a table for the printer (and computer), a flat area or tray for powdering, a heat source for curing, and a heat press station for pressing to garments. These steps should ideally flow in order. For example, you might have the printer on one end of a table, a powdering station (tray) next to it, and a small curing oven beside that. Then a separate table for the heat press where you actually press the finished transfers onto shirts. Ensure you have enough clearance around equipment: printers need some space for loading film (especially roll-fed printers which may have feeders or take-up reels), heat presses need room to fully open or swing, and you'll want room to lay out garments. If you graduate to a larger pro setup (say a 24″ roll printer with an attached shaker), that machine alone could be the size of a large appliance, and you might need a dedicated room or section of your shop for it. Check the dimensions of equipment – for instance, the Uninet 24″ shaker mentioned earlier has a footprint of 12.7 sq ft (it's tall but less wide than older shakers), whereas some traditional 24″ shakers had a 30+ sq ft footprint. Make sure doorways and pathways are wide enough if you're moving in large equipment.
Within your space, organize for cleanliness: DTF powder is fine and will get everywhere if you're not careful. It's wise to set up your powdering area over a easy-to-clean surface (some lay butcher paper or a silicone mat under the powder tray to catch spills). Keep a small vacuum or lint roller handy to pick up stray powder. Also keep your printing area as dust-free as possible; dust or fibers can stick to wet prints or get on the film and cause defects. Many users run an air purifier not just for fumes but also to reduce dust.
Storage and Other Considerations
While not hardware, it's worth mentioning in setup: store your DTF film and powder in a clean, dry place. Humidity can cause film to absorb moisture (they often have a coating that can take in moisture, leading to clogs or "steam" during curing). So reseal film in its bag with desiccant if possible, and keep powder containers closed. The printing area should ideally avoid extreme humidity swings for this reason too.
Electrical and Power
All this equipment – printers, heat presses, ovens, shakers – will draw power. Ensure your electrical setup can handle it. A heat press can draw a lot of amperage (some 16x20 presses draw 15A on a standard 120V circuit by themselves). A curing oven might draw a similar amount of power as a large toaster oven. If you have everything on one circuit, you risk tripping breakers. So distribute the load (e.g. printer and computer on one circuit, heat press on another, oven on another if possible). Always follow safety guidelines – don't use flimsy extension cords for high-wattage devices like presses or ovens.
Beginner vs. Pro Environment
In a home or small studio, you might get by with a simple setup: a spare room or garage with a table, an open window, a portable humidifier or dehumidifier as needed, and some fans. As you scale up, you'll formalize this: e.g. a climate-controlled print room kept at 50% humidity with an air conditioner, an exhaust system over your curing area, and designated stations for each part of the workflow. A mid-size shop might install an actual ventilation hood (like a kitchen hood or DIY duct fan) above the curing oven or use a filtered enclosure for the powder application to suck up excess powder. They might also use shelving or racks to store printed films (both before and after curing) so they can cool or wait for pressing. Larger operations will treat the DTF area much like a screen printing or DTG area – with proper HVAC, perhaps even a clean room type approach for the printing section to avoid any contamination on prints, and strict procedures for handling materials.
In essence, create an environment where your equipment (and you) can operate safely and optimally. Good airflow, the right humidity, comfortable temperature, and enough space to work will lead to better prints and a smoother workflow. DTF printing can be incredibly rewarding and scalable, but it's a process that involves both art and science – and the "science" part is heavily influenced by the environment and equipment setup. By investing in the right hardware and setting up your space thoughtfully, you set yourself up for success as you grow from beginner to pro in DTF printing. For additional information on the textile printing industry standards, consult resources from the Specialty Graphic Imaging Association, FESPA, and organizations like Smithers Research. Continue your DTF journey with our other comprehensive guides: DTF Introduction, DTF vs Other Methods, DTF Consumables, Artwork Preparation, Workspace Setup, How to Apply DTF Transfers, DTF Certifications & Skills, and DTF Resources & Communities.