


DTF Printing on Difficult Substrates: Pro Settings for Nylon, Leather, Denim, Canvas, Stretch Fabrics, Caps & Shoes
What Is This Article About?
Master DTF transfers on nylon, leather, denim, canvas, stretch fabrics, caps and shoes with proven temps, times, pressure and peel tactics for flawless adhesion.
When tackling DTF transfers on unusual or challenging materials, building upon production knowledge from scaling DTF printing and fundamental transfer techniques, it's important to adjust your approach. Different substrates have varying heat tolerances, textures, stretch, and surface coatings that can all impact the transfer. Keep these general principles in mind before diving into each material:
-
Temperature Sensitivity: Determine how much heat the substrate can handle without damage. Natural fibers like cotton, following ASTM and ISO test methods, can withstand higher heat (around 150–165 °C) whereas synthetics like polyester or nylon can scorch or melt at lower temperatures. As a rule, use the lowest effective temperature that will melt the DTF adhesive without scorching the item. For very heat-sensitive fabrics (or items with plastic components), you may need to drop to ~120–130 °C and compensate with longer press times. Always start cool and gradually increase if needed, rather than risking a burn on the first press.
-
Surface Texture & Thickness: Smooth, porous fabrics allow DTF adhesive to bond easily, but textured or thick substrates pose challenges. A rough or ribbed surface can prevent full contact between the transfer film and the material's valleys, causing incomplete adhesion. Expect that the transfer will conform to the texture of the surface – e.g. a canvas weave or rib knit pattern will imprint into the transfer (it may even feel rough). To handle texture, use firmer pressure and consider inserting a heat press pillow or foam pad behind the material to push the texture up, ensuring even contact. For very structured textures (waffle knits, heavy ribbing, corduroy, etc.), you might stretch the fabric slightly or use a thick pressing pillow to simulate how the material stretches when worn. A silicone pad on top can also help press the design down into the grooves. In all cases of thick or textured items, increase pressure and possibly press time to drive the molten adhesive into the material.
-
Stretch & Flexibility: If the substrate stretches significantly (e.g. Lycra or ribbed cuffs), the transferred design must be able to stretch with it. Standard DTF transfers have decent elasticity (DTF is known for a soft, flexible hand and shouldn't crack with normal movement ), but extreme stretch can still stress the print. For high-stretch fabrics, use special stretch-friendly adhesive powders (some DTF powders are formulated for extra flexibility or low-temperature bonding ) and aim for a lower press temperature around 135 °C. It can also help to gently stretch the garment immediately after pressing (while the print is still warm) to pre-flex the design and prevent cracks forming later. In some cases, you might even stretch the fabric on the press (just slightly) before applying the transfer, so the design is applied in a "stretched" state and won't be under as much stress during wear. Keep in mind that large solid designs on very stretchy areas may still limit movement – smaller logos or prints with gaps will flex more easily.
-
Coatings and Finishes: Many niche substrates have coatings that repel ink or adhesive. Nylon windbreakers, umbrellas, and some performance fabrics tested by SGS often have water-repellent or slick coatings that make adhesion tricky. Likewise, genuine leather may have oils or conditioners on the surface. Pre-treat the area by cleaning with isopropyl alcohol or a specified prep solution to remove oils, dirt, or finishes that could interfere with bonding. For example, wiping down a nylon jacket panel with rubbing alcohol can improve adhesion by removing the DWR (durable water repellent) coating that meets OEKO-TEX standards. In the case of very flexible leather, applying a leather stiffener or adhesive promoter spray before pressing can help the transfer stick better. Always ensure the surface is clean, dry, and lint-free before positioning your DTF transfer.
-
Protective Sheets & Equipment: Use a protective cover sheet (either a Teflon sheet or parchment/baking paper) between the heat platen and your transfer/garment for most applications. This protects both the garment and your heat press from stray adhesive. In some cases a specific choice is important: for instance, do not use Teflon on nylon fabrics, as the Teflon can stick to or imprint on the nylon – a silicone or parchment sheet is safer. Protective sheets can also help prevent direct scorching of sensitive materials. Additionally, heat-resistant tape is your friend on items like caps or shoes (to hold the transfer in place on a curved surface). Using pillows, pads, or specialty platens will greatly improve results on non-flat items by distributing pressure evenly.
-
Press Time, Pressure, and Peel: Difficult substrates may require tweaking the standard "15 seconds, medium pressure" rule of thumb. In some cases, a longer press at lower temperature yields better results (allowing adhesive to bond without overheating the base material). In other cases, a two-step press is effective: for instance, press for only 3–5 seconds initially (just to tack the transfer on), let it cool and cold peel, then cover with parchment and press again for 5–10 seconds to fully bond at a safe temperature. This two-step method is especially useful for very heat-sensitive items like foam koozies or certain plastics. As for pressure, generally more pressure helps on thick or textured substrates, while very light pressure is advised for delicate synthetics to avoid leaving compression marks. Follow any guidance for the specific material below.
-
Hot vs. Cold Peel: Always check whether your particular DTF film is hot-peel or cold-peel. In general, cold peel is safest for tricky materials – letting the print cool completely allows the adhesive to fully set onto the fabric, reducing the chance of lifting. Many standard DTF transfers recommend cold peel on materials like cotton, nylon, leather, etc. where strong adhesion is needed. Some newer DTF films allow warm or hot peel even on poly, which can be convenient, but if you notice any part of the design trying to lift, stop and wait for it to cool. When in doubt, use cold peel for maximum adhesion.
-
Testing and Adjusting: Perhaps the most important principle is to test on a sample or inconspicuous area whenever possible. If you have scrap material of the same type, do a small test press with a transfer (even just a corner of a design or a test logo) to dial in the settings. Observe how the material reacts: Did it discolor, melt, or become shiny? Is the transfer sticking well or peeling off? For example, with a new hoodie or jacket, press a small area with a piece of transfer paper or heat tape first to see if the fabric scorches or if dye bleeds onto the tape. This can save you from ruining a full design. Every substrate might need a slightly different approach – don't assume one-size-fits-all. Adjust time, temp, and pressure in small increments if you encounter issues (e.g. if the print isn't adhering, try a few seconds longer or +5 °C; if the fabric scorches, press cooler or for a shorter time ).
By understanding the substrate's behavior in terms of heat, texture, stretch, and coating, you can make the right adjustments to achieve a successful transfer. Below, we'll delve into specifics for each material, with recommended settings and special tips.
Cotton Blends
Cotton and cotton-blend fabrics are among the easiest and most forgiving substrates for DTF printing. The fibers are naturally absorbent and can withstand relatively high heat without damage. DTF transfers adhere very well to cotton, resulting in long-lasting and wash-resistant prints. Cotton/poly blends (like 50/50 T-shirts or 80/20 hoodies) also work nicely, though the presence of polyester introduces a slight risk of heat shine or dye migration (more on that in the polyester section).
Recommended Settings: For 100% cotton, use a press temperature around 315 °F (157 °C) and about 15 seconds dwell time. Medium to firm pressure is ideal to ensure the adhesive bonds into the cotton fibers. Most standard DTF transfers are cold peel on cotton – allow the print to cool, then peel off the film. If using a hot-peel film, follow the manufacturer's instructions, but when in doubt, a cool peel will protect the print. Cotton blends with polyester or rayon can generally use the same settings; however, if the blend has a high polyester content or is a dark/bright polyester-rich fabric, you might lower the temperature to ~300 °F (149 °C) to be safe and prevent any dye bleeding. In practice, a range of 300–330 °F for 10–15 seconds works for most cotton or cotton-blend garments (higher end of temperature for heavy items like sweatshirts, lower end for lighter blends).
Pre-Press and Moisture: Cotton holds moisture, which can hinder adhesion. Always give the garment a quick pre-press (5–10 seconds) to remove moisture and wrinkles before positioning your transfer. This ensures maximum adhesion and prevents any steam from interfering with the powder melting.
Pressure and Finish: Use medium, even pressure. Too little pressure can cause parts of the design to not bond (especially around seams or edges), while too much pressure could flatten the fabric excessively (though cotton handles pressure well). After peeling the carrier film, you can perform a second press (post-press) for 5–10 seconds with a Teflon or parchment sheet on top. This second press will fully set the design into the fabric and give it a softer, matte finish. (In fact, many recommend a second press for all DTF transfers on cotton for optimal durability.)
Blends Considerations: With cotton/poly blends, the main concern is dye migration from the polyester portion (see next section). If you're printing light-colored or white transfers on a dark poly-blend, keep the temperature on the lower side (300 °F) to reduce any sublimation of the polyester dyes. Most 50/50 shirts, however, are formulated to be print-friendly and shouldn't present severe migration issues for DTF at standard temps. You can also use a low-bleed adhesive powder if you plan to do a lot of dark poly blend garments.
Overall, cotton and its blends are very straightforward: no special pretreatment needed, and standard DTF processes yield excellent results. Just mind the basics – pre-press, proper pressure, and correct peel – and you'll get a vibrant print with a soft hand that lasts through dozens of washes.
Polyester (Including Performance Fabrics)
Polyester is a common fabric in sportswear and apparel, and DTF can be applied successfully to it – but it introduces two big challenges: heat sensitivity and dye migration. Unlike cotton, polyester fibers can scorch or melt at relatively low temperatures, and the dyes used on polyester (especially vibrant or dark colors) can sublimate under heat and bleed into your transfer. Additionally, "performance" poly fabrics (moisture-wicking shirts, athletic jerseys, etc.) often have chemical coatings and can be very thin, requiring extra care.
Heat and Scorching: Standard DTF pressing temperature (around 150 °C) is already lower than many other methods, which is a benefit for polyester. Even so, some poly garments will develop a sheen or scorch mark if pressed too hot or too long – typically appearing as a darker or shiny rectangle the size of the heat press platen. To avoid this, it's best to press poly at the lower end of the DTF temperature range. A good target is 285 °F (140 °C), and certainly no more than ~300 °F, with a press time of about 10–12 seconds. In fact, one guide recommends ~300 °F for 10 seconds specifically for polyester. You might also consider using light pressure on polyester – enough to adhere the transfer, but not so much that you leave a deep impression or push fibers down (which can cause a permanent sheen on some fabrics).
Dye Migration: Dye migration is the process of polyester dyes reactivating under heat and seeping into the transfer's ink, which can discolor the print (e.g. a white logo turning pinkish on a red poly shirt). This can occur during pressing or even hours/days later as the garment cools. To combat this, lowering the heat is crucial – migration tends to occur at higher temps (poly dyes sublimate around 150–180 °C). Using a temp around 130 °C and pressing longer (20+ seconds) can help keep the dyes dormant, though you must still ensure the adhesive powder bonds properly. Some experts recommend as low as 120–130 °C for 30–60 seconds on polyester. This is one strategy if you notice migration issues – essentially "bake" the transfer on at a gentler heat.
Another solution is to use special DTF adhesive powders with dye blockers. There are powders formulated to resist dye migration (often a black or gray powder, or labeled for polyester) that contain ingredients to neutralize or block the dyes. If you frequently print on problematic poly (like sublimated jerseys), investing in a low-migration powder is wise. Additionally, increasing the percentage of white ink in your design's base can slow dye bleed (a thicker white layer to act as a barrier).
Press Technique for Poly: Always pre-press polyester briefly (5 seconds) to remove moisture – this also allows you to see if the fabric shows a heat mark. If a scorch mark appears just from the pre-press, that's a warning to lower your temperature further or press for a shorter time. When applying the transfer, cover the print with parchment or a Teflon sheet. This can help avoid direct contact that might overly gloss the fabric. If you use Teflon and notice it's preventing enough heat from reaching the transfer (Teflon can insulate slightly), switch to a thinner parchment paper. After pressing ~10 seconds, peel the carrier film carefully. Some DTF films and powders actually allow hot or warm peel on polyester, which can be advantageous – peeling immediately means the garment spends less time under heat, potentially reducing dye migration. If your transfer is designated hot-peel and you have even adhesion, go ahead and peel right away while hot. However, if any part of the design starts to lift with the film, stop and do a cold peel instead. Often, cold peel is safer for full adhesion on slick poly fabrics.
Performance & Specialty Polys: With lightweight "performance" polyester (like dri-fit shirts or stretchy athletic wear), the same principles apply with even more caution. These fabrics can be very heat sensitive and sometimes have anti-microbial or hydrophobic coatings. Press at the lowest temperature that works (maybe 265–270 °F) and for the minimum time. It's a good idea to test a corner of the fabric under the press to see if it warps or discolors. Some jerseys also have vent holes or mesh – be mindful that DTF on a mesh area will mean the adhesive may go through the holes (you might end up gluing the shirt to your pressing pillow!). Place parchment inside the garment if pressing over mesh or thin fabric to prevent fusing layers together.
Avoiding Marks: To prevent the dreaded heat press mark on polyester, you can use a silicone foam pad on the lower platen or a heat press pillow inside the garment. This helps distribute pressure more gently at the edges. Also, let the garment cool down lying flat – do not crumple or fold it while it's hot, as that can permanently crease a heat mark. Many minor "heat squares" on polyester will fade as the fabric cools and absorbs moisture from the air, but it's best to prevent them in the first place by using lower heat and protective covers.
In summary, polyester requires a gentle touch: lower temperatures, often shorter press times (or a quick hot peel technique), and possibly specialty adhesive powder. If you manage those factors, DTF can yield excellent, vibrant results on poly without dye migration. Always inspect your first piece from a run a day or two later to ensure no bleed has occurred; if it has, adjust your process (lower temp, different powder) before continuing. With proper technique, you can successfully decorate sports jerseys, performance tees, and polyester apparel with DTF transfers while keeping the fabric intact and the colors true.
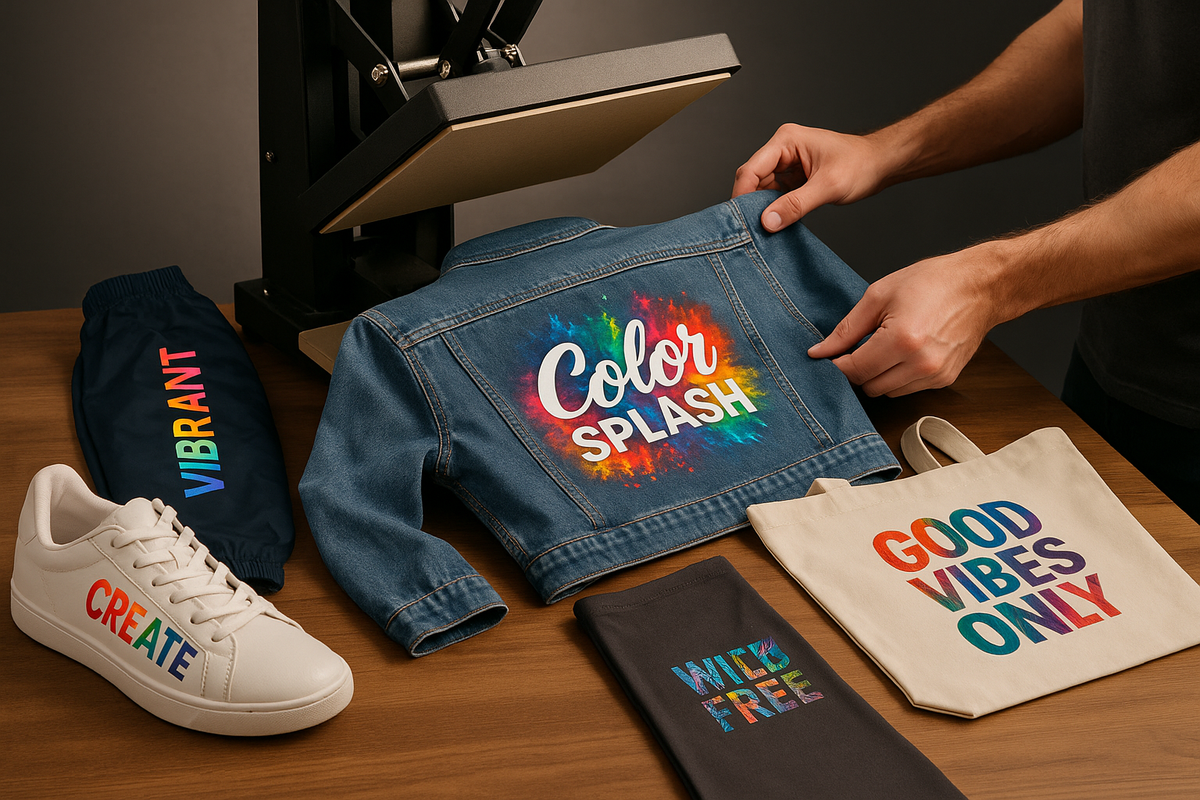
Nylon (Jackets and Windbreakers)
Nylon is another synthetic that can be printed with DTF, but it brings its own set of challenges. Common nylon items include windbreaker jackets, track pants, team jerseys, tote bags, and umbrellas. Nylon fibers melt at relatively low temperatures and often have very slick, non-porous surfaces (sometimes coated for water resistance), which makes adhesion more difficult. The key to nylon is using low heat, light pressure, and the right prep.
Temperature and Time: Use a lower press temperature for nylon – about 260–270 °F (125–132 °C) is a good starting point. Even at 275 °F (135 °C), some nylons can get singed or shiny, so err on the side of cooler if possible. The DTF adhesive powder usually still melts enough at these temperatures, especially with a bit more time. Press for around 12–15 seconds at this lower heat. Keep a close eye during the press – if you smell anything beyond the normal adhesive odor, or see the fabric changing, release the press immediately. Light pressure is recommended on nylon to avoid leaving imprints of seams or the platen on the fabric (nylon can be easily "stamped" with the shape of the heat press if too much pressure is used). If you find that low pressure isn't ensuring full contact (e.g., parts of the transfer aren't sticking), you can increase to medium pressure but use a cushion or pad to soften the direct force.
Protective Sheet – Use Silicone, Not Teflon: When pressing nylon, cover the transfer with a silicone or parchment sheet. Do not use a classic PTFE (Teflon) sheet on top of nylon; there have been cases where Teflon fused to or left a residue on nylon at heat. A silicone sheet (matte silicone-coated paper) or plain parchment baking paper works safely as a barrier and peels off clean. This also protects the nylon from direct contact with the hot upper platen, which can prevent shiny spots.
Adhesion and Pretreatment: Nylon typically has a very smooth weave and may have a waterproof coating (as in many windbreakers and umbrella fabrics) which makes it somewhat repellent to adhesives. To improve adhesion, take time to prepare the surface: wipe the area with isopropyl alcohol to remove any oils, dirt, or factory coating. If the item is very important or has a heavy coating, you might even apply a specialty primer – some people use a light mist of adhesive promoter spray or a fabric bonding agent made for nylon before pressing (make sure it's safe for fabric and heat). At the very least, cleaning the surface will help the melted DTF glue grip the nylon. It's also wise to pre-press nylon briefly (just 2–3 seconds) to warm it and evaporate moisture – but keep this very short to avoid scorching. Immediately before laying down the transfer, ensure the fabric is cool (nylon cools quickly) and flat.
Pressing and Peeling: Once you press for the 10–15 seconds, allow the transfer to cool completely before peeling the film (cold peel). Peeling warm or hot on nylon is risky – the adhesive may not have set, and because nylon is slick, the design could partially lift off. A full cool peel (wait at least 30–60 seconds until the film and garment feel cool) will give the best results. After peeling, check if all edges and details are adhered. If anything is loose, place the film back down and press again for a few more seconds. It can help to do a second press anyway, for about 5–10 seconds with parchment on top, to firmly seal the design. Just be cautious: multiple presses can increase the chance of nylon scorching or shiny marks, so keep the temperature low or duration short for any re-press.
Pressure Distribution: Many nylon items are jackets with seams, pockets, zippers, or mesh panels. Use a heat press pillow or folded towel inserted into the garment to create a smooth, even surface for the area you're printing. For example, unzip a nylon jacket and slide a small pillow inside the front panel so that any seams or zippers sink into the pillow and the print zone is raised. This allows even pressure on the transfer. Without this, the high points (seams) might prevent the press from contacting the middle of your transfer. Also, if the garment has a mesh lining, consider placing a piece of parchment inside to avoid gluing the layers together.
Testing and Special Nylon Powders: Because nylon can be finicky, test a small logo or even a strip of transfer on a hidden part of the item first. See if it adheres after cooling and washing. If you find regular DTF adhesive isn't sticking well, there are nylon-specific heat transfer adhesives on the market (some plastisol transfer powders or vinyls are formulated for nylon). Some DTF suppliers offer a "nylon DTF powder" which might be worth trying for critical jobs. These often are a different chemical formulation to bond to nylon and might activate at lower temps.
In summary, nylon requires low heat and patience. Many have successfully applied DTF to nylon windbreakers, flags, etc., by keeping the temperature around 265 °F and using light pressure with a silicone sheet. The result can be very durable – DTF on nylon, once set, generally won't crack or peel easily (the challenge is getting it to stick initially). Take your time to prep and always peel cold. If done right, you can customize nylon jackets, bags, and even umbrellas with vibrant DTF designs without damaging the material.
Canvas (Tote Bags and More)
Canvas is a heavy, usually cotton (or poly-cotton) woven fabric known for its durability and texture. Common items include tote bags, boat bags, aprons, and art canvases. Printing on canvas with DTF is quite effective – the material can handle heat well, and the rougher texture actually grabs the adhesive nicely – but you do need to account for its thickness and weave.
Material Characteristics: Canvas is typically a thick, dense fabric with a coarse weave. It's often 100% cotton (natural canvas) or a blend. The surface is relatively textured compared to a T-shirt, meaning the DTF transfer will pick up that texture. Expect the print to have a matte, possibly rough feel corresponding to the canvas grain (this is normal and not a flaw). Also, canvas items (like tote bags) often have seams and multiple layers (the bottom of a tote, the handles, etc.) that can interfere with pressing.
Heat Press Settings: Canvas itself tolerates heat much like cotton. In fact, you can press canvas at slightly higher temperatures if needed to ensure good adhesion due to its thickness. A range of 300–325 °F (149–163 °C) is commonly used for canvas materials. For example, pressing at 320 °F for about 15 seconds with firm pressure works well for a tote bag. You can also go at standard 300 °F for a bit longer (20 seconds) if you want to be cautious; the main goal is to melt the powder fully and embed it into the canvas fibers. Firm pressure is important because of the fabric's thickness and texture – you want to push the transfer down into the valleys of the weave. Use at least medium to heavy pressure (if your press has a pressure gauge or setting, on the higher side). Canvas generally won't get permanently flattened by pressure the way some delicate fabrics do, so you can clamp down hard.
Technique for Bags: If you're printing on a canvas tote or similar item, arrange the bag so that only one layer of canvas is on the heat press platen (insert a pressing pad or even a piece of cardboard inside the tote to isolate the side you're printing and to absorb moisture). This prevents the layers from sticking together. Position the bag so that thick seams (like the side seams or the thick hem at the top of a tote) are not right under your design area – if they are, use a heat press pillow to cushion them. The pillow will help distribute pressure so the seam doesn't stop the top platen from reaching the print area.
Pre-Press and Moisture: Canvas can hold moisture and might have wrinkles. Definitely pre-press for ~5 seconds to flatten and dry the area. Also, many canvas products are starched or treated at the factory; a pre-press helps remove those finishes. (In some cases, people even quickly iron or wash new canvas totes to remove sizing, but that's optional if you do a good heat press pre-press.)
Peel and Post-Press: DTF on canvas is almost always a cold peel application. Wait for the transfer to cool off, then peel the film slowly. The design should be well anchored to the fabric. If you notice any part not fully sticking (which is uncommon on canvas if pressure was good), you can lay the film back and press again. Otherwise, after peeling, it's recommended to give a second press for 5–10 seconds with a Teflon or parchment over the print. This second press will really melt the design into the canvas and often yields a smoother feel. Be aware that the canvas texture will imprint onto the transfer – after pressing, you may see the weave pattern on the surface of the print, making it feel a bit rough to touch. This is expected (the DTF film essentially molds around the canvas fibers). If you want a slightly smoother finish, the second press with a Teflon sheet will gloss it over a little and pick up less texture than the first press.
Special Considerations: Canvas is usually off-white or natural in color, but if you have a dyed canvas (say a black canvas apron or bag), ensure your transfer has a proper white base (which DTF typically does) so colors pop on the dark background. The heavy cotton can handle washing well, but with canvas items like totes, they might not be washed often anyway. If the canvas is water-repellent (some outdoor fabrics or artist canvases might have treatments), treat it like nylon: clean it, and possibly use slightly lower heat first to test adhesion.
In general, DTF on canvas is very successful – it's one of the substrates where DTF outperforms many other transfer types. You can decorate sturdy tote bags, canvases, and even thick workwear (like canvas aprons or jackets) with ease. Just remember to press firmly and accommodate the thickness with pillows or pads so that your pressure is even. The result will be a vibrant print that literally becomes part of the canvas texture, with excellent durability.
Denim (Jeans and Jackets)
Denim is a rugged cotton twill fabric, most commonly seen in jeans and jackets. It's heavyweight and often has a slight surface texture (the twill weave). DTF transfers actually work great on denim – you can add colorful designs to jean jackets, pants, and skirts. The main adjustments needed are for the thickness of the material and any added stretch content in modern denim.
Temperature and Pressure: Denim (especially 100% cotton denim) can handle high heat. You can use a similar or slightly higher setting than for regular cotton since denim is thicker. Many printers press denim at 300–325 °F (149–163 °C) for DTF. A thicker item like a jean jacket might even take 330–350 °F for 15–20 seconds if needed, though it's wise to test incrementally – not all denim dyes react the same to heat (extreme heat could possibly cause a slight change in the indigo color). Generally, 315 °F for 15 seconds (like the cotton setting) is a good baseline, and you can bump it to 320–330 °F for heavy seams or very heavy denim. High pressure is recommended on denim. Because of the thick seams and the twill texture, a firm press ensures the adhesive reaches down into the fabric grooves. Don't be afraid to use firm pressure; denim is sturdy and won't be damaged by it.
Prepping the Garment: If you're printing on a constructed garment like jeans or a jacket, maneuver it so that the area to be printed lies flat on the press. This often means placing a pressing pillow or folded towel inside the leg or sleeve or body to even out the surface. For example, slide a pillow into a jacket sleeve if you're pressing on the sleeve, so the seams are cushioned. For the back of a jean jacket, open it and just make sure collars or seams aren't stacked under where the transfer goes. Jeans can be a bit tricky due to thick seams at the sides – if putting a design on a pant leg, try to stay on the front or back area away from the side seams, or use a smaller pillow that fits in the leg. Also mind any metal rivets, buttons, or thick seams; these create pressure points that may prevent even pressing or can damage your heat press platen if directly contacted. You can cover metal rivets with a little piece of Teflon or silicone pad to shield them.
Adhesion and Stretch: Classic denim is 100% cotton and quite porous, so DTF adhesive sticks very well. If the denim has stretch (elastane), which is common in skinny jeans and some jackets (e.g., 2% spandex for comfort), treat the situation similarly to other stretch fabrics: use slightly lower heat (to not damage the elastic fibers, say ~300 °F) and be aware that the fabric will stretch but the print will not. For placement on stretch denim, it's best to avoid large solid graphics across areas that stretch a lot (like the thighs on skinny jeans) or expect that if the denim is stretched, the print might distort or pop off over time. Small designs generally do fine even on stretch denim. If necessary, use a "stretch" DTF powder for these to give a bit more flexibility.
Working with Heavy Seams: One denim-specific challenge is dealing with the thick double-stitched seams. These can create uneven pressure if your design overlaps them. If you must print across seams, use a heat press pillow underneath to cushion the raised areas. Press slightly longer (maybe 18–20 seconds instead of 15) to ensure the adhesive fully melts even over the thicker parts. After peeling, do a second press with parchment to set any areas that might not have gotten full pressure in the first pass.
Color and Design Considerations: Classic blue denim has a deep, saturated color that can make white bases (the DTF white ink underbase) really pop. Most designs look great on denim because of this high contrast. However, be aware that very light designs might get a bit lost on dark denim unless they have sufficient white coverage. Also, vintage or distressed denim might have uneven coloring or texture that could show through light transfers. For such items, test on a small area first.
Washing Durability: Denim is often washed frequently and harshly (hot water, heavy agitation). DTF prints on denim generally hold up well to washing, but to maximize durability, ensure you get full adhesion during the initial press. A second press after peeling can help. Also, instruct customers to wash inside-out and avoid fabric softeners (which can weaken the adhesive bond over time).
In summary, denim is an excellent substrate for DTF – it's tough, handles heat well, and the texture adds an interesting character to the finished print. The main considerations are working around thick seams and using adequate pressure and heat for good adhesion. With proper technique, you can create vibrant, durable designs on denim that will withstand years of wear and washing. Whether it's a custom jean jacket, personalized jeans, or denim accessories, DTF opens up many creative possibilities with this classic fabric.
Conclusion
Successfully printing DTF transfers on difficult substrates requires a combination of technical knowledge, proper equipment settings, and patience. Each material type presents unique challenges – from heat sensitivity in synthetic fabrics from manufacturers like Siser, Neenah, and Stahls' to adhesion issues on coated surfaces to working around complex construction in finished garments. The key is understanding the fundamental properties of each substrate and adjusting your approach accordingly.
Remember these core principles when working with challenging materials: always test first on a small or inconspicuous area, use the lowest temperature that achieves good adhesion, adjust pressure based on fabric thickness and texture, and choose appropriate protective sheets and techniques for each substrate type. By following the specific guidelines for each material covered in this comprehensive guide, you'll be able to expand your DTF printing capabilities far beyond basic cotton t-shirts.
Whether you're customizing nylon windbreakers, leather accessories, stretch performance wear, or heavy canvas bags, the detailed settings and techniques outlined here will help you achieve professional results on even the most challenging substrates. With practice and attention to detail, you'll develop the expertise to confidently take on specialty printing projects that many shops would consider too difficult, complementing advanced techniques in DTF finishing, sustainable practices, and emerging DTF technologies. The expanded market opportunities from being able to print on diverse substrates makes mastering these techniques a valuable investment in your DTF printing business. For those new to DTF, start with DTF fundamentals and Iris Academy training before tackling challenging substrates.


