

Common DTF Printing Pitfalls & Proven Solutions – The Ultimate 2025 Troubleshooting Guide
What Is This Article About?
Stop wasted film and peeling prints—discover the most common DTF printing mistakes and step-by-step fixes that keep your transfers vibrant, durable, and customer-ready.
Direct-to-Film (DTF) printing is a versatile technology that produces vibrant, durable designs on textiles. However, even experienced operators encounter recurring pitfalls that can disrupt production and compromise quality. This guide delves into the most frequent and impactful DTF printing issues and provides practical, step-by-step solutions. Each section below outlines a specific problem, explains its technical nature, identifies likely root causes (from hardware and consumables to environment, software, or user error), and offers a clear troubleshooting workflow. Preventive measures are also highlighted to help you avoid repeat issues. By mastering these troubleshooting techniques, you can minimize downtime, maintain consistent output, and enhance quality control in your DTF printing operations.
Poor Adhesion
Description
"Poor adhesion" in DTF printing refers to the transferred design not sticking properly to the fabric. You might notice parts of a print peeling, flaking, or fading soon after transfer or after the first few washes. In a properly adhered transfer, the ink and adhesive should form a strong bond with the garment fibers. When adhesion is insufficient, the print's durability is drastically reduced – an unsatisfactory outcome for both producer and customer. This issue typically manifests as edges lifting off the garment or sections of the image wearing away prematurely.
Likely Root Causes
-
Inadequate Curing or Pressing: Under-cured adhesive powder (not fully melted) or insufficient heat/pressure during heat pressing can result in weak bonding. Over-curing (excessive heat/time) can also degrade adhesion by making the print brittle.
-
Low-Quality or Damp Adhesive Powder: The thermally activated glue powder may be of poor quality or have absorbed moisture, reducing its effectiveness. Moist or clumped powder won't evenly cover the ink, causing some areas to have no adhesive.
-
Fabric Contamination: Oils, dust, or chemical finishes on the garment can interfere with adhesion. If the fabric area wasn't clean (or pre-pressed to remove moisture and wrinkles), the transfer might not stick well.
-
Incorrect Application Parameters: Using the wrong temperature, pressure, or pressing time for the specific fabric and transfer can prevent proper adhesion. For instance, a very short press or too low temperature may not fully bond the design.
-
Insufficient Ink or Adhesive Layer: If too little ink was laid down or if the white underbase layer is too thin, there may be insufficient surface for the powder to grab onto, leading to patchy adhesion. (This can happen due to misconfigured software settings or clogged nozzles affecting ink output.)
Troubleshooting & Repair Workflow
-
Inspect the Failed Print: Identify patterns in the failure. Are specific areas (edges or center) peeling? Did it peel after washing or immediately after cooling? Noting these can hint at causes (e.g. edges peeling might mean uneven press pressure on edges).
-
Check Curing of Powder: Examine the transfer film before pressing on fabric. The printed design with powder should have a slightly rough, crystalline look but feel smooth (fully melted) after curing. If you find powder granules still loose or only partially melted, the curing step was underdone. Re-cure the printed film at the recommended temperature/time and ensure even heating. If you suspect over-curing (brittle, yellowed print), reduce the temperature or time and test again.
-
Re-Press with Proper Settings: Using a scrap or test piece of the same fabric, try pressing a new transfer with adjusted settings. Increase the press temperature and/or time incrementally to see if adhesion improves. Ensure you are using firm, even pressure across the entire design. Many peeling issues are resolved by simply pressing longer or hotter to fully bond the adhesive.
-
Evaluate Powder and Ink: Make sure you applied a good, even coat of adhesive powder while the print was fresh. If the powder is old or clumpy, replace it with fresh, dry powder and try again. Also consider if the ink layer was thick enough – a very light ink deposit (from low saturation settings or a clogged printhead) might not hold powder well. Perform a nozzle check on your printer to confirm all color and white channels are printing correctly.
-
Fabric Prep: Re-test on a properly prepared garment. Pre-press the fabric for 5-10 seconds to eliminate moisture and flatten fibers. Immediately do the transfer while the fabric is warm. Also, wipe or lint-roll the target area to remove any dust or lint that could be hindering contact.
-
Peel and Post-Press: Follow the proper peeling method (cold peel vs. warm peel as recommended by your film manufacturer). A premature peel can lift a not-yet-bonded print. After peeling the film, you can also perform a brief post-press (with a parchment or Teflon sheet on top of the print) to re-melt and set the design, improving adhesion.
-
Wash Testing: Once you believe the issue is resolved, do a wash test on a sample print. Wash the garment according to recommended conditions (inside out, mild detergent, cold water) and see if the design stays intact. This will confirm if your adjustments successfully improved adhesion.
Preventive Practices
-
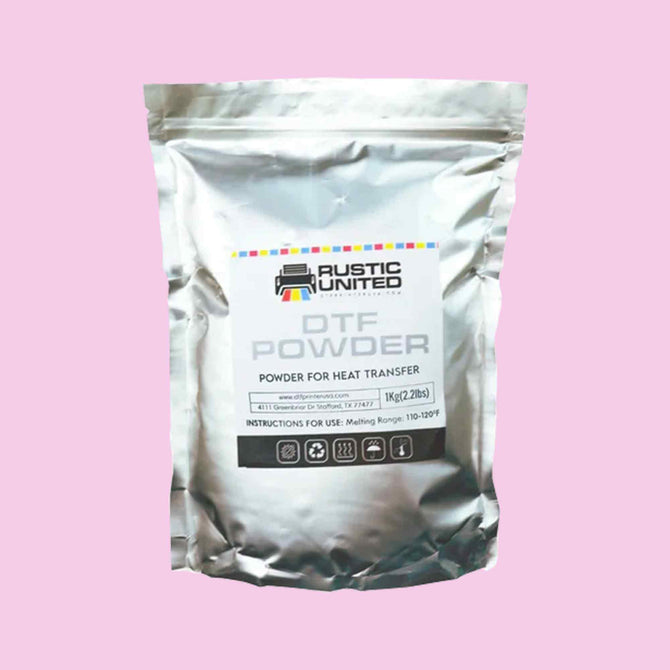
Use Quality Materials: Always use a reputable DTF powder that is compatible with your inks and fabrics. Store it in an airtight container to prevent moisture absorption (moist powder can clump and reduce bonding strength).
-
Maintain Consistent Settings: Document your proven settings for different fabric types and transfer sizes. Having a "recipe book" saves time and reduces trial and error.
-
Regular Printer Maintenance: Clean printheads and perform nozzle checks to ensure consistent ink output. Weak adhesion can start from poor ink coverage. Follow your printer maintenance schedule religiously.
-
Pre-Press Garments: Making pre-pressing standard reduces the chance of adhesion failure due to moisture or wrinkles.
Real-World Example
A small print shop noticed that their DTF prints were peeling off just after one laundry cycle, especially around the edges of the designs. Upon investigation, they found they had recently switched to a different heat press and hadn't realized its temperature was running about 10°C cooler than the setting. As a result, the adhesive powder was under-cured and the press wasn't hot enough to fully bond the prints. By recalibrating the heat press (setting it slightly higher to reach true target temperature) and pressing each transfer for an extra 5 seconds, the shop eliminated the peeling issue. In addition, they made it standard practice to pre-press garments to remove moisture and to periodically test wash a sample from each batch for quality control. The result was significantly improved adhesion and customer satisfaction.
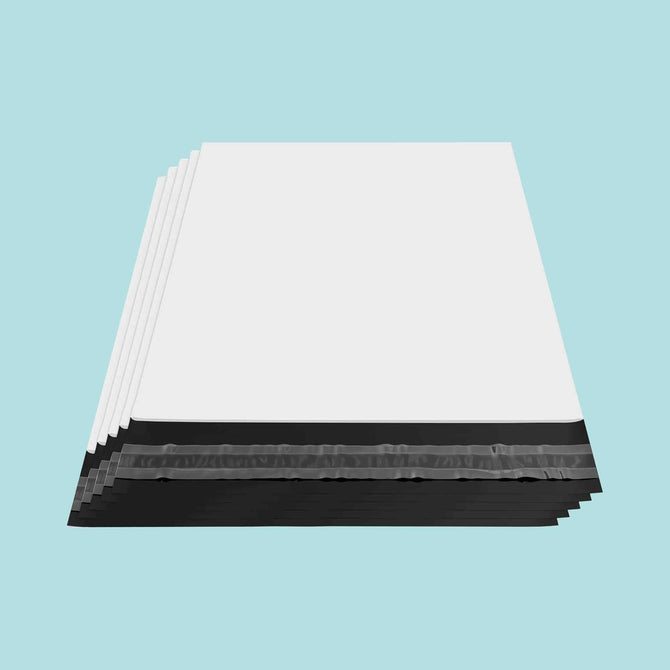
Film Jamming
Description
Film jamming refers to the PET transfer film getting stuck, crumpled, or misfed inside the printer during printing. This malfunction is akin to a paper jam in a regular printer, but with DTF transfer film as the medium. A jam can occur at the printhead feed, around the rollers, or at the output tray. When a film jam happens, the printing process halts; you may hear the printer's feed mechanism struggle or see the film folding/bunching up. Not only does this ruin the current print (wasting ink and film), it also raises the risk of a messy ink smear inside the printer or even a printhead strike if the film buckles upward. Jamming is a major source of downtime since you must carefully clear the jam and possibly clean the machine before resuming.
Likely Root Causes
-
Incorrect Film Loading: Loading the film upside down, off-center, or with wrinkles can cause it to misfeed and jam. DTF film has a coated side, and loading it the wrong way can cause the printer rollers to grip poorly, leading to skewing and jamming. According to Wikipedia's article on digital textile printing and industry standards from ASTM International, proper media handling is crucial for consistent results.
-
Roller Contamination: Dust, adhesive powder residue, or dried ink on the feed rollers reduces traction, causing the film to slip or feed unevenly. This is especially common in DTF workspaces where powder particles are airborne.
-
Film Quality Issues: Low-quality or damaged film (with curled edges, creases, or inconsistent thickness) is more prone to jamming. Films that have been stored improperly (exposed to humidity or heat) can warp.
-
Printer Settings Mismatch: Using the wrong media type setting in your printer or RIP software can result in inappropriate feed tension or speed, causing jams.
-
Mechanical Issues: Worn or damaged feed rollers, misaligned paper guides, or foreign objects in the paper path can cause consistent jamming problems.
Troubleshooting & Repair Workflow
-
Power Off and Open Printer: Turn off the printer to prevent further damage. Open all access panels to locate the jammed film.
-
Carefully Remove Jammed Film: Gently pull the film in the direction of the paper path. Avoid yanking or tearing, as film pieces left inside can cause future jams. If the film is wrapped around rollers, slowly rotate them manually (if possible) while pulling.
-
Inspect and Clean Rollers: Check all feed rollers for contamination. Clean them with a lint-free cloth dampened with isopropyl alcohol. Look for any sticky residue or powder buildup that could affect grip.
-
Check Film Quality: Examine your film roll for damage, curling, or moisture exposure. If the film edges are curled, try flattening them or switch to a fresh roll.
-
Reload Film Correctly: Ensure the film is loaded with the coated side facing the correct direction (usually up). Center it properly and ensure it feeds straight through the guides.
-
Adjust Printer Settings: In your RIP software, verify you've selected the correct media type and thickness settings for your film.
-
Test Print: Run a small test print to ensure smooth feeding before attempting a full production run.
Preventive Practices
-
Regular Cleaning Schedule: Clean feed rollers weekly or more frequently in dusty environments. This prevents buildup that causes slipping and jamming.
-
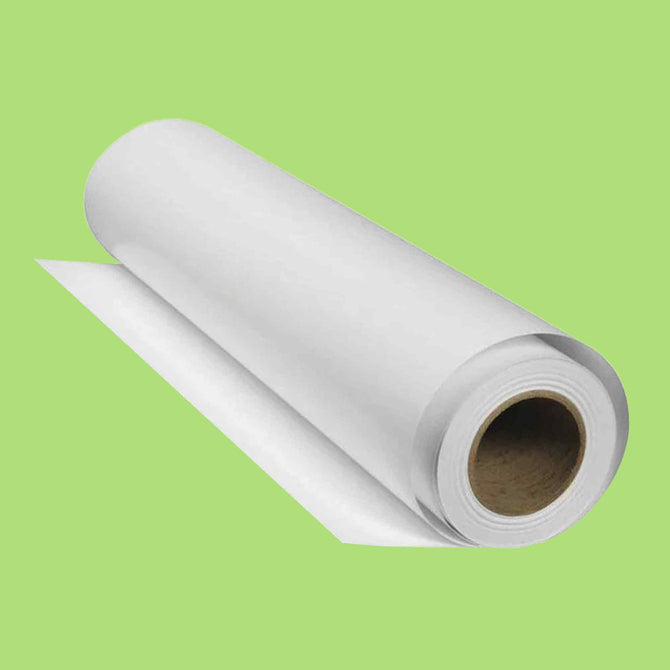
Proper Film Storage: Store DTF film rolls horizontally in a cool, dry place. Use the original packaging or sealed bags to prevent moisture absorption and edge curling.
-
Quality Film Selection: Invest in high-quality DTF film from reputable suppliers. The cost difference is minimal compared to the downtime from jams.
-
Environmental Control: Maintain proper humidity (40-60%) in your printing area. Excessive dryness can cause static, while high humidity can make film stick together.
Real-World Example
An independent T-shirt business experienced repeated film jams midway through large print jobs, which was frustrating and led to wasted material. On inspection, they discovered a fine layer of adhesive powder dust had built up on the feed rollers over weeks of printing. This was causing the film to slip off track. The operator thoroughly cleaned the rollers and also noticed the PET film roll was stored vertically without caps, causing the edges to curl. After cleaning, they stored new film rolls horizontally in a bag with silica gel to keep moisture out. They also began wiping the new film with an anti-static cloth before loading. As a result, film jams dropped to near zero. By establishing a weekly cleaning routine and proper storage, the printer now runs through 50+ transfers in a batch without misfeeds, significantly improving productivity.
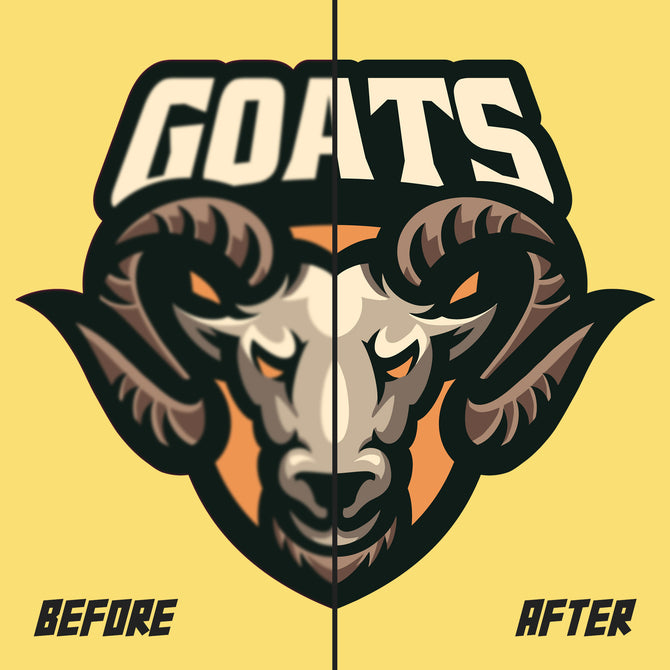
Incorrect Color Output
Description
Incorrect color output in DTF printing means the printed colors don't match your design file or expectations. You might see colors that are too dark, too light, have a color cast (e.g., everything looks greenish), or certain colors might be completely wrong (red printing as orange). This is frustrating because color accuracy is often critical for brand logos, team uniforms, or matching existing designs. The issue can range from subtle differences that only trained eyes notice to dramatic color shifts that make prints unusable.
Likely Root Causes
-
Missing or Incorrect ICC Profiles: ICC profiles translate your design colors into instructions for your specific printer/ink combination. Without the right profile, colors will be off. Learn more about color management and ICC profiles.
-
Wrong Color Mode: Designing in RGB but printing in CMYK without proper conversion causes color shifts. DTF printers work in CMYK, so RGB colors need accurate translation.
-
Ink Issues: Old, contaminated, or incorrectly installed ink cartridges produce wrong colors. Mixed-up cartridge positions (e.g., cyan in magenta slot) cause dramatic color problems.
-
Clogged Nozzles: Partially clogged nozzles in one color channel create color imbalance. If yellow nozzles are clogged, prints will look blue/purple.
-
White Ink Problems: In DTF, white ink creates the base layer. If white isn't printing properly, colors on dark garments appear muted or wrong.
-
Monitor Calibration: Your monitor might not accurately display colors, leading to false expectations. What looks right on screen may print differently.
Troubleshooting & Repair Workflow
-
Print a Nozzle Check: This reveals if any color channels have clogged nozzles. Clean as needed using your printer's built-in cleaning cycle.
-
Verify Ink Installation: Check that all cartridges are correctly installed in their designated slots. Ensure cartridges aren't expired or contaminated.
-
Check RIP Software Settings: Verify you're using the correct ICC profile for your printer/ink/film combination. Ensure color management is enabled.
-
Print a Color Chart: Create a test file with known color values and print it. Compare output to expected results to identify specific color channel issues.
-
Calibrate Your Workflow: If colors are consistently off, you may need to create a custom ICC profile using a spectrophotometer. Consider professional calibration services if color accuracy is critical.
-
Test Different Films: Some films have slight color casts. Try a different brand/type to see if color improves.
-
Adjust White Ink Percentage: For dark garment printing, experiment with white ink opacity settings. Too much white can make colors look pastel; too little makes them dull.
Preventive Practices
-
Regular Nozzle Checks: Perform daily nozzle checks to catch clogs early before they affect color accuracy.
-
Consistent Workflow: Use the same color space and settings throughout your design-to-print workflow.
-
Monitor Calibration: Calibrate your design monitor monthly using hardware calibration tools for accurate color representation.
-
Document Settings: Keep records of successful color settings for different types of designs and fabrics.
-
Quality Inks: Use manufacturer-recommended or high-quality third-party inks. Cheap inks often have inconsistent color properties.
Real-World Example
A DTF printing service struggled with customer complaints about logo colors not matching brand guidelines. Blues were printing purple, and reds looked orange. After extensive troubleshooting, they discovered they were using a generic ICC profile instead of one specific to their ink brand. They also found several yellow nozzles were partially clogged, shifting the color balance. After downloading the correct ICC profile from their ink supplier and performing a deep clean cycle on the yellow channel, color accuracy improved dramatically. They now maintain a color reference library, printing and heat-pressing sample swatches of common brand colors for customer approval before production runs. This proactive approach has eliminated color-related reprints and boosted customer confidence.
White Ink Issues
Description
White ink is crucial in DTF printing as it creates the opaque base layer that allows vibrant colors on dark fabrics. White ink issues manifest as streaky white layers, incomplete coverage, grainy texture, or complete absence of white in prints. Since white ink contains heavier titanium dioxide particles that tend to settle, it requires special attention. Problems with white ink can ruin entire print runs, especially for dark garment applications where the white underbase is essential for color vibrancy.
Likely Root Causes
-
Ink Settling/Separation: White ink pigments settle quickly when not agitated, causing inconsistent density and clogging. According to NIST research on additive manufacturing, particle settling in pigmented fluids is a common challenge in digital printing technologies.
-
Clogged White Channels: White ink's heavy particles clog nozzles more frequently than color inks, especially if the printer sits idle.
-
Incorrect White Ink Settings: Wrong density, choke, or number of white passes in RIP software causes poor coverage.
-
Circulation System Failure: Many DTF printers have white ink circulation systems. If these fail, settling accelerates.
-
Old or Contaminated White Ink: Expired white ink or ink contaminated with other colors produces poor results.
-
Environmental Factors: Temperature fluctuations can cause white ink to thicken or separate more quickly.
Troubleshooting & Repair Workflow
-
Agitate White Ink: Gently shake white ink cartridges or run the circulation system for 5-10 minutes before printing.
-
Perform White Ink Nozzle Check: Print a specific white-only test pattern to identify clogged nozzles.
-
Deep Clean White Channels: Run intensive cleaning cycles focused on white channels. May require multiple cycles for severe clogs.
-
Check Circulation System: Ensure white ink circulation pumps and tubes are working. Look for air bubbles or blockages in circulation lines.
-
Adjust White Ink Settings: In your RIP software, increase white ink density or add additional white passes for better coverage. Adjust the white choke (shrinking white boundaries slightly) to prevent white edges showing beyond colors.
-
Print White Ink Daily: Even on non-production days, print a small white test pattern to keep nozzles clear.
-
Replace if Necessary: If white ink is old (>6 months) or contaminated, replace it entirely.
Preventive Practices
-
Daily Agitation Routine: Shake or circulate white ink every morning before production, even on slow days.
-
Weekly White Printing: Print a full-coverage white test sheet weekly to maintain flow and identify issues early.
-
Proper Storage: Store white ink at consistent room temperature. Avoid locations near windows or heating/cooling vents.
-
FIFO Inventory: Use "first in, first out" inventory management for white ink to avoid using old stock.
-
Filtered Environment: Use air filtration in your print room to reduce dust that can contaminate white ink systems.
Real-World Example
A custom apparel printer noticed their white underlayers were printing with horizontal streaks, making designs on black shirts look faded and unprofessional. Initially, they ran multiple cleaning cycles with minimal improvement. Upon deeper investigation, they discovered their white ink circulation system's timer had been accidentally disabled during a power outage weeks earlier. The white ink had been settling for hours between print jobs. They re-enabled the circulation timer to run every 30 minutes and implemented a morning routine of manually shaking cartridges and printing a white test pattern. They also started logging white ink installation dates and set reminders to replace cartridges after 4 months, regardless of remaining volume. These changes eliminated streaking and reduced white channel cleaning cycles by 70%, saving both time and ink.
Banding in Prints
Description
Banding appears as horizontal lines or stripes across your DTF prints, creating a striped or gradient-like effect where there should be solid color. These bands can be light (missing ink) or dark (excess ink), and they typically run perpendicular to the print head's travel direction. Banding degrades print quality significantly, making designs look unprofessional and potentially unusable for customer orders. The issue is particularly noticeable in large solid color areas or gradients.
Likely Root Causes
-
Clogged or Misfiring Nozzles: Individual nozzles not firing correctly create gaps in ink coverage, showing as light bands.
-
Print Head Alignment Issues: Misaligned print heads cause ink drops to land incorrectly, creating visible bands where passes don't overlap properly.
-
Incorrect Print Settings: Wrong print resolution, speed, or pass count settings can cause banding. Too fast printing doesn't allow proper ink coverage.
-
Media Feed Problems: Inconsistent film advancement between passes creates uneven spacing, showing as bands.
-
Encoder Strip Issues: A dirty or damaged encoder strip (which tells the printer where the print head is) causes positioning errors and banding.
-
Ink Flow Problems: Insufficient ink flow due to low ink levels, air bubbles, or supply issues creates intermittent banding.
Troubleshooting & Repair Workflow
-
Nozzle Check Pattern: Print a nozzle check to identify any clogged or misfiring nozzles. Clean as needed.
-
Head Alignment: Run your printer's automatic head alignment procedure. Print alignment patterns and adjust if necessary.
-
Clean Encoder Strip: Carefully clean the encoder strip with a lint-free cloth and isopropyl alcohol. Look for damage or scratches.
-
Adjust Print Settings: Reduce print speed and increase pass count. Try printing in higher quality mode to see if banding disappears.
-
Check Media Feed: Ensure film is feeding smoothly. Clean feed rollers and check for proper tension.
-
Verify Ink Levels: Check all ink levels and look for air bubbles in ink lines. Prime the system if necessary.
-
Environmental Check: Ensure printer is on a stable, level surface. Vibrations can cause banding.
Preventive Practices
-
Regular Maintenance Schedule: Follow a strict maintenance routine including daily nozzle checks and weekly deep cleans.
-
Quality Mode for Important Jobs: Use higher quality settings for customer orders, even if it takes longer.
-
Stable Environment: Place printer on a sturdy table away from high-traffic areas to minimize vibrations.
-
Monitor Ink Levels: Never let ink run completely empty, as this introduces air into the system.
-
Document Successful Settings: Keep a log of print settings that produce band-free results for different design types.
Real-World Example
A growing DTF business started noticing subtle banding in their prints after moving to a new location. The bands were most visible in their popular gradient designs. Initial troubleshooting (nozzle checks, cleaning cycles) showed no problems. They eventually discovered their new workspace was next to a busy loading dock, and delivery trucks caused vibrations throughout the day. They relocated the printer to a corner room with a dedicated heavy-duty table and added vibration-dampening pads. They also switched from "fast" to "normal" print mode for all production runs. The combination eliminated banding completely. As a bonus, they created a "quiet hours" printing schedule for their most quality-critical jobs, running them early morning before deliveries began.
Powder Application Problems
Description
Powder application is crucial for DTF transfers as the adhesive powder bonds the ink to fabric. Problems include uneven powder coverage, powder sticking to non-printed areas, insufficient powder adhesion to ink, or powder contamination. These issues result in transfers that won't adhere properly, have rough textures, or show white powder residue on the final product. Poor powder application can ruin otherwise perfect prints and is often discovered only after pressing, wasting time and materials.
Likely Root Causes
-
Incorrect Powder Type: Using the wrong powder mesh size or type for your application. Fine powder for detailed work, coarse for bold designs.
-
Timing Issues: Applying powder too late (ink partially dried) or too early (ink too wet, causing overflow).
-
Environmental Humidity: High humidity causes powder to clump; low humidity creates static, making powder fly everywhere. The EPA notes that humidity control is essential for many industrial processes.
-
Application Technique: Uneven shaking, wrong shaker settings, or manual application problems.
-
Powder Contamination: Mixed powder types, moisture absorption, or foreign particles in powder.
-
Ink Wetness Issues: Ink not wet enough (dried too quickly) or too wet (causing powder to sink in).
Troubleshooting & Repair Workflow
-
Check Powder Quality: Inspect powder for clumps, contamination, or moisture. Sift if necessary or replace if compromised.
-
Timing Adjustment: Apply powder immediately after printing while ink is optimally wet. Develop a consistent timing routine.
-
Environmental Control: Measure workspace humidity. Use dehumidifiers or humidifiers to maintain 40-60% relative humidity.
-
Application Technique: For automatic shakers, adjust vibration intensity and duration. For manual application, use consistent, even motions.
-
Powder Removal: Ensure excess powder is completely removed. Use proper shaking/vacuum techniques to eliminate loose powder.
-
Test Different Powders: Try different mesh sizes or brands to find optimal adhesion for your specific inks and designs.
-
Ink Saturation Check: Verify your RIP settings aren't producing too dry or too wet prints for powder application.
Preventive Practices
-
Powder Storage: Store powder in airtight containers with silica gel packets to prevent moisture absorption.
-
Consistent Workflow: Develop a standardized powder application process with specific timing and techniques.
-
Regular Cleaning: Clean powder application equipment daily to prevent contamination between different powder types.
-
Quality Control: Inspect powdered transfers before curing to catch application issues early.
-
Environmental Monitoring: Install a hygrometer to continuously monitor humidity levels in your powder application area.
Real-World Example
A DTF printer specializing in detailed designs struggled with inconsistent powder application. Fine details would sometimes lose definition, while other times powder would stick to unprinted areas, creating a halo effect. They discovered they were using the same coarse powder for all designs. After researching, they invested in three powder grades: fine (80-120 mesh) for detailed work, medium (60-80 mesh) for standard designs, and coarse (40-60 mesh) for bold, solid designs. They also noticed their manual powder application was inconsistent, so they purchased an automatic powder shaker with adjustable settings. They created a reference chart matching design types to powder grades and shaker settings. This systematic approach improved their transfer quality dramatically, and customer complaints about "fuzzy" edges disappeared entirely.
Curing and Melting Issues
Description
Proper curing melts the adhesive powder to create a smooth, glossy surface ready for transfer. Curing issues include under-cured powder (remains granular), over-cured powder (yellowed or brittle), uneven curing (some areas melted, others not), or powder not adhering to ink properly during curing. These problems lead to poor transfer quality, adhesion failures, or visible defects in final products. Curing is critical because it transforms the powder into the actual adhesive that bonds to fabric.
Likely Root Causes
-
Incorrect Temperature: Curing oven or heat press temperature too low (under-curing) or too high (over-curing).
-
Inconsistent Heat Distribution: Hot and cold spots in curing oven cause uneven melting.
-
Wrong Duration: Too short doesn't fully melt powder; too long degrades the adhesive or yellows the print.
-
Powder Quality: Low-quality powder may have inconsistent melting points or poor adhesion properties.
-
Environmental Factors: Drafts, air conditioning, or inconsistent room temperature affect curing consistency.
-
Equipment Calibration: Actual temperature may differ from displayed temperature on curing equipment.
Troubleshooting & Repair Workflow
-
Temperature Verification: Use an infrared thermometer or temperature strips to verify actual curing temperature matches settings.
-
Time Adjustment: Start with manufacturer-recommended time, then adjust in 30-second increments until optimal cure is achieved.
-
Even Heat Distribution: For ovens, rotate transfer position halfway through curing. Check for hot/cold spots.
-
Visual Inspection: Properly cured powder should look smooth and slightly glossy. Granular appearance means under-cured; yellowing means over-cured.
-
Touch Test: After cooling, properly cured transfers feel smooth. Rough texture indicates curing problems.
-
Test Different Settings: Create a test matrix with various time/temperature combinations to find optimal settings.
-
Equipment Maintenance: Clean curing oven or heat press platen. Built-up residue can affect heat transfer.
Preventive Practices
-
Regular Calibration: Check curing equipment temperature monthly with external thermometer.
-
Consistent Settings: Document successful curing parameters for different powder types and design sizes.
-
Equipment Maintenance: Clean curing equipment weekly to prevent residue buildup affecting heat transfer.
-
Environmental Control: Minimize drafts and temperature fluctuations in curing area.
-
Quality Powder: Use reputable powder brands with consistent melting characteristics.
Real-World Example
A print shop received complaints about transfers washing out after just a few cycles, despite following all recommended procedures. Investigation revealed their curing oven's temperature display showed 100°C, but actual temperature was only 85°C due to a faulty thermostat. The under-cured powder wasn't forming proper adhesive bonds. They replaced the thermostat and implemented a weekly temperature verification routine using temperature-indicating strips placed on test prints. They also created a curing log, recording settings and results for each batch. This documentation helped them identify that thicker powder applications needed 30 seconds extra curing time. After these changes, wash durability improved dramatically, and returns dropped to near zero.
Transfer Quality Defects
Description
Transfer quality defects encompass various visual and structural problems in the final transferred design: blurry images, color bleeding, incomplete transfers, ghosting (faint duplicate images), or texture issues. These defects often appear only after heat pressing to fabric, making them costly to identify and fix. Quality defects damage reputation and require reprinting, re-pressing, or discarding garments, directly impacting profitability.
Likely Root Causes
-
Film Quality: Poor quality or incompatible film affects ink reception and release during transfer.
-
Pressing Issues: Incorrect pressure, temperature, time, or uneven pressure distribution during transfer.
-
Design Problems: Low resolution artwork, incorrect color profiles, or design elements too fine for DTF process.
-
Ink Migration: Colors bleeding into each other during printing, curing, or pressing stages.
-
Storage Conditions: Printed transfers stored in poor conditions (humid, hot) degrading before application.
-
Fabric Incompatibility: Certain fabric coatings or treatments preventing proper adhesion or causing reactions.
Troubleshooting & Repair Workflow
-
Inspect at Each Stage: Check quality after printing, after powder application, after curing, and after transfer to identify where defects occur.
-
Pressure Test: Use pressure indicator paper to verify even pressure distribution across heat press platen.
-
Film Evaluation: Try different film types to see if quality improves.
-
Resolution Check: Verify artwork is at least 300 DPI and properly prepared for DTF printing.
-
Press Settings Matrix: Test various combinations of time, temperature, and pressure to find optimal settings.
-
Fabric Testing: Pre-test on fabric swatches before full production, especially with new fabric types.
-
Storage Audit: Check how and where transfers are stored. Implement proper storage protocols.
Preventive Practices
-
Quality Checkpoints: Implement inspection points throughout production process.
-
Standardized Settings: Create pressing "recipes" for different fabric and design combinations.
-
Proper Storage: Store completed transfers flat, in cool, dry conditions, away from direct sunlight.
-
Regular Equipment Checks: Verify heat press calibration and even pressure distribution monthly.
-
Design Guidelines: Create minimum size requirements for text and fine details to ensure printability.
Real-World Example
A sports uniform printer experienced recurring ghosting issues where a faint duplicate of the design appeared offset from the main image. This was particularly noticeable on their popular numbered jerseys. After systematic testing, they discovered the problem occurred when they stacked hot transfers immediately after curing. The residual heat was causing slight ink transfer between stacked sheets. They implemented a cooling rack system where transfers cooled for 5 minutes before stacking, and added silicone parchment paper between sheets for extra protection. They also found that their heat press pressure was too high for athletic mesh fabrics, causing ink to push through the fabric weave. By reducing pressure by 20% for mesh materials and creating fabric-specific pressing guides, they eliminated both the ghosting and strike-through issues, improving their reputation with local sports teams.
Software and File Problems
Description
Software and file problems in DTF printing include RIP software crashes, incorrect file processing, color management failures, white layer generation issues, or compatibility problems between design software and RIP. These issues can cause production delays, waste materials through failed prints, or produce unexpected results that don't match design intentions. Software problems are particularly frustrating because they often occur at the start of production, affecting entire batches.
Likely Root Causes
-
Incompatible File Formats: Using file types not fully supported by your RIP software causing processing errors.
-
Incorrect Color Profiles: Mismatched or missing ICC profiles between design software and RIP.
-
Software Conflicts: Other programs interfering with RIP software operation or printer communication.
-
Corrupted Files: Damaged design files causing RIP to crash or produce errors.
-
White Layer Settings: Incorrect automatic white generation settings creating too much, too little, or misaligned white.
-
Memory Issues: Insufficient computer RAM or storage for processing large or complex files.
-
Outdated Software: Using old versions missing bug fixes or compatibility updates.
Troubleshooting & Repair Workflow
-
File Format Verification: Save designs in RIP-recommended formats (usually PDF, PNG, or TIFF). Avoid proprietary formats.
-
Color Profile Sync: Ensure design software and RIP use matching color profiles. Export with profiles embedded.
-
Software Updates: Check for and install latest RIP software updates and printer firmware.
-
White Layer Review: Manually check white layer generation preview before printing. Adjust choke and density as needed.
-
System Resources: Close unnecessary programs. Clear temporary files. Restart computer before large print jobs.
-
Test with Simple File: Print a basic test file to determine if issue is file-specific or system-wide.
-
Reinstall if Necessary: If problems persist, backup settings and perform clean software reinstallation.
Preventive Practices
-
Standardized Workflow: Create templates and presets for common design types to reduce setup errors.
-
Regular Backups: Backup RIP settings and profiles regularly to quickly recover from software issues.
-
File Preparation Checklist: Use consistent file preparation steps for all designs.
-
Dedicated Computer: Use a dedicated computer for RIP software to avoid conflicts with other programs.
-
Training Documentation: Create guides for common software tasks to ensure consistency across operators.
Real-World Example
A busy print shop experienced intermittent RIP software crashes when processing customer-supplied artwork, causing delays and frustration. The crashes seemed random, affecting about 20% of jobs. After keeping a detailed log, they noticed crashes occurred primarily with files containing spot colors or complex vector gradients. They discovered their RIP software version was two years old and had known issues with certain Adobe Illustrator features. After updating to the latest version and creating a file preparation guide for customers (specifying to convert spot colors to CMYK and rasterize complex vectors), crashes dropped to near zero. They also implemented a policy of opening and checking all customer files in their design software before sending to RIP, catching potential issues early. This proactive approach reduced production delays and improved customer satisfaction with faster turnaround times.
Environmental Factors
Description
Environmental factors significantly impact DTF printing quality and consistency. Issues include static electricity causing film jams, humidity affecting powder application and ink flow, temperature fluctuations impacting ink viscosity and curing, dust contaminating prints, and poor ventilation affecting operator health and equipment performance. Environmental problems often cause intermittent issues that are difficult to diagnose because they vary with weather, season, or time of day.
Likely Root Causes
-
Humidity Extremes: Too low (<30%) causes static; too high (>70%) causes powder clumping and ink issues.
-
Temperature Variations: Fluctuations affect ink viscosity, film behavior, and curing consistency.
-
Static Electricity: Dry conditions create static, attracting dust and causing film feeding problems.
-
Dust and Contamination: Airborne particles settling on wet ink or getting into printer mechanisms.
-
Poor Ventilation: Inadequate air circulation affecting cure times and potentially harmful to operators. The OSHA ventilation standards and testing protocols from SGS and Testex provide guidelines for workplace air quality.
-
Direct Sunlight: UV exposure affecting ink stability and causing premature curing of materials.
Troubleshooting & Repair Workflow
-
Environmental Monitoring: Install thermometer and hygrometer to track conditions. Log readings at problem times.
-
Humidity Control: Use humidifiers or dehumidifiers to maintain 40-60% relative humidity year-round.
-
Temperature Stabilization: Maintain workspace at 20-25°C (68-77°F). Avoid placing equipment near windows or vents.
-
Static Mitigation: Use anti-static mats, wrist straps, or ionizers near printer and powder station.
-
Dust Control: Install air filtration. Keep workspace clean. Cover printers when not in use.
-
Ventilation Improvement: Ensure adequate air exchange without creating drafts that affect printing.
-
UV Protection: Use window treatments to block direct sunlight from hitting equipment and materials.
Preventive Practices
-
Climate Control System: Invest in HVAC system that maintains consistent temperature and humidity.
-
Regular Cleaning Schedule: Daily dusting and weekly deep cleaning to minimize contamination.
-
Proper Workspace Design: Position equipment away from windows, doors, and vents as outlined in workspace setup guides.
-
Sealed Storage: Store all materials in sealed containers to protect from environmental changes.
-
Environmental Log: Track conditions and correlate with print quality issues to identify patterns.
Real-World Example
A DTF printing business in Phoenix struggled with seasonal quality variations. Summer prints had frequent static issues and film jams, while winter prints showed powder clumping and uneven application. They installed a comprehensive environmental monitoring system and discovered their workspace humidity ranged from 15% in summer to 65% during monsoon season. They invested in an industrial humidification/dehumidification system maintaining 45-50% humidity year-round. They also discovered their printer, positioned near a window, experienced temperature swings of 15°C daily. After relocating equipment to an interior wall and installing UV-blocking window film, print consistency improved dramatically. They calculated that the environmental controls paid for themselves within six months through reduced waste and reprints, plus they could now guarantee consistent quality to customers regardless of season.
Summary and Best Practices
Successfully troubleshooting DTF printing issues requires systematic approaches, proper documentation, and preventive maintenance. The key to minimizing problems is understanding the interconnected nature of the DTF process – how ink, powder, film, equipment, and environment all affect final quality.
Essential Best Practices:
- Daily Maintenance: Perform nozzle checks, agitate white ink, and clean critical components every production day.
- Environmental Control: Maintain consistent temperature (20-25°C) and humidity (40-60%) in your workspace.
- Documentation: Keep detailed logs of successful settings, maintenance performed, and issues encountered.
- Quality Checkpoints: Inspect prints at each stage – after printing, powder application, curing, and transfer.
- Standardization: Develop and follow standard operating procedures for all production steps.
- Training: Ensure all operators understand both the how and why of DTF processes.
- Inventory Management: Use quality consumables and follow FIFO principles to avoid material degradation.
- Continuous Improvement: Regularly review and refine processes based on production data and customer feedback.
Remember that most DTF printing problems have multiple potential causes, so systematic troubleshooting is essential. Start with the most likely cause based on symptoms, test one variable at a time, and document your findings. Building a knowledge base of problems and solutions specific to your equipment and environment will make future troubleshooting faster and more effective.
For continued success in DTF printing, stay informed about new techniques, equipment updates, and industry best practices. Join DTF printing communities, attend trade shows, and maintain relationships with suppliers who can provide technical support. The DTF printing industry continues to evolve rapidly, and staying current with developments will help you maintain competitive advantage while delivering consistent, high-quality products to your customers.
By implementing these troubleshooting strategies and preventive measures, you'll minimize downtime, reduce waste, and build a reputation for reliability and quality in the competitive custom apparel market. Remember that every problem solved is a learning opportunity that makes you a better DTF printer and business owner.
Continue Your DTF Education
Master more troubleshooting techniques and advanced DTF methods at Iris Academy:
- DTF Color Management: Advanced Artwork & ICC Profiles
- Mastering DTF Adhesive Powder: Complete Application & Curing Guide
- DTF Printer Maintenance: Essential Troubleshooting Guide
- DTF Heat Press Guide: Mastering Pressure, Temperature & Time Settings
- Specialty Inks & Finishes: Advanced DTF Techniques
Connect with the DTF community through professional organizations like FESPA and Printing Industries of America. Stay updated on the latest troubleshooting techniques through industry publications like Impressions Magazine and Printwear Magazine. Quality assurance from Intertek, ISO, and equipment manufacturers like Epson, Brother, Roland, Mimaki, and Mutoh can help validate your solutions.