
How to Apply DTF Transfers: The Professional Guide for 2026

What Is This Article About?
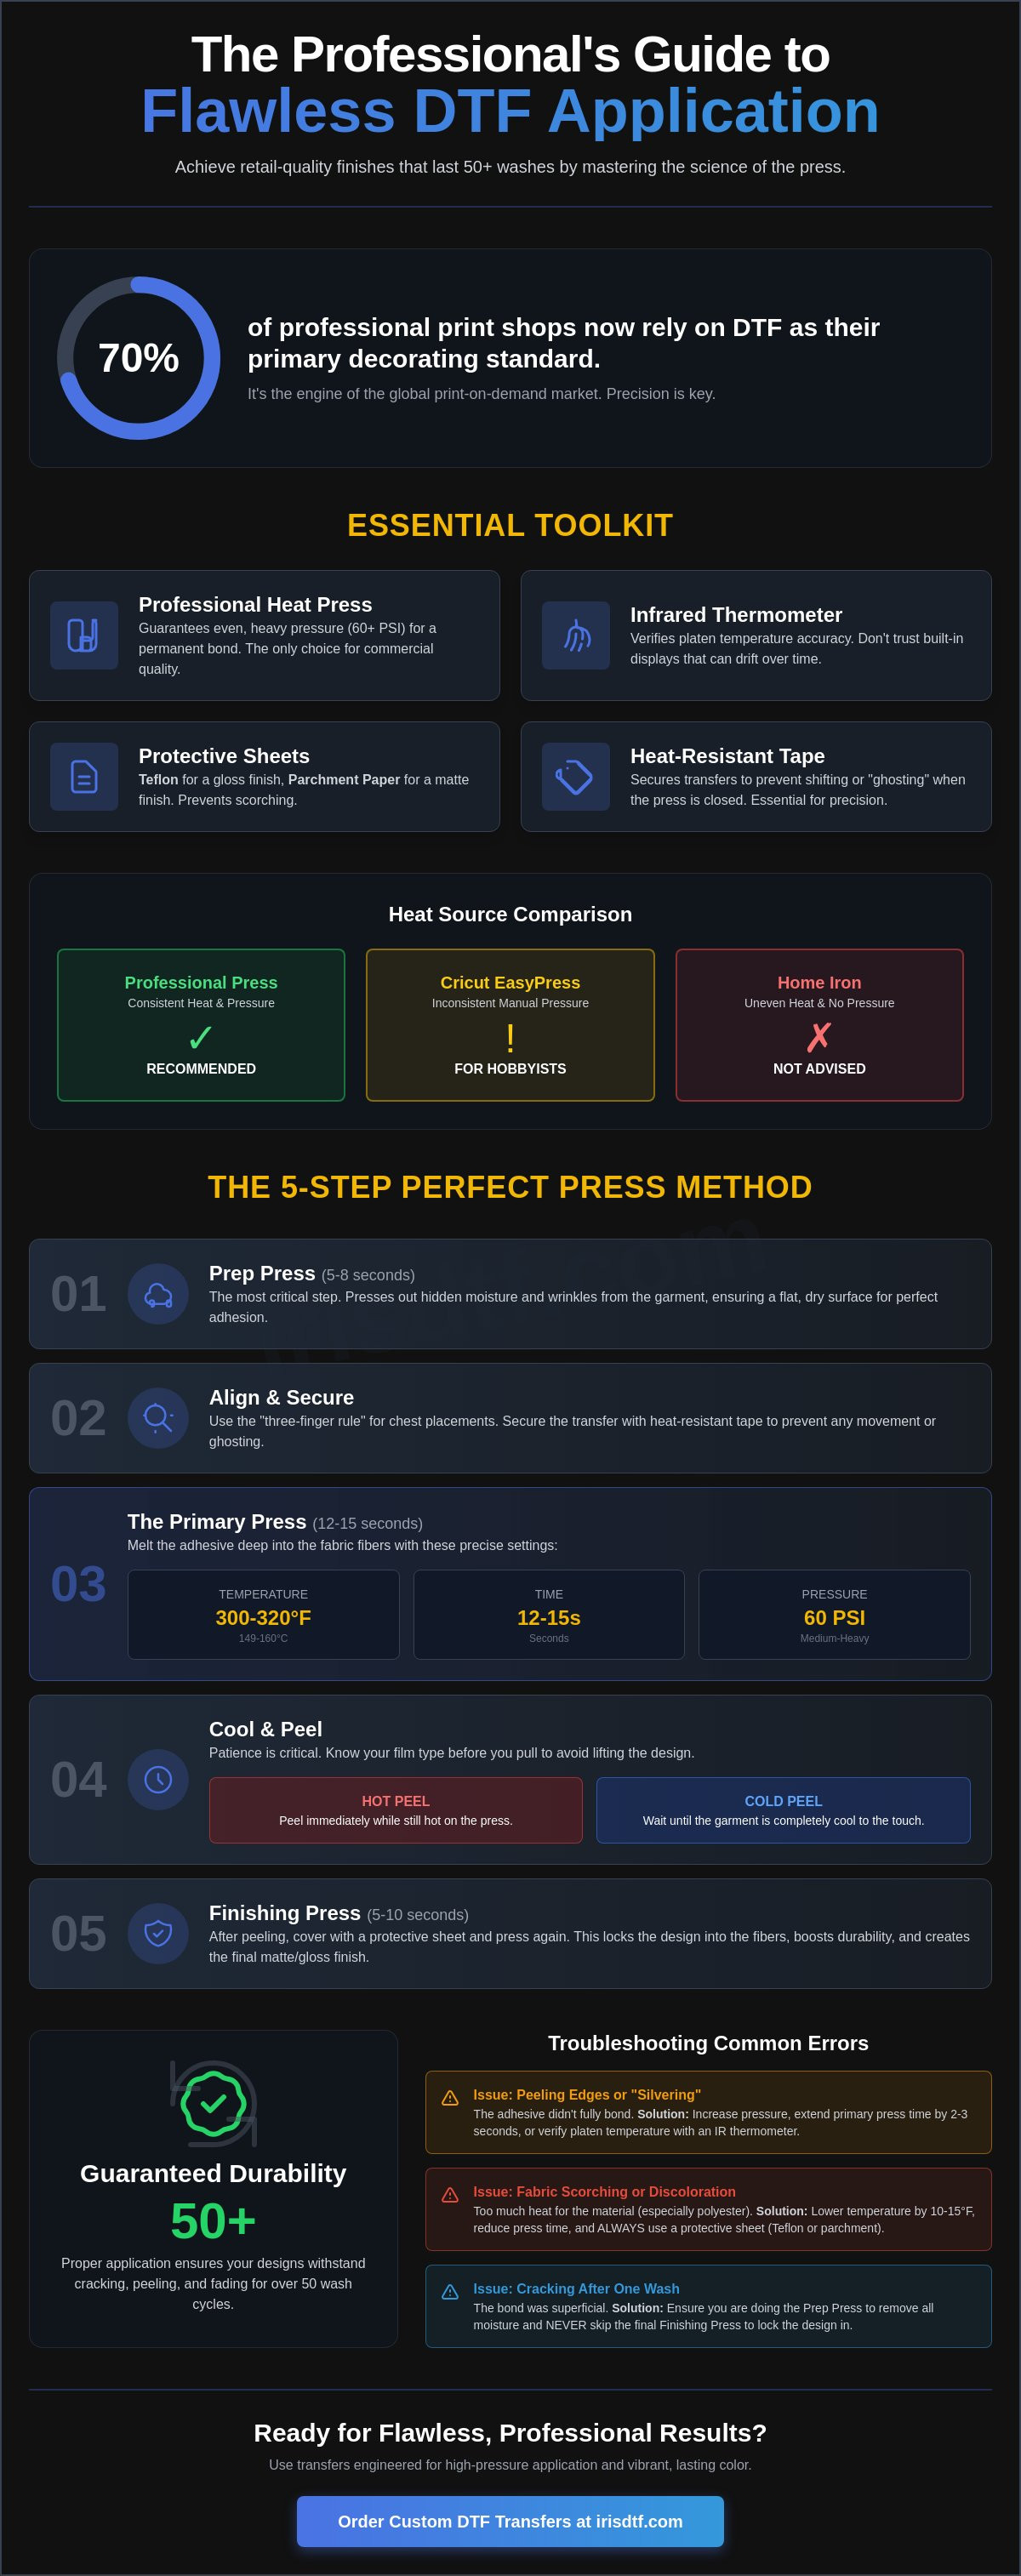
Did you know that 70% of professional print shops now rely on DTF as their primary decorating standard? It's the engine driving the massive global print-on-demand market. Yet, even with the best equipment, many creators still struggle with peeling edges or designs that crack after a single wash. It's incredibly frustrating to ruin expensive blank apparel because of a slight timing error or inconsistent pressure.
You deserve a retail-quality finish that stays vibrant through 50 plus wash cycles. Learning exactly how to apply dtf transfers with professional precision is what separates amateur projects from high-growth brands. This guide provides the exact science behind the prep, the press, and the finish to guarantee durable results every time. We'll walk you through the critical 2026 temperature settings, the necessity of the post-press seal, and how to master specialty films like Puff and Glitter DTF for a flawless production workflow.
Key Takeaways
- Equip your workspace for professional success. Use reliable heat presses and non-stick protective sheets to ensure clean, consistent applications every time.
- Master how to apply dtf transfers by utilizing the "Prep Press" method. This essential step removes moisture and wrinkles to create a perfect bond.
- Optimize your settings for any machine. Learn the exact pressure requirements for manual and pneumatic presses to prevent peeling or adhesion failure.
- Eliminate production errors before they happen. Discover how to identify and fix common issues like silvering, bubbles, and fabric scorching on delicate materials.
- Guarantee long-term durability. Use the secondary finishing press to lock designs into the fibers and achieve a professional matte or gloss finish.
Essential Tools for DTF Application
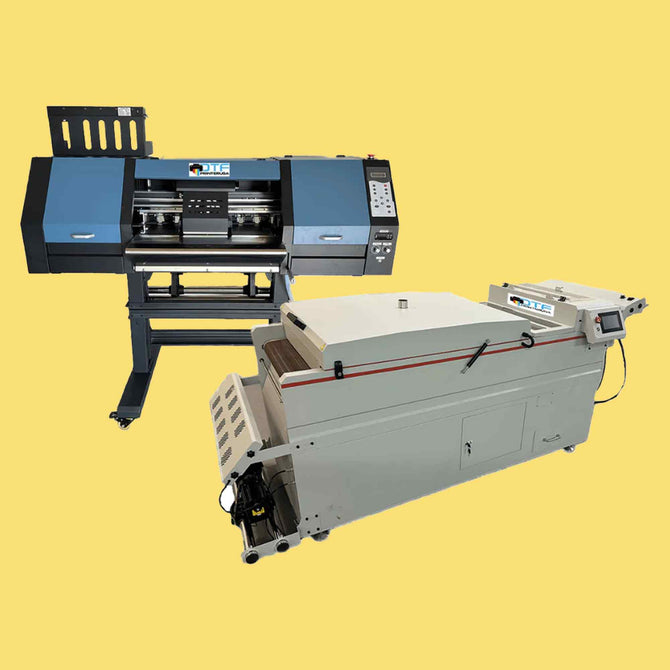
Professional results start with a professional kit. You can't fake a retail finish with sub-par equipment. If you want to master how to apply dtf transfers so they look sharp and last for years, you need tools that offer precision and consistency. Success in this industry is a game of variables. The right tools help you control those variables. Before you fire up your equipment, it's helpful to understand the technical foundation of What is Direct-to-Film (DTF) Printing. This encyclopedic overview highlights why thermal management is the most critical factor in the entire process.
Choosing Your Heat Source
Your heat source is the engine of your production. A professional heat press is the only way to guarantee the heavy, even pressure required for a permanent bond. These machines allow you to lock in specific PSI settings, ensuring the adhesive melts deeply into the garment fibers. While a Cricut EasyPress is a solid middle-ground for hobbyists or small batches, it relies on manual body weight. This often leads to inconsistent results. Avoid home irons for anything beyond a quick test. They suffer from hot spots and lack the surface area to heat the entire design at once. In the fast-paced world of 2026, efficiency requires a dedicated press.
The Importance of Protective Layers
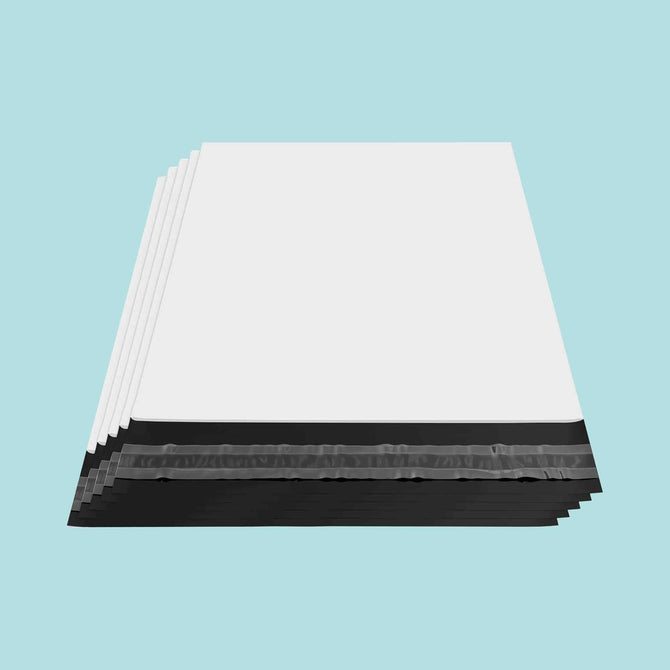
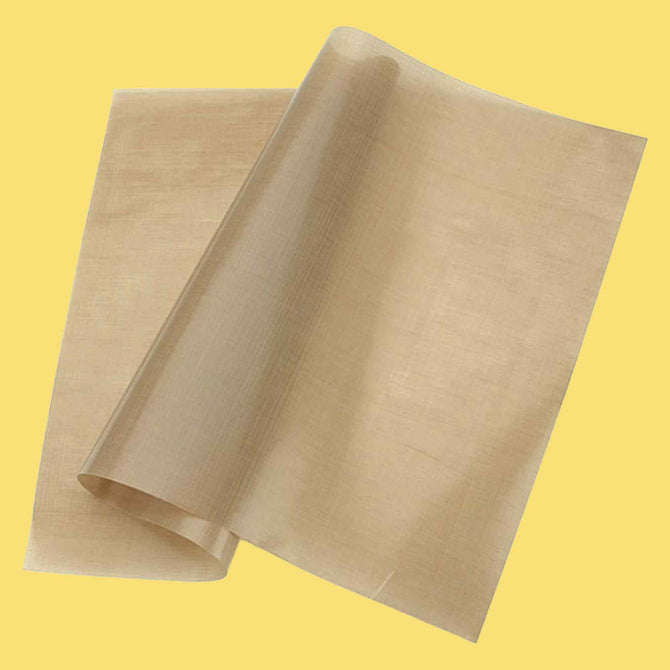
Protective sheets aren't just a barrier; they're a finishing tool. Teflon sheets are a staple in most shops. They protect the garment from scorching and provide a slight gloss to the final print. If you prefer a traditional matte retail look, use high-quality parchment paper instead. Never use thin fabrics or towels as a barrier. These trap moisture and dissipate heat, which prevents the transfer from reaching the necessary 285°F to 325°F range. Consistency is everything. We recommend keeping a fresh stock of DTF supplies, including various protective sheets, to match the specific finish your customer demands.
Precision requires more than just heat. Use heat-resistant tape to secure your designs. This prevents "ghosting" or shifting when you close the press. Finally, invest in an infrared thermometer. Built-in digital displays can drift over time. Verifying your platen temperature with a handheld laser ensures you're hitting the exact specs required for the film. When you know how to apply dtf transfers using verified data rather than guesswork, your failure rate drops to zero. This methodical approach is what builds a reliable, high-capacity brand.
Step-by-Step Instructions: Applying Your Transfers
Mastering how to apply dtf transfers requires a disciplined sequence. It isn't just about heat. It's about chemistry, timing, and environmental control. Start by pre-heating your press to the specific requirements of your film. Most standard films thrive between 300°F and 320°F. While your machine reaches temperature, organize your workspace for a smooth, rapid workflow. Efficiency here prevents errors later.
The Prep Press: Don’t Skip This
Moisture is the silent killer of DTF adhesion. Press your blank garment for 5 to 8 seconds before placing the transfer. This release of trapped steam is vital. In high-humidity environments, like Dallas, fabric can hold significant water weight that interferes with the adhesive bond. This step also smooths the surface, removing deep wrinkles that could cause gaps in the transfer. By creating a bone-dry, perfectly flat foundation, you ensure the adhesive melts directly into the fibers without obstruction. This level of preparation aligns with professional practices that prioritize substrate readiness for long-term washability.
Alignment and Primary Press
Precision defines a retail-ready garment. Use the "three-finger rule" for standard chest placements by positioning the top of the design three fingers below the collar. Once aligned, secure the film. For the primary press, set your timer for 12 to 15 seconds. Medium-heavy pressure is the industry standard. For pneumatic presses, medium-heavy pressure is specifically defined as 60 PSI. This force is necessary to drive the ink and adhesive into the weave. If you want the best starting point for your projects, consider using professional-grade custom DTF transfers that are engineered for high-pressure application.
The final stage is the cooling phase. Know your film type before you pull. Hot peel transfers must be removed immediately while the garment is still on the platen. Cold peel transfers require the garment to be completely cool to the touch. Removing a cold peel film too early will result in "lifting," where the ink stays on the carrier sheet instead of the shirt. Slow down. Let the adhesive set. This patience is the difference between a design that lasts five washes and one that lasts fifty. Once the film is removed, you're ready for the finishing press to lock in that professional hand-feel.
Optimizing Settings for Different Heat Sources
Precision depends on your platform. Every heat source requires a specific calibration to achieve a professional bond. While the core Direct-to-film (DTF) printing process remains the same, the way you deliver thermal energy changes based on your hardware. Manual heat presses require a physical "lock-in" feel. You should feel significant resistance when closing the handle. Automatic and pneumatic presses remove this guesswork. They allow you to set a precise 60 PSI, ensuring the adhesive penetrates the fabric weave perfectly every time. If you're using older equipment, watch out for cold spots. Use your infrared thermometer to check the corners of the platen. If the edges are 15 degrees cooler than the center, keep your designs centered for maximum reliability.
Heat Press Settings Table
Use these verified 2026 benchmarks to dial in your equipment. Always check your specific film packaging, as "Hot Peel" films often require slightly lower temperatures than traditional "Cold Peel" varieties to prevent adhesive residue.
| Equipment Type | Temperature | Time | Pressure Level |
|---|---|---|---|
| Professional Press | 300°F - 320°F | 12-15 Seconds | Medium-Heavy (60 PSI) |
| Cricut EasyPress | 330°F - 340°F | 20-30 Seconds | Firm Manual Pressure |
| Home Iron | Cotton/Linen Setting | 30-45 Seconds | Maximum Body Weight |
The Home Iron Workaround
You can achieve decent results with a home iron in a pinch. It isn't ideal for bulk production, but it works for one-off tests. Set your iron to the "Cotton" or "Linen" setting. Ensure the steam function is completely turned off. Water vapor will ruin the transfer instantly. Because an iron has a small surface area, you must use a "Center-to-Edge" movement technique. Start in the middle of the design and push outward with maximum body weight. You'll need to hold localized pressure for 30 to 45 seconds per section. This ensures the heat penetrates the film and reaches the adhesive layer. When you're ready to move beyond DIY tests, upgrading to professional DTF supplies and a dedicated press will drastically improve your efficiency.
Handheld presses like the EasyPress fall right in the middle. They offer better heat distribution than an iron but still lack a mechanical lock. Stand directly over the press. Use your full body weight to mimic the force of a commercial machine. Learning how to apply dtf transfers with these mobile tools is a valuable skill for on-site events or small custom batches. Consistency is your goal. Keep your movements steady and your pressure heavy.
Troubleshooting: Avoiding Common Application Errors
Troubleshooting is the difference between a wasted blank and a profitable order. Even seasoned pros encounter variables like humidity or fabric density that disrupt the bond. Knowing how to apply dtf transfers means recognizing these issues in real-time. Silvering, which appears as tiny air bubbles trapped under the film, is a common hurdle. It usually signals insufficient pressure or a platen that hasn't reached its target temperature. If you see this, increase your pressure by 10 PSI and verify your heat with an infrared thermometer. Precision is your best defense against failure.
Peeling Problems and Solutions
Lifting during the peel is the most frequent error for beginners. If the design starts to pull away with the film, stop immediately. Lay the film back down and perform a "Quick-Press" for 5 seconds to re-melt the adhesive. This often fixes edges that didn't fully bond. Remember, "Cold Peel" means exactly that. The garment must be cool to the touch before removal. If the ink looks grainy or wet after peeling, you're likely dealing with under-cured ink from a supplier. However, if the ink stays on the film, your pressing time or temperature was too low. Success requires a perfect balance of both.
Fabric Specific Adjustments
Standard settings don't work for every garment. When you're pressing on Comfort Colors, you're dealing with pigment-dyed cotton. These fabrics can bleed or resist adhesive if the moisture isn't fully removed during your prep press. Heavyweight blanks like Shaka Wear require even more attention. Their thick weave needs maximum pressure and sometimes an extra 2 to 3 seconds of dwell time to ensure the adhesive sinks deep into the fibers. For delicate polyesters and tri-blends, lower your temperature to 285°F. This prevents "shiny" heat marks and fabric scorching while maintaining the integrity of the synthetic blend.
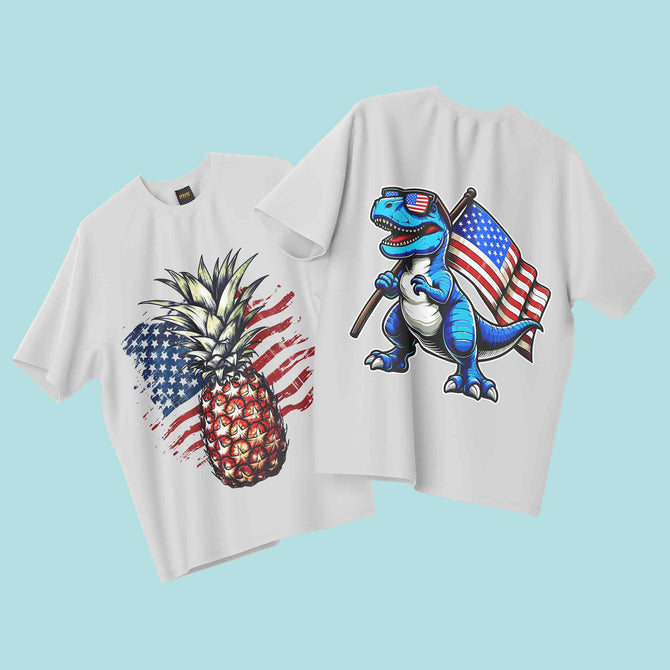
Specialty films introduce their own rules. For example, Puff DTF transfers require a specific 300°F setting and must be peeled hot to achieve that 3D effect. If you peel them cold, you'll lose the volume. Consistency across these different materials is what builds a reliable brand. If you want to eliminate the guesswork and start with the best materials, browse our latest DTF supplies and blank apparel to ensure your gear matches your ambition. Get the foundation right, and the results will follow.
Post-Application Mastery: Finishing and Durability
The peeling phase isn't the finish line. If you want to master how to apply dtf transfers at a professional level, you must understand the finishing press. This final step is what transforms a plastic-feeling print into a soft, retail-quality garment. It's the difference between a design that sits on top of the fabric and one that becomes part of it. After removing the carrier film, you have a brief window to permanently lock the ink into the textile fibers. Skipping this step is the most common reason for premature cracking or peeling after just a few washes.
The Finishing Press (The Second Hit)
Once you've peeled the carrier film, place the garment back on the platen. Cover the design with a fresh sheet of parchment paper or a Teflon sheet. Press for a final 5 to 10 seconds using the same medium-heavy pressure. This "second hit" sinks the ink deep into the weave of the fabric. It flattens the adhesive layer and significantly improves the hand-feel. This process also allows you to control the final texture. If you want a traditional matte retail look, use parchment paper. For a vibrant, high-gloss finish, use a Teflon sheet. This level of customization is how you deliver exactly what your client expects.
Quality control is your final check. Perform a "Stretch Test" once the garment has cooled completely. Gently pull the fabric in the decorated area. The design should stretch with the fibers and return to its original shape without any visible breaking or lifting. If you see the design start to pull away, your initial press likely lacked the necessary 60 PSI of pressure. A successful stretch test proves the bond is secure and ready for the rigors of daily wear. Consistency here ensures your production meets the 50 plus wash cycle standard that modern customers demand.
Caring for Your DTF Apparel
Longevity depends on proper aftercare. Educate your customers on how to maintain their custom gear. The adhesive needs time to fully cure, so wait at least 24 hours before the first laundry cycle. This patience prevents the bond from weakening under the stress of agitation. Follow these specific rules for maximum durability:
- Turn the garment inside out to protect the print from friction.
- Wash in cold water to preserve the vibrancy of the ink.
- Tumble dry on low heat or hang dry to prevent adhesive fatigue.
- Avoid harsh bleaches or fabric softeners that can break down the polymer bond.
When you follow this precise workflow, your results will rival any big-box retail brand. You're not just making shirts; you're building a reputation for quality. If you're ready to scale your production with the highest quality materials on the market, we've got you covered. Need premium transfers for your Dallas brand? Order Custom DTF Transfers Here and see the professional difference for yourself. Get the right transfers, follow the right process, and watch your business grow.
Scale Your Production with Professional Precision
You now have the technical blueprint for high-quality apparel decoration. Success in this industry depends on mastering the science of heat, time, and pressure. Always prioritize the prep press to eliminate moisture and use the finishing press to lock your design into the garment fibers. These steps ensure your work moves beyond the hobbyist level and enters the realm of retail-quality manufacturing. Consistency is the foundation of every successful brand.
Mastering how to apply dtf transfers is significantly easier when you start with superior materials. We provide over 10 years of industry expertise in the DFW area. Our transfers offer commercial-grade durability tested for 50 plus wash cycles. If you're in a rush, we offer same-day local pickup in Richardson, TX, to keep your workflow moving at full speed. Get Professional Custom DTF Transfers from Iris DTF and elevate your next project. Your creative success starts with a reliable partner. Let's get to work.
Frequently Asked Questions
Can I apply DTF transfers with a regular home iron?
Yes, you can use a home iron for small projects, but it is not recommended for commercial production. Home irons lack the consistent pressure and edge-to-edge heat distribution found in professional equipment. You must use the cotton or linen setting and apply heavy body weight for 30 to 45 seconds per section. This method often fails to reach the 50 plus wash cycle standard required for retail brands.
What temperature and time should I use for DTF transfers?
Most professional DTF films require a temperature between 300°F and 320°F for a duration of 12 to 15 seconds. These specific benchmarks provide the ideal thermal energy to melt the adhesive without scorching the garment. Specialty films like Puff DTF may require a different calibration. Always verify your platen temperature with an infrared thermometer to ensure your digital display is accurate and reliable.
Do I need to peel the DTF film while it is hot or cold?
Your peeling method depends on whether your film is specifically designated as a hot peel or cold peel product. Hot peel films must be removed immediately while the garment is still warm on the platen. Cold peel films require the transfer to be completely cool to the touch before removal. Peeling a cold peel film too early will cause the ink to lift from the fabric fibers.
Why is my DTF transfer peeling off after the first wash?
Peeling usually occurs because of trapped moisture in the fabric or a lack of sufficient pressure during the press. Skipping the prep press allows steam to push the transfer away from the fibers during the heating cycle. Additionally, failing to perform a secondary finishing press prevents the ink from forming a permanent mechanical bond. This finishing step is what ensures the design stays locked into the weave.
What is the best pressure setting for a manual heat press?
Set your manual press to a medium-heavy level where you feel significant resistance when locking the handle. Learning how to apply dtf transfers with a manual machine requires physical consistency. If the press closes too easily, the adhesive won't penetrate the fabric fibers correctly. This lack of force is a leading cause of designs lifting after only a few wears or laundry cycles.
Can I apply DTF transfers to 100% polyester or nylon?
DTF transfers are highly compatible with 100% polyester and nylon when you use lower heat settings. Lower your temperature to approximately 285°F to prevent the "shiny" heat marks or melting that can occur on synthetic blends. Use a Teflon sheet to provide an extra layer of thermal protection. This versatility is why DTF has become the industry standard for athletic wear and promotional gear.
Should I use a Teflon sheet or parchment paper for DTF?
Use a Teflon sheet for a vibrant, glossy finish or parchment paper for a traditional matte retail appearance. Both serve as a critical barrier that prevents the transfer film from sticking to your heat platen. While Teflon is durable and easy to clean, parchment paper is often preferred for the finishing press. This choice allows you to customize the final hand-feel based on your customer's preference.
How long do I need to wait before washing a newly pressed shirt?
Wait a minimum of 24 hours before washing any garment decorated with a DTF transfer. This time allows the adhesive to fully stabilize and reach its maximum bonding strength. Rushing into the laundry cycle can cause premature adhesive fatigue. When you're teaching others how to apply dtf transfers, emphasize that patience after the press is just as important as the heat itself for long-term durability.